'"
$
&
.,
)
%
0
'2
'"
$
&
.,
)
%
0
'2
3
4. Install Driver and Photo Viewer
Note: Before using the driver, please first install the Photo Viewer and connect the digital
photo frame to your computer. Otherwise, the driver of the digital photo frame will not be
installed normally.
The CD driver can support Windows 98SE/Windows 2000/Windows Me/Windows XP, unless
the digital photo frame is not connected to the computer.
A. Insert CD into the CD driver of the computer.
B. Enter the CD and select the installation program to install.
C. After installation, a shortcut icon
will be shown on the screen.
5. Software Interface and Photo View
After the software is installed correctly and the digital photo frame is connected to the
computer through USB cable, the system will then automatically inspect and install the
Driver. Double click the
button to enter the software main interface as shown in
Figure 1.
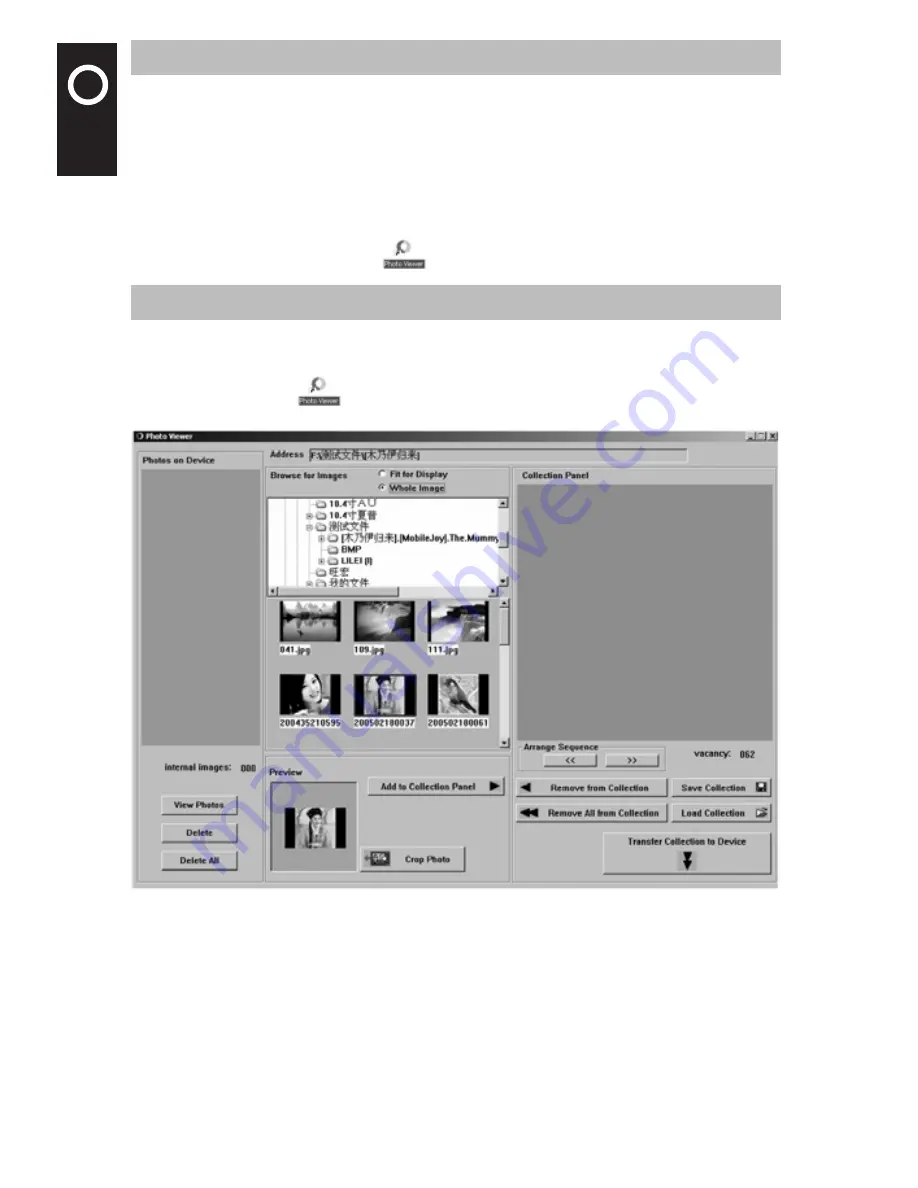
Figure 1
The Photo Viewer window is divided into five parts: “Photos on Device” window, Address bar,
“Browse for Images” window, “Preview” window and “New Collection Panel” window.
Note: The internal images of the Driver will be displayed in the “New Collection Panel” win-
dow. When removing or adding photos, the number under the vacancy will correspondingly
increase or decrease.


