background image

Using a Pre-Built Microsoft Windows Image

There are two after-market kits for HP Image Manager, one contains a pre-built Microsoft Windows XP®
image; the other contains a Microsoft Windows Vista® image, with all the Image Manager drivers pre-
installed and ready to serve from the server. The use of these kits requires that the customer have a
volume licensing key (available from Microsoft). These kits are available for a nominal fee from HP using
the following ordering information:

AU726AA - HP Image Mgr Supt disk-Pre-built WinXP

AU727AA - HP Image Mgr Supt disk-Pre-built WinVS

NOTE:

These kits are NOT bootable images for the 5730 without HP Image Manager. The file is

structured in an internal format that Image Manager uses and are useless without this tool.

To install the kit and serve out the image contained therein, follow the directions included with the kit.
As a convenience, these directions are reproduced below, but the kit directions are authoritative, and
take precedence where there is a discrepancy. It is suggested that where the guide says 

extract the

content to a location on your hard-drive

, you extract the content to the 

C:\Program Files\HP Image

Manager\Server

 folder. The instructions given below are for the Windows XP kit.

If you have any issues with any of the following steps, refer to the troubleshooting guide located in

Appendix A

 of this guide.

Before starting the installation procedure, ensure that the Image Manager service is stopped using the
Microsoft Management Console (MMC). The Image Manager service is called HPIMSvc. At this point
you should rename the file

 C:\Program Files\HP Image Manager\Server\nvdd.conf

 to

nvdd.conf.old

.

1.

Insert the DVD into the Image Manager server’s DVD drive.

2.

Browse to the 

t5730_XP_Pro_VL_5-0-0-0.zip

 file on the DVD drive and extract its contents to a

location on your hard drive.

3.

Browse to the location of the extracted content on your hard drive. Rename the the file 

nvdd.5730-

xppro.vol.conf

 to 

nvdd.conf.

4.

Configure the Image Manager server to use the volume.

NOTE:

If you unpack the files into the Server folder, as instructed above, and your Image

Manager server is set to use nvdd.conf as its configuration file, this step is not necessary. If you
unpacked the files somewhere else, you must configure the Image Manager server to point to that
directory and config file.

5.

Start the Image Manager service and your Image Manager server should be ready to use to boot
the first image.

6.

Use the Image Manager console to set the image into 

Admin

 mode, and boot a 5730 from the

extracted image. Go through the Microsoft out-of-box experience the first time to activate the image
and set your customizations. You can also set a 

computer name

 that makes sense to you. By

default, Image Manager will provide a name which is the letter 

h

 followed by the hexadecimal

representation of the computer's MAC address.

7.

You may also join the image to a domain using the tool included in the client installation and
described in the HP Image Manager User Guide.

8.

When you have completed all of the client customizations and installed any additional software you
may need in the image, shut-down the Thin Client and use the console to put the image back

28

Chapter 5   Initial Client Configuration

Summary of Contents for st5548 - Thin Client

Page 1: ...HP Image Manager 5 0 Quick Setup Guide ...

Page 2: ...hange without notice The only warranties for HP products and services are set forth in the express warranty statements accompanying such products and services Nothing herein should be construed as constituting an additional warranty HP shall not be liable for technical or editorial errors or omissions contained herein This document contains proprietary information that is protected by copyright No...

Page 3: ...onment Variable 19 3 Installing and Configuring Image Manager Desktop Management Web Console Introduction 20 Installing the Desktop Manager Console 20 Configuring Image Manager for use with the Desktop Manager Console 22 Modifying the client image to support Desktop Manager Console 23 Supported browsers for the Desktop Manager Console 24 4 Enabling Clients to Access Images TFTP and DHCP Server Con...

Page 4: ...Appendix A Appendix A Troubleshooting Unpacking and Installing Rebooting 30 Booting the Thin Clients 31 Glossary 32 Index 35 iv ...

Page 5: ...age multiple client images from a graphical interface representing client desktops groups of desktops and their related hard disk images volumes You centrally manage images and define each client s virtual drives in just a few mouse clicks Changes are made to a single image on the server Applications can be deployed instantly Images can be swapped in and out quickly Desktops can be re purposed by ...

Page 6: ...ion Protocol DHCP Bootstrap Protocol BOOTP and Trivial File Transfer Protocol TFTP server configuration This manual describes standard installation options for Image Manager for use in the most likely deployment scenarios If you have a more complex deployment you should refer to the HP Image Manager User Guide Conventions The following names may be abbreviated within the text of this manual HP Ima...

Page 7: ...mended for the Image Manager server network card You should install the latest NIC Network Interface Card drivers for the NICs in the server which are usually available from the NIC manufacturer s web site These drivers are usually more efficient than the drivers shipped with Windows When using multiple clients booting off a single server a performance bottleneck may occur during network and serve...

Page 8: ...eed to run the Installer Wizard on a PC running a Windows operating system select Decompress as the Setup type then copy the server software component files installed on the PC to the server 1 Run the HP Image Manager Installer Wizard 4 Chapter 2 Installing Image Manager Components ...

Page 9: ...2 Click Next to display the License Agreement screen Running the Installer Wizard 5 ...

Page 10: ...nse Agreement and if you agree to the terms select the I accept the agreement option then click Next This dialog box provides instructions on how to install the software 6 Chapter 2 Installing Image Manager Components ...

Page 11: ...k Next to continue 5 Specify the directory where the software components will be installed 6 Click Next then select the type of installation required from the following options Running the Installer Wizard 7 ...

Page 12: ...lation for Windows from the drop down box in the Select Components panel of the installer The same can be done for the PXE server using the PXE Server installation option The drop down box for selecting the installation type determines subsequent installation wizard defaults For a server installation the relevant options are Server Installation for Windows This option will set the defaults for a f...

Page 13: ...llation You could also select Custom installation in order to modify any of the pre built scripted installation options 7 Click Next to continue If you have selected Server installation for Windows or Flexnet License Server installation for Windows or if the component Flexnet License Server is selected on a Custom installation the Flexnet License Server Service Installation page is displayed This ...

Page 14: ...on for Windows or PXE Server installation or if the component PXE Server is selected on a Custom installation the PXE Server Service Installation page is displayed This page is not displayed if Decompress All is selected 11 Choose to Install only or to Install and start the PXE Server service If you don t want to install the PXE server now select Decompress PXE Server only and install it manually ...

Page 15: ...13 Choose between a Typical or a Custom installation Typical The server components are decompressed onto the default folders and the server settings are set with default folder paths for volumes installdir volumes for CVOLs installdir cvols for Files installdir files Custom You must choose the folder paths Volumes folder installdir volumes is the default location where the images will be stored CV...

Page 16: ...nstallation page is displayed This page is not displayed if Decompress All is selected 15 Choose to Install only or to Install and Start the HP Image Manager Server service If you don t want to install the Image Manager server now select Decompress HP Image Manager Server only and install it manually later NOTE By default logs are redirected into the directory where the Image Manager Server nvdd e...

Page 17: ...Choose to Full install or Partial install the Web Console Full install may require the Windows installation disk This option will install and configure IIS FastCGI and the web console Partial install will only decompress into the install directory all needed files to install the web console manually NOTE The desktop manager console installation is described in more detail in chapter 3 of this guid...

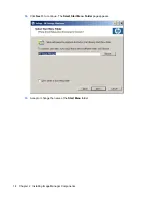
Page 18: ...18 Click Next to continue The Select Start Menu Folder page appears 19 Accept or change the name of the Start Menu folder 14 Chapter 2 Installing Image Manager Components ...

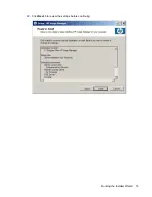
Page 19: ...20 Click Next to review the settings before continuing Running the Installer Wizard 15 ...

Page 20: ...ed location A progress bar will indicate the current status of the installation NOTE If the destination device does not have enough disk space for the software to be installed a message will be displayed and the Installer Wizard will fail 16 Chapter 2 Installing Image Manager Components ...

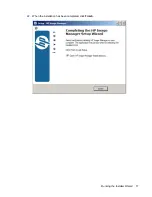
Page 21: ...22 When the installation has been completed click Finish Running the Installer Wizard 17 ...

Page 22: ...this directory the Windows server components are stored in the Server subdirectory the Linux server components are stored in the Server Linux subdirectory 2 If required copy the relevant NVDD file for the operating system you are using into a directory in the server partition where the virtual hard disks will be stored 3 If required copy the files SmallDisk vol and nvdd smalldisk vol conf from the...

Page 23: ...r quarter This would be approximately 2 GB for the HD and 800 MB per client Some Windows settings such as virtual memory settings have an impact on the size of CVOL files Configuring the License Server For detailed information on license server administration please refer to the License Administration Guide shipped with the license server or visit http www acresso com The License Administration Gu...

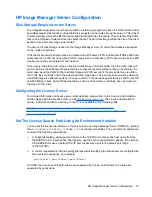
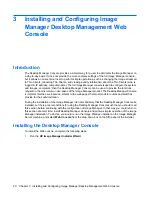
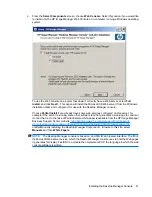
Page 24: ...onsole is implemented as a web service similar to the web pages that most modern routers and switches provide for their administration During the installation of the Image Manager it is not mandatory that the Desktop Manager Console be installed but there are preconditions for using the Desktop Manager Console such that you should read this section before continuing with the configuration of Image...

Page 25: ... other software tool that generates a web page to control or monitor the tool In the case of Partial Install a white paper is available from the HP Image Manager Business Support Center web site http h20000 www2 hp com bizsupport TechSupport Home jsp lang en cc us prodTypeId 18964 prodSeriesId 3646231 lang en cc us entitledManually Installing the Desktop Manager Components Browse to this site sele...

Page 26: ...s devices using it The configuration file that comes with Image Manager and the configuration file supplied as part of the option kits for Windows XP and Vista HP part numbers AU726AA and AU727AA conform to these rules The configuration file is named nvdd conf The configuration file contains only one group called group0 All the images that you would want to switch between should be in group0 Micro...

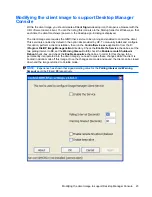
Page 27: ...installation then run the ControlService exe application from the C Program File HP Image Manager client directory Check the Enable the Service check box set the two polling interval to 30 set the Warning timeout to 90 check the Enable remote Shutdown Reboot check box and check the Enable keep alive check box In order for this change to be permanently incorporated into the client image you need to...

Page 28: ...lude all Web standards compliant browsers such as Internet Explorer version 7 and beyond Firefox Google Chrome and Apple Safari Web standards are defined by the World Wide Web consortium W3C 24 Chapter 3 Installing and Configuring Image Manager Desktop Management Web Console ...

Page 29: ... 1 Disable the PXEServer in the HP IM PXE Server This is done by modifying the config file for HP IM PXE Server so as to disable the PXEServer capabilities 2 Set the correct tags in the DHCP scope to indicate the location of the TFTP server to the client See Appendix D of the Image Manager User Guide for more details Windows HP Image Manager provides a PXE TFTP server called HP PXEServer The insta...

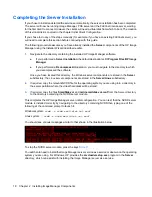
Page 30: ...typing the following at the command prompt tftp i host_ip_address get mPXELdr bin TEMP mPXELdr bin If the TFTP command fails you need to rectify the problem before you can actually boot your clients from the network If the TFTP command succeeds this means that the TFTP server is correctly configured to serve mPXELdr bin to the client that was used to launch this command You can then delete the mPX...

Page 31: ...port Home jsp lang en cc us prodTypeId 18964 prodSeriesId 3646231 lang en cc us Once you have either created an image following the white paper or installed the image from the AMO kit as outlined in Using a Pre Built Microsoft Windows Image following the steps below in Client Configuration should give you a working Image Manager solution with multiple Thin Clients able to boot off a single virtual...

Page 32: ...r service is called HPIMSvc At this point you should rename the file C Program Files HP Image Manager Server nvdd conf to nvdd conf old 1 Insert the DVD into the Image Manager server s DVD drive 2 Browse to the t5730_XP_Pro_VL_5 0 0 0 zip file on the DVD drive and extract its contents to a location on your hard drive 3 Browse to the location of the extracted content on your hard drive Rename the t...

Page 33: ...of the other Thin Clients from the image logging in one time to each Thin Client to set the computer name and add the client to the domain if desired Your HP Image Manager system is ready for use Using a Pre Built Microsoft Windows Image 29 ...

Page 34: ...the DHCP server is running on the local host Right click this element the DHCP Server and set the state to either Manual or Disabled so that the DHCP server is not automatically restarted when the server is rebooted NOTE There must to be a DHCP server somewhere in the network serving IP addresses to the Thin Clients If there is not another DHCP server then disable HP IM PXE Server as per Appendix ...

Page 35: ...unning on the server If the HP IM PXE Server has been deliberately disabled then check that the DHCP scope serving the Thin Clients has Tag 066 set to the IP address of the TFTP Server and Tag 067 set to the filename to PXE boot typically mPXELdr bin I receive an error PXE E3B TFTP Error File not found This error indicates that the TFTP service is running but the specified file does not exist Sele...

Page 36: ...age with the content of an overlay file DHCP Dynamic Host Configuration Protocol This protocol allows for a server to specify pre boot values to a network attached system disk signature A unique identification value written on Windows disk drives domain credentials The credentials maintained in a Windows domain between each of the member workstations and servers and the domain crontrollers FLEXnet...

Page 37: ...Preboot eXecution Environment PXE also known as Pre Execution Environment or pixie is an environment to boot computers using a network interface independently of available data storage devices like hard disks or installed operating systems Samba A Unix based server product that emulates Windows network file sharing SAN Storage Area Network A storage area network is an architecture to attach remote...

Page 38: ...VMWare A software product that emulates a PC in software 34 Glossary ...

Page 39: ...s client access 25 installation server requirements 3 installer wizard 3 installing Image Manager installer wizard 3 L license file location 19 license search path 19 license server configuring 19 Linux TFTP directory 25 S server configuration 19 DHCP configuration 25 disk storage required 19 file locations 18 TFTP configuration 25 server requirements Image Manager installation 3 T testing service...

Reviews: