Compaq Evo D500 USD Getting Started Manual Download Page 5

Quick Setup & Getting Started Guide

1

Quick Setup

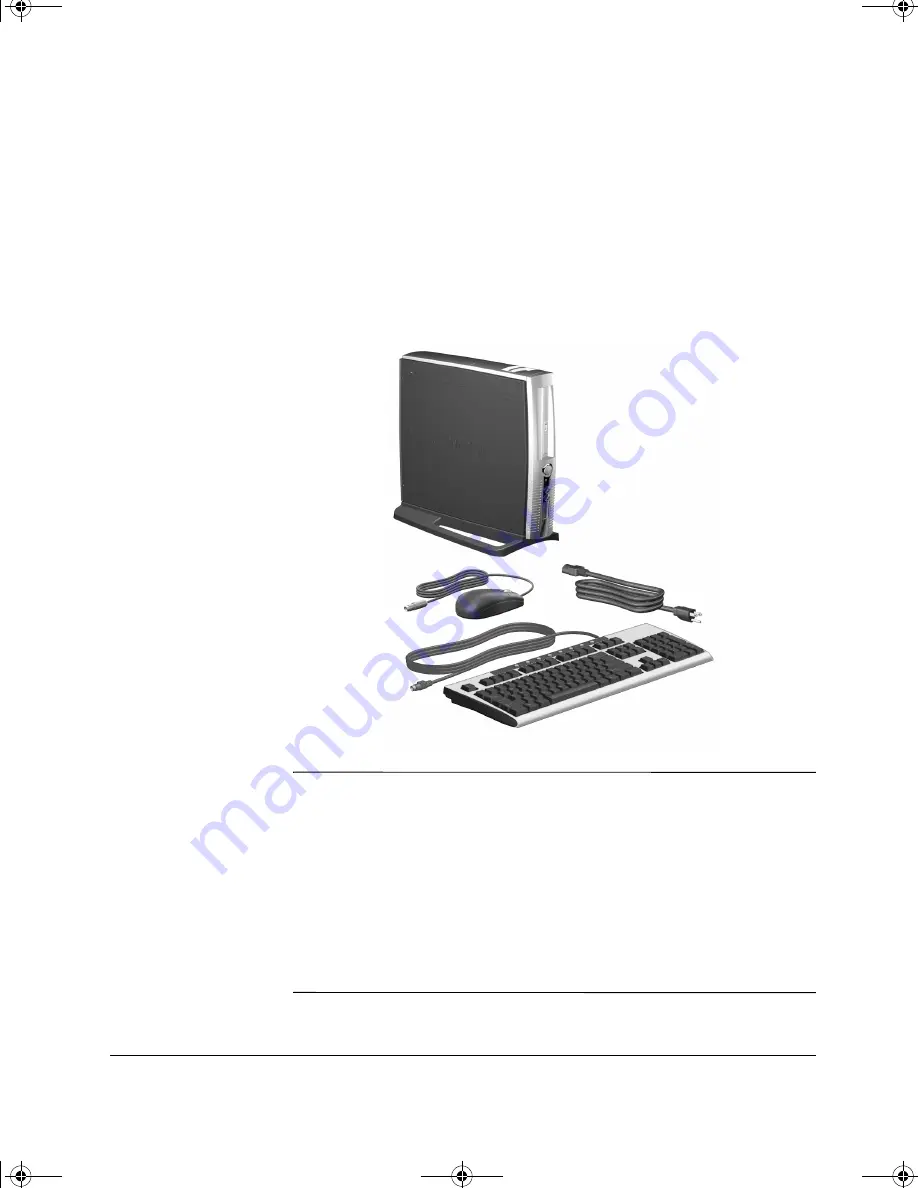
Step 1: Unpack the Compaq Evo D500 Ultra-Slim 

Desktop Personal Computer

Å

WARNING: 

Misuse of your personal computer or failure to establish a 

safe and comfortable workstation may result in discomfort or serious 
injury. Refer to your 

Safety & Comfort Guide for more information on 

choosing a workspace and creating a safe and comfortable work 
environment.

This equipment has been tested and found to comply with the limits for 
a Class B digital device, pursuant to part 15 of the FCC Rules. For more 
information, refer to the 

Compaq Reference Library CD. To reduce the 

risk of electrical shock, connect your personal computer only to a 
grounded (earthed) electrical outlet that is easily accessible at all times.

sp-gs.book  Page 1  Thursday, December 13, 2001  8:58 AM

Summary of Contents for Evo D500 USD

Page 1: ...Desktop Personal Computer Document Part Number 250893 001 November 2001 This book will help you with the initial hardware and software setup for the Compaq Evo D500 Ultra Slim Desktop personal comput...

Page 2: ...ided as is without warranty of any kind and is subject to change without notice The warranties for Compaq products are set forth in the express limited warranty statements accompanying such products N...

Page 3: ...d Front Panel Components 6 Step 6 Turn On the Personal Computer and Install the Operating System 7 Accessibility 7 Getting Started Customizing the Monitor Display 9 Protecting Your Software 9 Compaq R...

Page 4: ...iv Quick Setup Getting Started Guide Contents sp gs book Page iv Thursday December 13 2001 8 58 AM...

Page 5: ...or more information on choosing a workspace and creating a safe and comfortable work environment This equipment has been tested and found to comply with the limits for a Class B digital device pursuan...

Page 6: ...a minitower or desktop configuration To use it in the minitower configuration align the hole at the base of the personal computer with the post and thumbscrew in the stand Tighten the screw to secure...

Page 7: ...tor 5 Legacy Module q Serial Connector Connector is not visible with Legacy Module or rear panel cover installed w Parallel Port Connector 6 Monitor Connector e Multiport and retaining screw Any USB d...

Page 8: ...k fire or damage to the equipment do not plug telecommunications telephone connections into the network interface controller NIC connectors PS 2 mouse and keyboard connectors are available only on Evo...

Page 9: ...WARNING To reduce the risk of electric shock or damage to the equipment Do not disable the power cord grounding plug The grounding plug is an important safety feature Plug the power cord into a ground...

Page 10: ...er Button 3 System Activity Light 4 Microphone Connector 5 Headphone Connector 6 Universal Serial Bus USB Connectors 1 7 Power On Light 8 Multiport You must turn off the computer before installing or...

Page 11: ...stallation CAUTION Once the automatic installation has begun DO NOT TURN OFF THE COMPUTER UNTIL THE PROCESS IS COMPLETE Turning off the personal computer during the installation process might damage t...

Page 12: ...8 Quick Setup Getting Started Guide Quick Setup sp gs book Page 8 Thursday December 13 2001 8 58 AM...

Page 13: ...CD Along with the operating system CD the Compaq Restore CD enables you to recover the original operating system Internet browser and NIC or modem drivers This can be extremely helpful in the event of...

Page 14: ...e screen Turning Off the Personal Computer To properly turn off the personal computer first shut down the operating system software In Microsoft Windows operating systems click Start Shut Down Dependi...

Page 15: ...dware Reference Guide PDF Format Computer Setup Guide PDF Format Desktop Management Guide PDF Format Network Communications Guide PDF Format Troubleshooting Guide PDF Format Safety Regulatory Informat...

Page 16: ...k the title of the book you want to read The first time you click a link to a book provided on CD in Adobe PDF format you may be prompted to install the Adobe Acrobat Reader software which is provided...

Page 17: ...ty to perform the task or if you are concerned about voiding your product warranty contact you local authorized sales or service representative before undertaking the recommended corrective action If...

Page 18: ...option See Solving Hardware Installation Problems for instructions Be sure that all the needed device drivers have been installed For example if you have connected a printer you need to install a pri...

Page 19: ...S1 Normal suspend mode Power Green 1 flash every 2 seconds S3 Suspend to RAM if applicable Power Clear Off S4 Suspend to disk if applicable Power Clear Off S5 Computer off Power Red 4 flashes every 1...

Page 20: ...cks for a valid system ROM flash when power to the system is turned on The following table lists the various keyboard light combinations used by the Boot Block ROM as well as the meaning and action as...

Page 21: ...2 times accompanied by 1 long and 3 short beeps ROM flash failed Num Caps Scroll Lock Green On Boot Block ROM Flash successful Turn power off then on to reboot Diagnostic lights do not flash on USB ke...

Page 22: ...ables connecting the computer to the external power source are plugged in properly and the wall outlet is active Drive power data or power supply cables may not be properly connected Reseat drive powe...

Page 23: ...t it cool down 2 Ensure that computer air vents are not blocked and internal fan is running Contact Compaq authorized reseller or service provider The unit temperature was exceeded because the compute...

Page 24: ...electrical outlet The energy saver feature has been enabled Press any key or click the mouse button and if set type your password The RGB Red Green Blue input switch on the monitor is incorrectly set...

Page 25: ...nfigure the computer in Windows NT 4 0 after installing new hardware use the utility provided with the hardware Solving Hardware Installation Problems Problem Cause Solution A new device is not recogn...

Page 26: ...22 Quick Setup Getting Started Guide Getting Started sp gs book Page 22 Thursday December 13 2001 8 58 AM...

Page 27: ...or Ethernet RJ 45 3 headphone 6 Legacy Module 3 line in audio 3 line out audio 3 microphone 6 monitor 3 mouse 4 parallel Legacy Module 3 power cord 3 5 PS 2 keyboard Legacy Module 3 PS 2 mouse Legacy...

Page 28: ...keyboard use during setup 10 O operating system 7 P Plug and Play device 1 21 ports 3 power button 6 10 power cord connector 3 5 power on light 6 problems installing hardware 1 21 minor 1 13 solving m...

Reviews: