background image

3

C

le

an

in

g

&

U

se

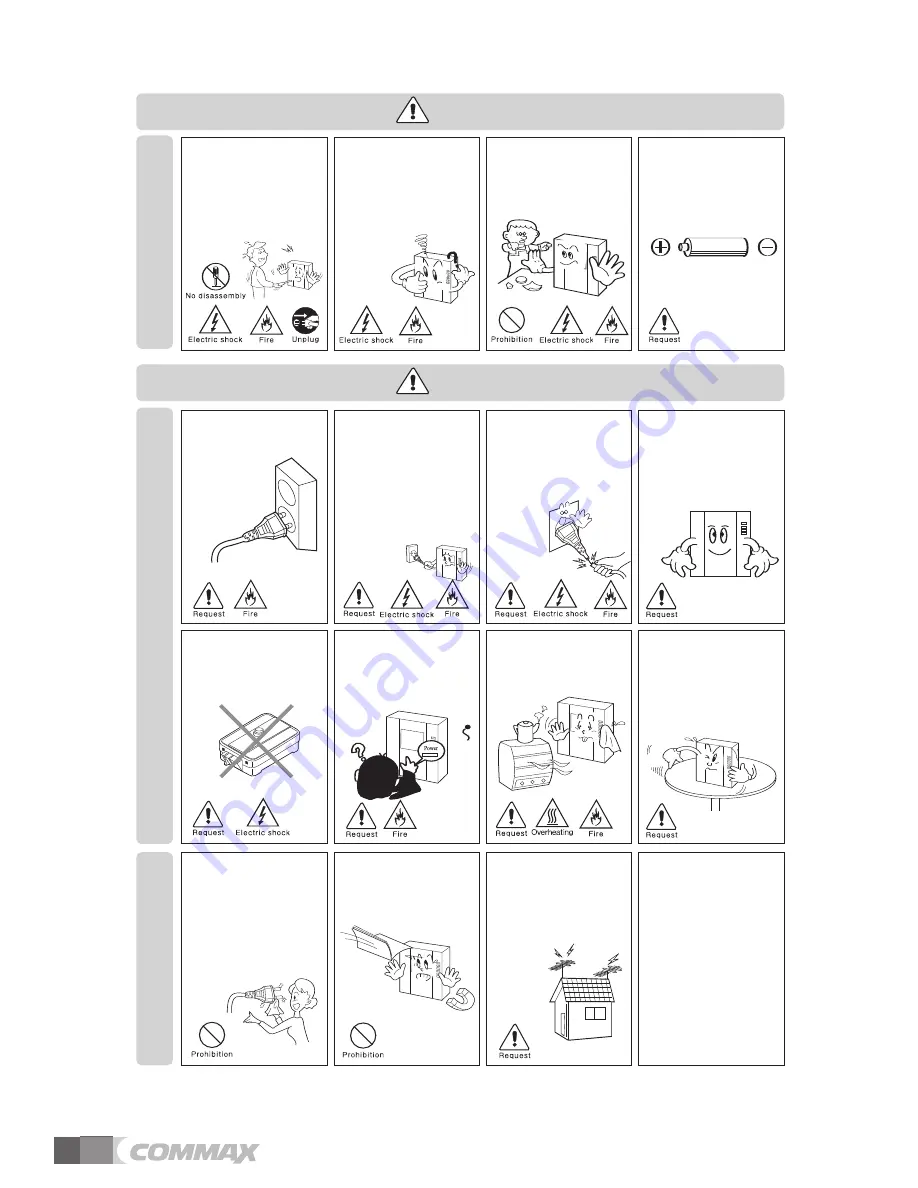
Please don

t disassemble,

repair or rebuild this product

arbitrarily (please contact the

service center if a repair is

needed. 

·

It may cause an electric

shock or fire. 

Please plug the power cable

firmly into the inner end 

·

It may cause a fire. 

Please hold the plug tightly

when unplugging the power

cable (a part of the copper

wire may be disconnected if

the grabbing is only made on

the cord when pulling out the

cable).

·

It may cause an electric

shock or fire 

When connecting the power

cables after cutting the cable,

please install the product with

power off

·

It may cause an electric

shock or fire  

When installing the product,

please fix it firmly while using

the wall-mounting unit and

screws.

·

It may cause an injury from

the falling object.

Please be careful when using

an AC circuit breaker since

there is a possibility of an

electric shock. 

When cleaning the product,

please rub it with a soft and

dry cloth after plugging out

the power cable. (Please don

t

use any chemical products

such as wax, benzene, alcohol

or cleanser.) 

Please don

t drop the product

on the ground and don

t apply

a shock . 

·

It may cause a failure.

Please use the designated

connection cable within the

maximum calling distance

designated for the product

·

It may reduce the product

performance. 

Please check the use voltage

and current for the DC-only

products and use the

appropriate rectifier. 

·

It may cause a fire. 

Please avoid direct rays of the

sun or heating devices at a

time of installation. 

·

It may cause a fire. 

Please don

t install the

product on an unstable place

or small support board. 

·

It may cause an injury if it

falls down while in use. 

If an abnormal sound, burning

smell or smoke is coming out

of the product, please plug out

the power cable and contact a

service center. 

·

It may cause an electric

shock or fire. 

Please don

t insert any

metallic or burnable materials

into the ventilation hole. 

·

It may cause an electric

shock or fire. 

Please use only the designated

batteries for the products of

using DC power. 

·

It may cause an electric

shock or fire. 

C

le

an

in

g

&

U

se

P

ow

er

&

In

st

al

la

tio

n

Warning

Caution

Summary of Contents for CDV-40QM

Page 1: ...sponsible for any safety accidents caused by abnormal operation of the product Thank you for purchasing COMMAX products Please carefully read this User s Guide in particular precautions for safety bef...

Page 2: ...e the product MEMO Greetings 1 Contents table 1 1 Warnings and caution 2 2 Part names and functions 4 3 How to use the products 6 4 Settings 8 5 Installation 18 6 Wiring 19 7 Parts list 21 8 Specifica...

Page 3: ...tric shock fire when using a damaged power cable Please don t handle the power cable with a wet hand It may cause an electric shock Please plug out the power cable from the socket when not using it fo...

Page 4: ...e power cable Please don t use any chemical products such as wax benzene alcohol or cleanser Please don t drop the product on the ground and don t apply a shock It may cause a failure Please use the d...

Page 5: ...entry 8 SELECT Button Press to select an item from the menu 9 UP button It is used to move from the menu items up and right If there are too many files in the list press UP button for a while to move...

Page 6: ...g the conditions as bellows If not then video quality cannot be guaranteed Micro SD T FLASH suggested Spec Please after format use the product 1 Manufacturing SANDISK Micro SD 2GByte Micro SDHC CLASS...

Page 7: ...and ring tones After 60 Sec It will be closed the screen It will be displayed from standby mode to image when you press the monitor button If take handset of Interphone you can call with interphone w...

Page 8: ...please press the talk button you can call with house hold also If you take handset of interphone you can call entrance camera interphone 2 Interphone with house holds call If you call from interphone...

Page 9: ...ting color How to adjust In the configuration mode of 3 1 move to the icon to set Interphone button Talk button button Press the SELECT Unlocking button button to choose an icon Adjust the set value w...

Page 10: ...ton Talk button Complete initializing the screen value with SELECT Unlocking button button Configuration In standby status move to Configuration menu by pressing menu button And move to relevant icon...

Page 11: ...saving video it can be saved by cancellation of calling or end of call If you press the monitor button more than 1 sec in the middle of recording video video keeps recording and separately capturing...

Page 12: ...icro SD Card or built in memory you can secure minimum space You can save depend on the file qty please check reference It is depend on the memory size and please see the as follow information Even th...

Page 13: ...l memory If Micro SD Card is removed it will be stored on the product s internal memory again 3 FORMAT Data format formatting the data of captured image and saved video of the product Once data is for...

Page 14: ...a route Select the saved data you want with Interphone button Talk button After choosing play and delete the data with SELECT Unlocking button button 2 Video and Image CAPTURE picture set 1 Saving ro...

Page 15: ...d after press the SELECT Unlocking button button move to FOMET icon with Interphone button Talk button Press the SELECT Unlocking button button to choose an icon Select the FORMET set acceptance or re...

Page 16: ...n icon Select the desired mode with Interphone button Talk button After choosing complete the set with SELECT button Unlocking button UTILITY 1 LED DIMMING Stand by status of the product on No 1 mode...

Page 17: ...g complete the set with SELECT button Unlocking button 3 Time setting Set the time of products It is used videos and image saving Setting It will be moved the UTILITY icon from establishment of Enviro...

Page 18: ...to CCTV activation icon with Interphone button Talk button Press the SELECT Unlocking button button to choose an icon Select CCTV on or off with Interphone button Talk button After choosing complete...

Page 19: ...1 Installation Method of camera monitor Note Avoid the range of direct sunlight Recommended height is pertinent from 1450 1500mm Avoid the installation near magnetic activity humid temperatures and g...

Page 20: ...ng for each connect 2 UTP CABLE CAT 5 are required if UTP CABLE CAT 5 is used for CAMERA1 and CAMERA2 and Interphone UTP CABLE CAT 5 If 3 UTP CABLE CAT 5 For better picture quality We recommend using...

Page 21: ...power Please choose the appropriate coaxial cable according to the distance UTP CABLE Wiring If UTP CABLE CAT 5 is used please use 7 lines for GND line Other wise you may face inferior video quality p...

Page 22: ...Tp Rp Vp QTp CDV 40Q GH1T 4 X 50 ZnY PHM 3 X 6 ZnY 4P 300 2EA POWER CORD 480 Monitor CDV 40QM Mounting screw SCREW GH1T 4X18 ZnY 4EA Monitor fixing screw SCREW PHM 3X6 ZnY 1EA Connector CONN 4PX300 2...

Page 23: ...6 D mm CDV 40QM Model Spec 8 Specification Call sound 1 Turn on the power switch 2 Please contact your local agent for product maintenance when you have a problem in use of CDV 40QM 3 For your safety...

Page 24: ...513 11 Sangdaewon dong Jungwon gu Seongnam si Gyeonggi do Korea Int l Business Dept Tel 82 31 7393 540 550 Fax 82 31 745 2133 Web site www commax com Printed In Korea 2011 10 104 PM0740QM0011...

Reviews: