


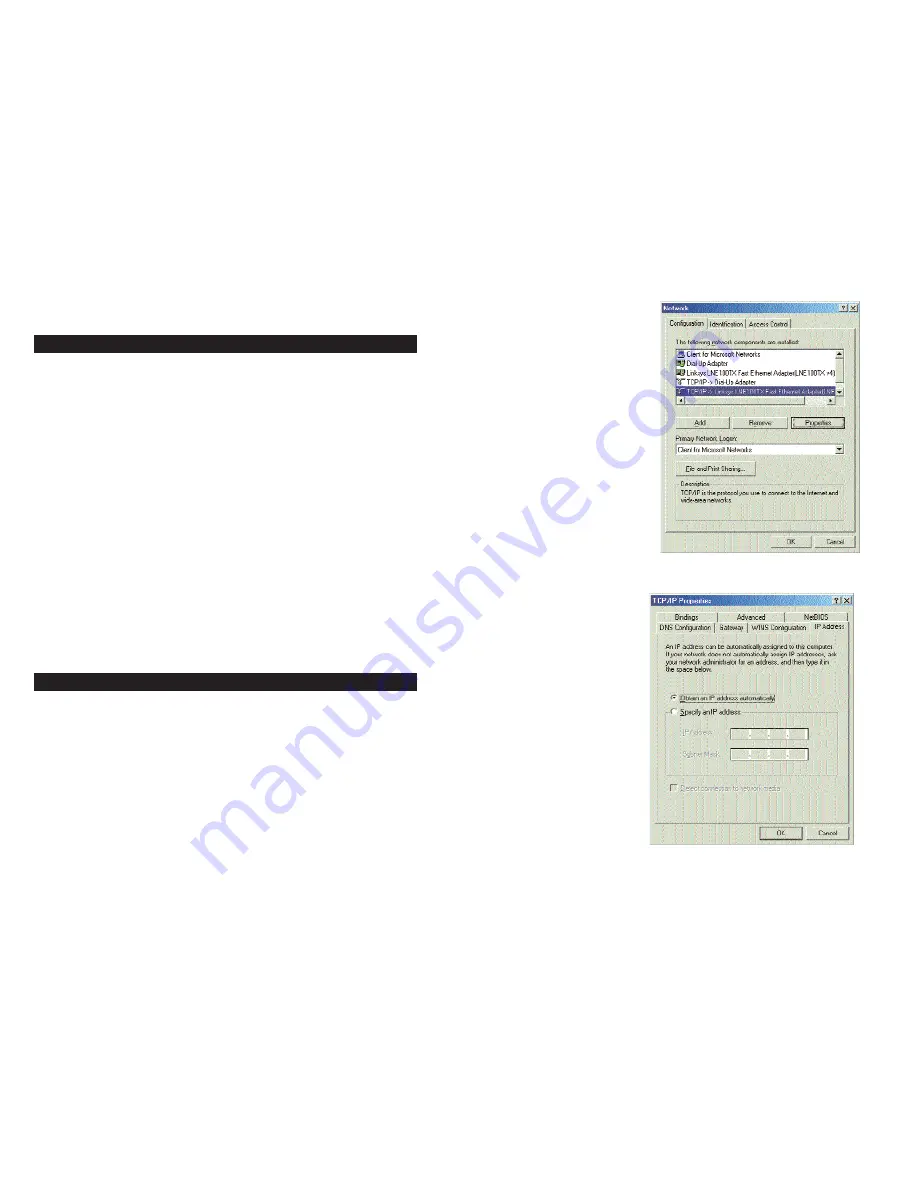
2. On the Configuration tab,
select the
TCP/IP line
for
the applicable Ethernet
adapter, as shown in Figure
4-1. Do not choose a
TCP/IP entry whose name
mentions DUN, PPPoE,
VPN, or AOL. If the word
TCP/IP
appears by itself,
select that line. (If there is
no TCP/IP line listed, refer
to “Appendix C: Installing
the TCP/IP Protocol” or
your Ethernet adapter’s
documentation to install
TCP/IP now.) Click the
Properties
button.
3. Click the
IP Address
tab. Select
Obtain an
IP address automati-
cally
, as shown in
Figure 4-2.
23
Chapter 4: Configuring the PCs
The instructions in this chapter will help you configure each of your comput-
ers to be able to communicate with the Cable Gateway.
To do this, you need to configure your PC’s network settings to obtain an IP (or
TCP/IP) address automatically (called DHCP). Computers use IP addresses to
communicate with each other across a local network or the Internet.
You will need to know which operating system your computer is running, such
as Windows 98, Me, 2000, or XP. One way to find out which operating system
you have is by clicking the
Start
button and selecting the
Settings
option.
Then, open the
Control Panel
, and double-click the
System
icon. The screen
that appears should display your operating system.
You may need to configure each computer you are connecting to the Cable
Gateway.
The next few pages show you, step by step, how to configure your network set-
tings based on the type of Windows operating system you are using.
If your operating system is not referenced here, refer to your operating system’s
documentation.
1. Go to the Network screen. Do this by clicking the
Start
button, selecting
Settings
and opening the
Control Panel
. From there, double-click the
Network
icon.
22
Figure 4-2
Figure 4-1
Overview
Windows 98 and Me


