background image

8

P/N: 192090087 REV. AA 

October 2021

MAINTENANCE

INSPECTION

To maintain continuous and satisfactory operation, regularly 

inspect the unit and replace worn or damaged parts before they 

become unsafe. Determine the intervals of inspection based on 

the individual application and also the type of service to which the 

hoist is subjected. The intervals indicated as follows are based on 

normal service.

Divide inspections into two general classifications (frequent and 

periodic). 
FREQUENT INSPECTIONS 
The operator conducts these visual examinations daily or before 

each use, including: 

1. 

Braking mechanism for evidence of slippage.

2. 

Operation of the directional lever for free movement.

3. 

Load chain for lubricant, wear, damaged links or foreign 

material.

4. 

Hooks for damage, cracks, twists, latch engagement and latch 

operation.

PERIODIC INSPECTIONS 
A designated person conducts visual inspections of external 

and internal conditions, making records to provide the basis for 

continuing evaluation of the condition of the hoist. Determine the 

frequency of periodic inspections based upon usage as defined in 

ASME B30.21. Periodic inspections should include those items as 

well as the following:

1. 

Chain for excessive wear or stretch 

(See Figures 7 thru 8, starting on page 8). 

2. 

Worn, cracked or distorted parts such as lower hook block, 

upper hook block, upper hook pin, chain guide, bushings, 

lever, brake cover, free-chaining knob, directional pawl, friction 

hub and lever ratchet.

3. 

Inspect for wear on the tip of the pawls, teeth of the ratchet, 

and pockets of the lift-wheel.

4. 

Loose or missing bolts, nuts, pins or rivets.

5. 

Inspect the brake components for worn, glazed or 

contaminated friction discs and scoring of the friction hub and 

ratchet. Replace brake ratchet assembly if contaminated, 

glazed or if thickness is less than the following thickness: 

• 0.256 in. (6.5 mm) for 3/4-ton and 1-1/2-ton units


• 0.307 in. (7.8 mm) for 3-ton and 6-ton units

6. 

Corroded, stretched or broken pawl springs, directional lever 

pawl spring and lever ratchet spring.

7. 

Hooks – Visual inspection based upon ASME B30.10 and 

ASME B30.21.

8. 

Nameplate and warning labels for legibility and retention.

9. 

Chain stop in place and properly secured.

Correct any deficiency before returning the hoist to service. Also, 

the external conditions may show the need for more detailed 

inspection which, in turn, may require the use of non-destructive 

type testing. 
Replace any parts deemed unserviceable, using new parts before 

returning the hoist to service. Destroy unserviceable parts and 

properly dispose of them to prevent any future use of them.
When the unit is subjected to heavy usage or dusty, gritty, moist 

or corrosive atmospheric conditions, assign shorter time periods 

between inspections. Inspect all parts for unusual wear, corrosion or 

damage, in addition to those specifically mentioned in the schedule.


HOOK INSPECTION 

Replace hooks that have suffered damage from chemicals, 

deformations or cracks, or that have a twist from the plane of 

the unbent hook, excessive opening or seat wear (see ASME 

B30.10). Also, replace hooks that are opened to the extent that 

the latch does not engage the tip. Any hook that is twisted or has 

excessive throat opening indicates abuse or overloading of the 

hoist. Inspect other load-sustaining parts for damage. 
Check to assure the latch is not damaged or bent and that 

it operates properly. The latch should have sufficient spring 

pressure to keep it tightly against the tip of the hook and allow it to 

spring back to the tip when released. Replace the latch if it does 

not operate properly. 
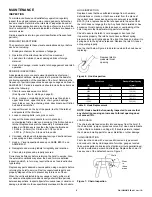
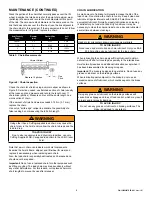
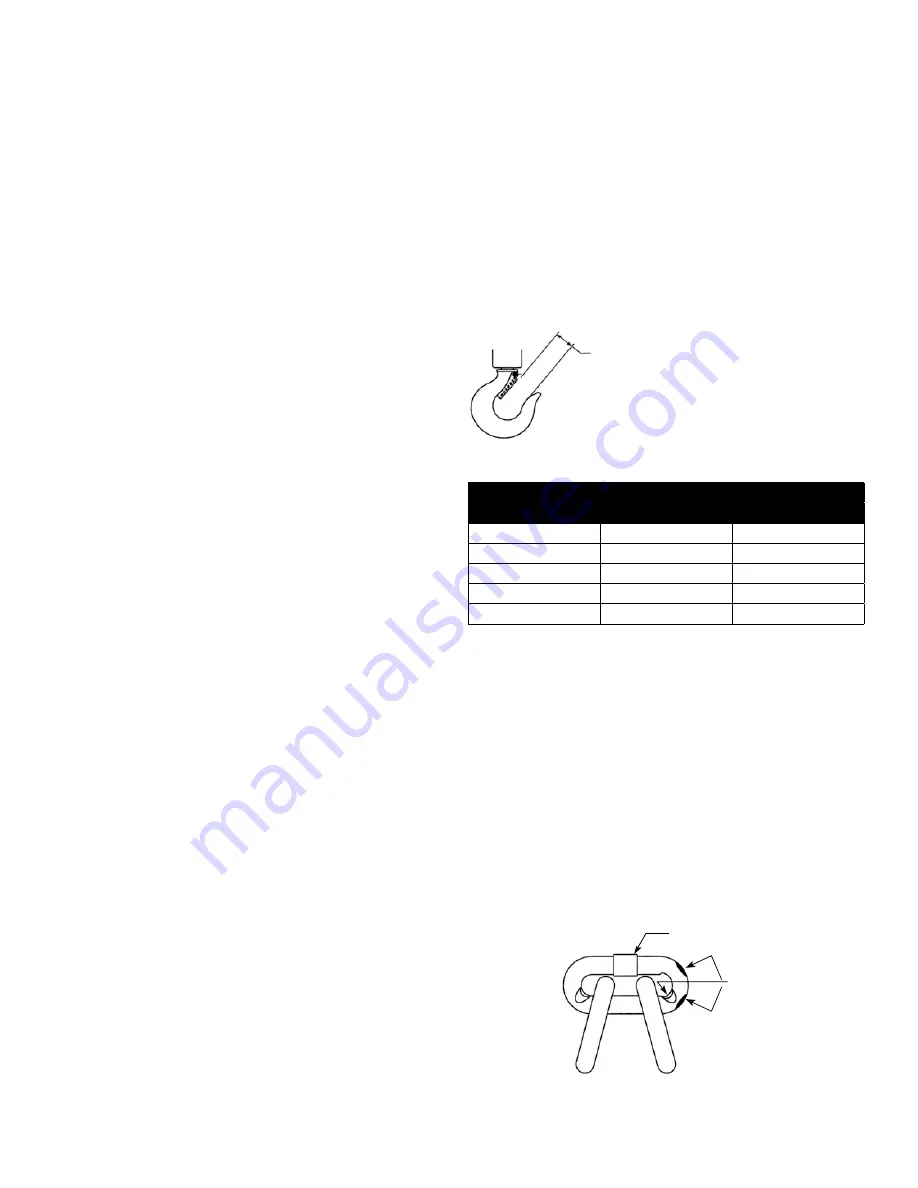
Use the chart below Figure 6 to determine when the hook needs 

replacing.

Depress latch to

measure throat

opening 

Figure 6:  Hook Inspection

Rated Load

Standard Throat Opening

(lb)

(Ton)

in. (mm)

1500

3/4

1.10 (21)

2000

1

1.25 (22)

3000

1-1/2

1.37 (26)

6000

3

1.44 (31)

12000

6

2.00 (46)

Table 2:  Hook Replacement

NOTE: Hook should be frequently inspected to ensure that  

any distortion causing an increase to throat opening does 

not exceed 10%.

LOAD CHAIN 
The chain should feed smoothly into and away from the hoist. If 

the chain binds, jumps or produces noise, first clean and lubricate 

it (See Chain Lubrication on Page 9). If trouble persists, inspect 

the chain and mating parts for wear, distortion or other damage.

CHAIN INSPECTION 

First clean the chain with a non-caustic/non-acid type solvent 

and conduct a link-by-link inspection for nicks, gouges, twisted 

links, weld spatter, corrosion pits, striations (minute parallel lines), 

cracks in weld areas, wear and stretching. Replace the chain if it 

has any one of the defects shown in Figure 7.

Weld

Wear

in

these

areas 

Figure 7:  Chain Inspection

Summary of Contents for Coffing Hoists LSB-12000C

Page 1: ...ing and operating this hoist The use of any hoist presents some risk of personal injury or property damage That risk is greatly increased if proper instructions and warnings are not followed Before using this hoist each operator should become thoroughly familiar with all warnings instructions and recommendations in this manual Retain this manual for future reference and use Forward this manual to ...

Page 2: ... parts services through a network of Master Parts Depots and Service Centers that are strategically located in the United States and Canada These facilities have been se lected for their demonstrated ability to handle all parts and repair requirements promptly and efficiently To quickly obtain the name of the Master Parts Depot or Service Center nearest you call 800 888 0985 Fax 716 689 5644 ...

Page 3: ...unctions or unusual performances of a hoist Shut it down and forbid its use until it has undergone repair 28 not operate a hoist on which the safety placards or decals are missing or illegible 29 Be familiar with operating controls procedures and warnings CAUTION improper operation of a hoist can create a potentially hazardous situation which if not avoided could result in minor or moderate injury...

Page 4: ...Statement This is to certify that the accompanying Coffing Hoist s has have been tested at 125 of rated capacity and inspected in accordance with ASME ANSI B30 21 Do not exceed rated capacity stated on the hoist Refer to manual for operating instructions and forward manual to operator SPECIFICATIONS Model LSB C Lever Hoist 0 75 3t 6t Model Rated Capacity Test Load 150 Rated Standard Lifts Load Cha...

Page 5: ...e from the bottom hook accidentally turning over through the load chains 4 The area in which the hoist is installed must provide sufficient room for The operator to operate the lever The operator and other personnel to stand clear of the load at all times Firm footing for the operator Clearance between the hoist frame and any object The frame must be free to swivel on the upper hook WARNING Attach...

Page 6: ...g See Figure 2 Set the selector lever to the UP position Take up the slacked load chain by turning the guide handle clockwise Next manipulate the operating handle clockwise Lowering Releasing See Figure 3 Set the selector lever to the DOWN position Manipulate the operating handle counterclockwise When there is no load on the lever hoist the load chain can be slacked by turning the guide handle cou...

Page 7: ...ull by manipulating the operating handle WARNING If the unit is not rigged in a straight line hook to hook and if the frame is not free to swivel the lever pull may break the frame and cause physical injury and loss of load TO AVOID INJURY Rig the unit in a straight line hook to hook and ensure the frame swivels freely See Figure 5 Figure 5 Pulling at an Angle INSPECT HOIST Inspect it before each ...

Page 8: ...before returning the hoist to service Also the external conditions may show the need for more detailed inspection which in turn may require the use of non destructive type testing Replace any parts deemed unserviceable using new parts before returning the hoist to service Destroy unserviceable parts and properly dispose of them to prevent any future use of them When the unit is subjected to heavy ...

Page 9: ...ipper and lift wheel for wear and replace it as necessary when replacing worn chain Also the load chain is specially heat treated and hardened and should never be repaired Important Do not use a replaced chain for other purposes such as lifting or pulling The load chain may break suddenly without any visual deformation For this reason cut replaced chain into short lengths to prevent its use after ...

Page 10: ...rication To ensure proper operation DO NOT apply lubricant to the friction surfaces or to adjacent parts of the load limiter TESTING Test the load limiter during periodic inspections To perform this test attach the lower hook to a load at maximum 200 of rated capacity and operate the unit in the UP direction When attempting to lift the load the lever should slip After this test move the trigger to...

Page 11: ...Load Chain SAE 20 30 Machine Oil Daily Weekly Monthly See Pages 15 17 Load Pawl Shaft Pinion Shaft Gear Bearings Pinion Gear Teeth Multi purpose Lithium base bearing grease At periodic inspection See Inspection Maintenance Checklist See Pages 15 17 Bottom Block Shaft Bearing Hook Swivel SAE 20 30 Machine Oil Monthly Yearly Yearly This lubrication schedule is based on a hoist operating in normal en...

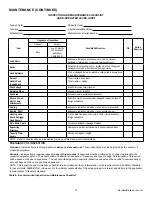
Page 12: ...essive wear Housing Load Block Outrigger Hook Swivels Cracks distortion loose bolts nuts or rivets Internal buildup of foreign substances Nuts Bolts Rivets Looseness stripped or damaged threads Supporting Structure Damage or wear that restricts ability to support imposed loads Capacity Plate Decals Missing damaged or illegible NOTE Refer to Maintenance and Inspection Sections of this manual for fu...

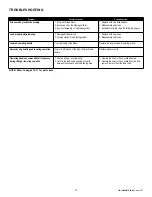
Page 13: ...ce with new ones 2 Disassemble and clean Jammed operating handle Over tightening of the brake Operate the lever hoist as if lowering a load Noises during hoisting and lowering operation Wear or deformation of the load chain and load sheave Replace with new parts Operating handle becomes difficult to operate during lifting or lowering operation 1 Over hoisting or over lowering 2 Twist in the load c...

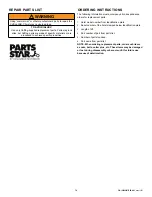
Page 14: ...operties ORDERING INSTRUCTIONS The following information must accompany all correspondence orders for replacement parts 1 Hoist model number from identification plate 2 Serial number of the hoist stamped below identification plate 3 Length of lift 4 Part number of part from parts list 5 Number of parts required 6 Part name from parts list NOTE When ordering replacement parts order such items as nu...

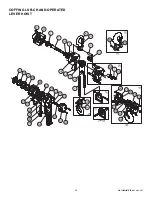
Page 15: ...15 P N 192090087 REV AA October 2021 COFFING LSB C HAND OPERATED LEVER HOIST ...

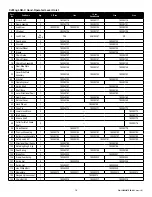
Page 16: ... 1 192090159 192090160 32 Lever Directional Pawl 1 192090161 192090162 37 Gear Cover 1 192090163 192090164 192090165 40 Ratchet Cover 1 192090166 192090167 192090168 42 Hand Wheel 1 192090169 51 Yoke Pin 1 192090170 192090171 192090172 53 3 Lower Hook Block 2 192090173 55 Idle Sheave 1 192090174 56 Sheave Shaft 1 192090175 58 Collar for Idle Sheave Shaft 2 192090176 59 Pinion Washer 1 192090177 19...

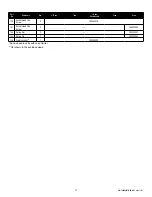
Page 17: ...1 ton 1 5 ton Short Handle 3 ton 6 ton 128 Socket Head Cap Screw 2 192090219 141 Socket Head Cap Screw 3 192090220 142 Spring Nut 3 192090221 143 Spring Pin 1 192090222 146 Warning Label 1 192090223 Not included in units with Load Limiter Not shown in the exploded views ...

Page 18: ...MCO Warranty HOISTS OF i SUCH WARRANTY WITH RESPECT TO THE ELECTRICAL COMPONENTS OF ANY GOOD SHALL BE VALID OR ENFORCEABLE UNLESS BUYER S WRITTEN NOTICE THEREOF IS RECEIVED BY SELLER WITHIN ONE 1 YEAR FROM THE DATE OF SELLER S DELIVERY TO THE CARRIER AND ii SUCH WARRANTY WITH RESPECT TO THE MECHANICAL COMPONENTS OF ANY GOOD SHALL BE VALID OR ENFORCEABLE UNLESS BUYER S WRITTEN NOTICE THEREOF IS REC...

Reviews: