COHU Helios 3920 Operation Manual Download Page 35

35

6X-1090D

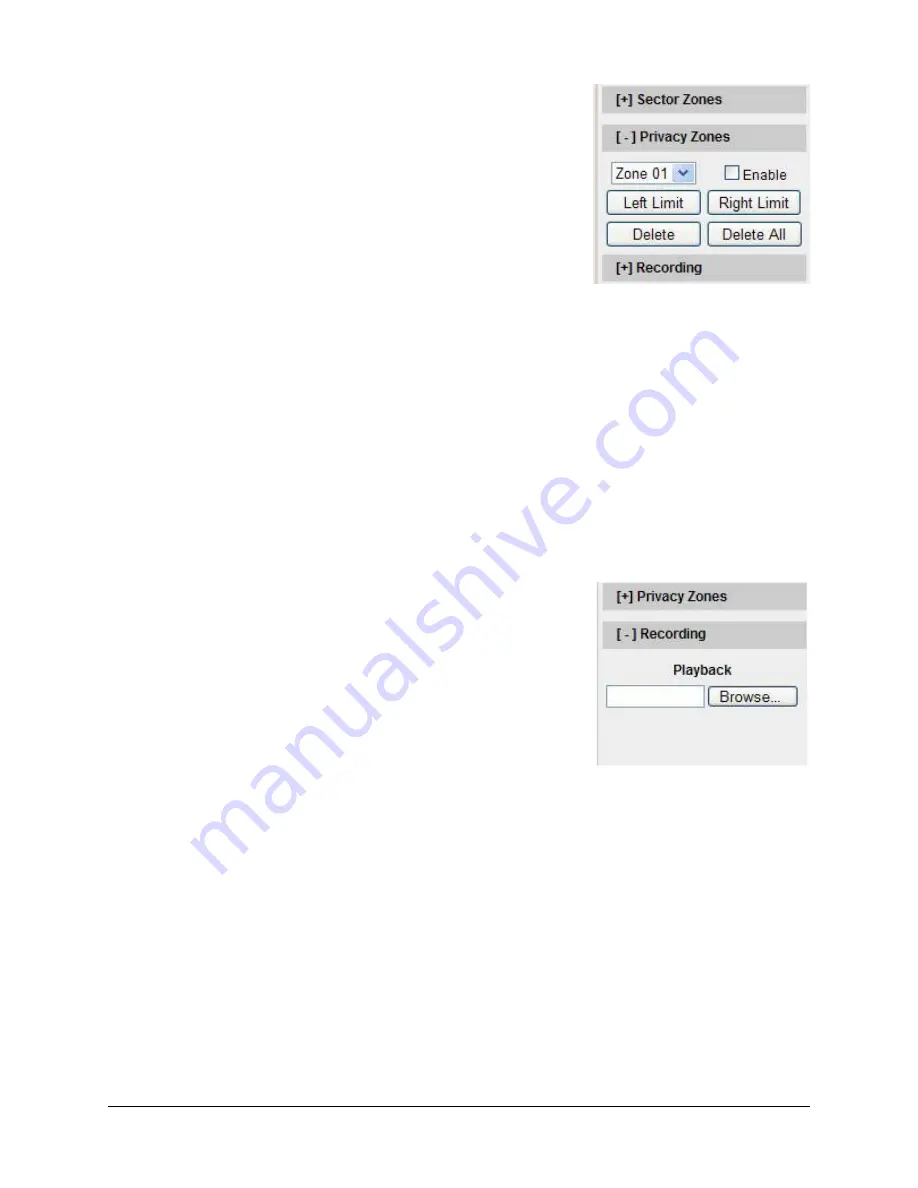
2.10  Privacy Zones (Applies to 3960

HD

/3960

SD

/3920

HD

/3920

SD

)

Priv and Admin users are allowed to establish privacy zones. Privacy 

zones are used to conceal user-defined privacy areas. Up to eight pri

-

vacy zones can be established.

Below are steps for setting a privacy zone:

NOTE: 

When establishing a privacy zone be sure that zoom magnifica

-

tion level is 1 (the slider in the Zoom Magnification bar should be all the 

way to the left).

•  Click the Privacy Zones button from the Camera configuration/

control menu.

• 

Select the desired zone number from the Zone dialog box.

• 

Position the left edge of the privacy zone to the right edge of the video area. Be sure  that you cannot 
see any objects that belong to the privacy zone. Click the Left Limit button. 

• 

Position the right edge of the privacy zone to the left edge of the video area. Be sure that you cannot 
see any objects that belong to the privacy zone. Click the Right Limit button.

• 

The privacy area will be covered with the solid black color.

NOTE: 

To turn off the privacy zone, clear the check box labeled “Enable.”

• 

Use the Delete button to clear the selected privacy zone.

• 

Use the Delete All button to clear all privacy zones that have been set.

2.11  Playing Back Recorded Video 

This control is available to all users. The recording section is used to 

find and play back recorded video.

NOTE: 

Before starting play back of recorded video, turn off the live vid-

eo stream by clicking the Stop button. “Nothing is loaded” sign should 
be displayed in the video area. A new button (Playback Video Record-
ing) will be displayed in the video slider area.

• 

Click the Recording button.

•  Click  the  Browse  button  and  find  the  location  of  the  file  you 

want to see or type the file location in the left box in the Play

-

back area.

IMPORTANT: 

Make sure that the Show hidden files and folders button is selected. The button is located:

• 

for Windows XP - Wndow Explorer\Tools\Folder Options\the View tab\Files and Folders\Show hid-

den files and folders

•  for Windows 7 - Control Panel\Folder Option\the View tab\Show hidden files, folders and drivers

The default recording and snapshot folders are located:

• 

for Windows XP - C:\Documents and Settings<Username>Application Data\CohuRecordings 

• 

for Windows 7 - C:\Users<Username>Application Data\CohuRecordings

NOTE 1:

 If you cannot access the Application Data Folder, your access has been restricted and you need 

to take ownership of the folder. To take ownership of the folder, follow these steps:

•  Right-click on the file that you want to take ownership, and click Properties.

Summary of Contents for Helios 3920

Page 1: ...hwaite Circle Poway CA 92064 Fax 858 277 0221 Technical Manual 6X 1090D www cohu cameras com August 28 2011 info cohu com Cohu Helios Products OPERATION MANUAL Series 3960HD SD 3930HD SD HD EX 3920HD...

Page 2: ...Page Overview 16 2 1 1 Video Control Area 17 2 1 2 Live Video and Recording Controls 17 2 1 3 LED Indicators 17 2 1 4 Text Overlay On Screen Text Display 17 2 2 Camera Setup Control 18 2 2 1 Configur...

Page 3: ...om the Cohu website listed above Copyright Intellectual property rights statement Copyright 2010 by Cohu Inc Electronics Division Cohu has intellectual property rights to technology em bodied in the p...

Page 4: ...for inspection immediately upon discovery of the concealed damage Keep all cartons and packing materials To return the product to the factory for service please contact the Customer Service Departmen...

Page 5: ...000BASE T network card installed in your computer Microsoft Internet Explorer version 8 if the web browser is used Cohu Helios Viewer software if the Helios Viewer is used The Helios Viewer is availab...

Page 6: ...cable connect the system cable to the power connect the Camera system cable CAT5e to a network switch connect your PC Ethernet cable to the switch NOTE If your PC has a GigE network interface you shou...

Page 7: ...AT5e Router non PoE Switch PoE Injector 100 240 V AC WAN LAN Out In Default IP Address 192 168 2 150 Power Cord Be sure to mount the Camera before the power is applied Do not apply power before in sta...

Page 8: ...mount the Camera before the power is applied Do not apply power before in stallation is completed Network Switch Power Router Switch CAT5e Cable Router non PoE Switch PoE Injector 100 240 V AC WAN LAN...

Page 9: ...ra using IP output Figure 6 shows a setup of the Camera using analog and IP output These diagrams give an idea of a typical installation Each installation site will have its own unique require ments N...

Page 10: ...have Admin privileges Set your computer IP address to the same subnet as the Camera IP address Go Start Control Panel Network connections Local Area Connection 1 Local Area Connection dialog box will...

Page 11: ...Click OK to close the the Local Area Connections Properties dialog box and click Close to close the Local Area Connection dialog box General Tab Use the following IP address button is selected Enter...

Page 12: ...Camera for starting a video stream take the following steps Start a browser Microsoft Internet Explorer version 8 Log in as a local administrator on your computer NOTE You may need to set security le...

Page 13: ...low different levels of access Those ac counts are Guest User Privileged User Priv Administrator Admin For more information see sections 2 2 1 6 and 2 2 3 IMPORTANT Upon delivery the first time you ac...

Page 14: ...ht make the Camera inaccessible through the network Consult with your network administrator before starting to assign new network settings to ensure that your camera won t conflict with other devices...

Page 15: ...ick on the Start Discovery button A list of Cameras will be automatically displayed Select your camera network settings NOTE Use the MAC Address to identify Cohu cameras 00 09 f2 identifies cameras as...

Page 16: ...ea 1 The current user level logged into the Camera See sections 2 2 1 6 and 2 2 3 2 The series number of the Camera 3 Logout 4 Camera configuration control panel menu See sections 2 2 2 9 Video area 5...

Page 17: ...2 Live Video and Recording Controls 1 Start Pause Live Video Button Starts Pauses Live Video stream 2 Start Recording Stop Recording Button Starts Stops recording See section 2 11 on how to find and p...

Page 18: ...you will be able to see two buttons Properties and Change Password If you are logged in as the Guest you will be able to see one button Change Password 2 2 1 Configuration This button is available for...

Page 19: ...ique Hostname should be assigned for both DHCP and static configurations Select Use the following IP Address to do static configuration This will allow the following values to be set manually IP Addre...

Page 20: ...used for stream one unicast multicast RTP TCP and RTP HTTP TCP Selecting Multicast allows you to specify a multicast address to use In all cases the packet size to use can be specified as 550 1400 or...

Page 21: ...icast RTP TCP and RTP HTTP TCP Selecting Multicast allows you to specify a multicast address to use In all cases the packet size to use can be specified as 550 1400 or 8192 bytes Transport Mode choose...

Page 22: ...anges Click the Camera Set Up button Click the Configuration button Click the OSD tab Type a new name of the Camera into the Line 1 box Upper and lower case numbers and selected special characters are...

Page 23: ...min user has access to all Camera settings and functions can change network and user configuration and download firmware upgrades NOTE TheusernameisdisplayedaboveCohulogoontheHeliosWebInterfaceHomePag...

Page 24: ...user closes the browser or stops viewing the Camera NOTE Increasing this time will not allow a user to close the browser and then return to the Camera without authenticating again Max Login Time the...

Page 25: ...ght path Note 1 When changing from either color or monochrome mode to the auto mode there will be approximately a ten second delay before the automatic mode is en gaged Note 2 Auto Day Night mode requ...

Page 26: ...ific lighting condition Max AGC Automatic Gain Control Sets the maximum gain level that the automatic gain will attain In creasing this level will increase Camera sensitivity under low light condition...

Page 27: ...about the Camera current software version and component versions Follow instruc tions on the page to upgrade your firmware and web interface ver sions Download the desired software updates for firmwar...

Page 28: ...TION Make sure to install the correct file of the firmware dur ing the upgrade process CAUTION The upgrade process takes approximately 12 minutes Do not interrupt it A series of screens will be displa...

Page 29: ...UTION Make sure to install the correct file of the Web Inter face during the upgrade process CAUTION The upgrade process takes approximately 2 minutes Do not interrupt it A series of screens will be d...

Page 30: ...to the button shows the reported status of the Camera Manual Focus allows user to toggle the focus control between automatic and manual The indicator next to the button shows the reported status of th...

Page 31: ...ing on the Delete button Click on the Append ot Insert buttons to add the preset positions to the tour Enter the dwell time in seconds for each checked preset NOTE The dwell time must be set between 5...

Page 32: ...sign Path Path is recording will stop flash ing on the top left side of the video area of the Home Page Below are the steps to run a path Select the Paths Tours button from the the Home Page menu Sel...

Page 33: ...ra system sup ports 64 presets Below are steps for programming a preset Click the Preset button from the Camera configuration control menu Move the Camera to a desired position using Pan Tilt Zoom Foc...

Page 34: ...econds in the top left corner of the monitor It will turn off automatically 2 9 Sector Zones Applies to 3960HD 3960SD 3920HD 3920SD The sector zone function allows user to label specified areas within...

Page 35: ...ivacy zones that have been set 2 11 Playing Back Recorded Video This control is available to all users The recording section is used to find and play back recorded video NOTE Before starting play back...

Page 36: ...Click the Stop Data Display to stop the video 2 12 Viewing Snapshots The snapshot image is saved as a JPEG file on your computer The default recording and snapshot folders are located for Windows XP...

Page 37: ...labeled Add this website to the zone and click the Add button This will add the Camera to the list of trusted sites Repeat the step for each Camera you want to add NOTE Clear the check box labeled Req...

Page 38: ...6X 1090D 38 Figure 9 Custom Level Settings that are known to work with the Helios Web Interface table continues on the next page...

Page 39: ...39 6X 1090D Figure 9 Custom Level Settings that are known to work with the Helios Web Interface...

Page 40: ...6X 1090D 40 Figure 10 Advanced Settings that are known to work with the Helios Web Interface...

Page 41: ...d 3960SD series C 11 12 10 the manual is revised to add 3930HD and replace the Cohu Helios Viewer with Cohu Helios Web Interface description D 8 28 11 the manual is revised to add 3930HD EX and 3920HD...

Reviews: