background image

10

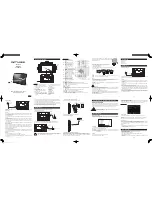
5.  Battery Installation( Optional): 

Open and remove the battery door located on
the bottom of  the battery compartment stand.

Insert 10

 “AA” (UM-3) batteries into the battery

compartment (see right p i cture). B e su re  the 

      pol arity (+and-) matches the markings inside. 

      Close the battery door, and connect the power
      cord of the battery compartment to the power
      source input jack of the unit.

Metal washer

Knob1

Knob2

3-1

3-2

3-3

12. Stand Holder(Plastic)

11.Rotary Telescopic
     Antenna

1. Volume Down Control
2. Volume Up Control
3. AV/TV Switch
4. Stand By Button
5. Menu Button
6. Channel Up Button
7. Channel Down Button
8. Remote Control Sensor
9. Power/Standby Indicator
10. Built In Speakers

2. General Part

FRONT VIEW

MENU

VOL-

VOL+

CH-

CH+

AV/TV

3

NOTE:

Do not mix new batteries with old or used ones.
Only use the batteries of the same type and brand.
Remove the batteries when not in use for a long period of time.
Do not connect the AC adaptor to the battery compartment while the power cord from the
battery compartment is connected to the unit.

6.  Stand Fixture(Optional) 

-  Loosen the metal washer on  the top of 
    the stand, but do not separate it from
    the stand (see picture 3-1).
-  Insert the metal washer with the stand
    into the slot on the back of the unit,
    and slide the stand up to a suitable
    height (see picture 3-2).
-  Tighten Knob 1 (see picture 3-3) to
    fasten the stand to the  unit. Adjust the
    angle of the unit, and then tighten
    Knob 2 (see picture 3-3) to lock it in
    place.

Summary of Contents for TF-TV700

Page 1: ...ce 1 piece 4 pieces 1 piece Battery Compartment Optional Instruction Manual Portable 7 COLOR TFT LCD TELEVISION SET AV TV POWER MUTE CH TUNE VOL VOL 2 4 9 CH PIC SETUP Dear Customer Thank you for purchasing this product Please read this manual carefully before connecting operating or adjusting this product in order to ensure the best efficiency and safety of this product Please keep the manual for...

Page 2: ... reception is too weak The brightness contrast are too low TV antenna is not properly adjusted or reception is too weak TV antenna is not adjusted correctly The reception is too weak or compromised by buildings or nearby mountains Color is not set correctly Sound on some channels but not all Adjust FINE function up or down in the MENU until sound is clear This troubleshooting guideis provided tohe...

Page 3: ...8 H X87 05 V mm 13 Power Source AC adaptor or car adaptor normal DC 12V 14 Measurement 195 L X 135 W X 30 D mm 15 Weight Approx 490g 16 Connection terminals Antenna Jack AV Input Jack Headphone Jack External Power Source Input Jack 8 General Specification Table of Contents Table of Contents 1 User Safety Instructions 2 General Parts 3 Connection 8 General Specification 9 General Troubleshooting 10...

Page 4: ...ty If the provided plug does not fit into your outlet consult an electrician for replacement of the obselete outlet 10 Place the power cord so that it is protected from being walked on pinched by objects torn and exposed to liquids especially at plugs convenience receptacles and the point where they exit from the product 11 Only use attachments accessories specified by the manufacturer Use of atta...

Page 5: ...sor 9 Power Standby Indicator 10 Built In Speakers 2 General Part FRONT VIEW MENU VOL VOL CH CH AV TV 3 NOTE Do not mix new batterieswith old or used ones Only use the batteries ofthe same type and brand Remove the batteries when notin use for a longperiod of time Do not connect theAC adaptor to the batterycompartment while the power cordfrom the battery compartment is connected tothe unit 6 Stand...

Page 6: ...volume range is 0 63 VOLup and VOLdown buttons arealso used toadjust features in the MENU 6 CH up CH down button Use the CH up and CH down buttons to go from channelto channel Also use the CH up and CH down buttons to navigate theMENU functions 7 NUMERICAL button 0 9 Numerical button 0 9 isused for selectingprogram number button 0 9 has the function of poweron when theTV is in waiting status 8 but...

Page 7: ...e remote until the PRESET screen appears see picture 2 5 Press CH up or CH down to scroll through these options Press VOL up or VOL down to adjust the desired option PRESET 5 ANT AV IN DC IN 12V Antenna Red YELLOW AUDIO INPUT VIDEO INPUT AC Adaptor Headphone not included AC Adaptor Detachable Battery Compartment Stand 10 X AA UM 3 SIZE batteries are not included 10 X AA UM 3 SIZE batteries are not...

Page 8: ... option PICTURE BRIGHT 32 CONTRAST 32 COLOR 32 TINT 00 2 3 BRIGHT Press VOL up to make picturebrighter and VOL down to make picture darker CONTRAST PressVOLup to increase contrast and VOL down to decrease contrast COLOR PressVOLup orVOL down to adjust color levels TINT Press VOL up orVOL down to adjust tint levels Press the MENU button to scroll through these three on screen options Press MENU but...

Reviews: