


Cable Connections
10
Connecting an External Aerial Antenna or Cable Television
To view television channels, a signal must be received by the device from one of the following
sources:
The internal antenna
An outdoor aerial antenna
A cable television network
A satellite network
1. Connect the supplied antenna adaptor into the "RF IN" jack located on the side of this
device.
2. Connect the external antenna source to the adaptor.
Connecting Audio and Video sources (DVD Player, VCR, Game Console, Etc.)
1. Using the supplied composite cable, connect the yellow video plug into the "VIDEO IN" and
the black audio plug into the "AUDIO IN" jack located on the side of this device.
2. On the other end of the cable, connect the yellow plug into the "VIDEO OUT" and the red
and white plugs into the "AUDIO OUT" of your DVD player, VCR, game console, etc.
3. Connect audio sources (including DVD/VCR/CAMCORDER/PC) to "AUDIO IN" ports by
RCA cable.
4. Connect video sources (DVD/VCR/CAMCORDER) to the "VIDEO IN" port.
Cable connections
DVD OR VCR
VIDEO IN AUDIO IN
RF IN
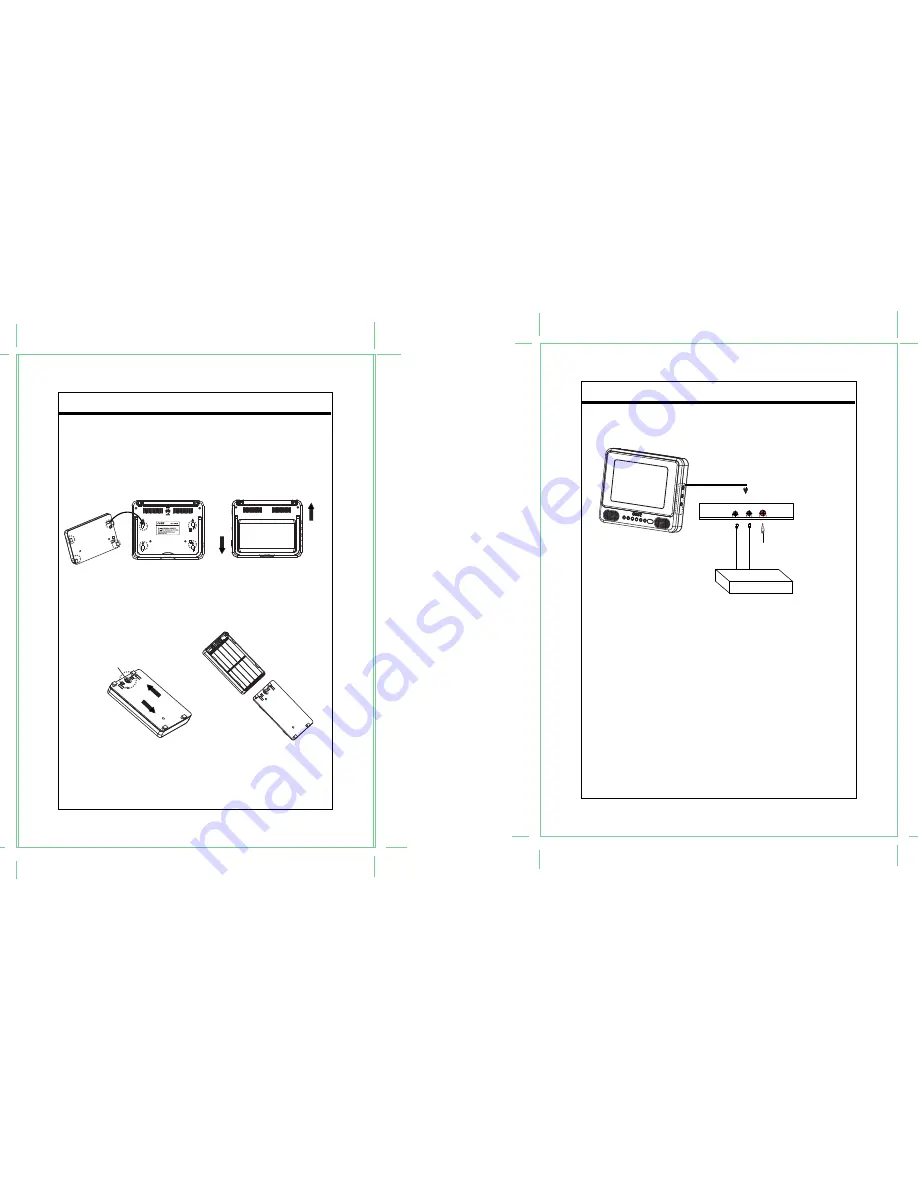
Power Connections
9
Battery pack connection
a) Match the four hooks to its attaching slots on the bottom of the main unit.
b) Slide downward to lock it into position.
c) To release the battery, press it upward.
Please refer to below diagram for better understanding.
Using battery pack
a) Loosen the screw.
b) Slide the cover downward to open the battery pack.
c) Insert ten batteries.
d) Slide the pack cover up to lock it.
e) Tighten the screw.
5 TFT LCD COLOR TV/MONITOR
Press it upward to release.
Press it
downward
to release.
Press it downward to lock.
Press it
upward to lock.
10 x "AA"
Battery
Screw


