background image

9

VnM

®

4 Keypad Templates - 1 to 5 Line Horizontal

PRINT UP TO

5 LINES OF TEXT

WITHOUT THE 

USE OF A COMPUTER

OR SOFTWARE!

d) 5 Lines

c) 1 line template no reverse text (press N)

DANGER!

b) 1 line template reverse text (press Y)

1 to 5 LINE HORIZONTAL

PRESS ENTER

X

INCH HOW MANY LINES?

PRESS 1,2,3,4 OR 5

RESERVE TEXT?

1.(Y)ES OR 2.(N)O

ENTER QUANTITY TO PRINT:

1

ENTER LINE l:

/CAUTION

1.   Select the 1 to 5 Line Horizontal 

template by pressing the ENTER 

key on the VnM

®

4 Keypad.

2.  

Select how many lines by pressing the 

numbers 1, 2, 3, 4 or 5. Do not press 

enter after pressing the amount of lines.

3.   Enter the text/symbols for your sign 

and once you finished the line or 

sign, press the ENTER key.

4.   Enter the quantity to print and 

press ENTER.

5.   Select if you would like reverse text. 

Press Y or 1 for Yes. 

Press N or 2 for No.

The 1 to 5 Line Horizontal template is the most versatile template for the VnM

®

SignMaker.  Create anything from 1 to 5 lines of text and control the font size by 

selecting the appropriate media size.

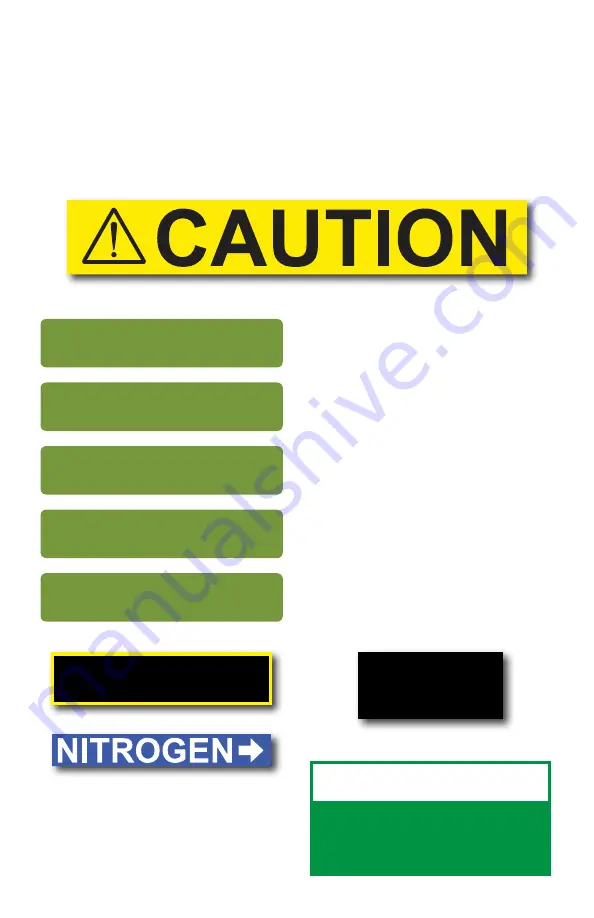
The sample sign below, a), was created by first selecting the SYMBOLS1 font, 

second selecting the 1 to 5 Line Horizontal template, then select the media width 

and choosing 1 for how many lines, then typing, “/CAUTION” where the “/” on the 

keypad screen represents 

symbol.

a) 1 line template no reverse, symbols1 font

TO GET BACK TO THE MAIN 

MENU PRESS AND HOLD

DOWN THE ALT KEY AND 

EXIT BUTTON

VnM4 Tips

Summary of Contents for VnM SignMaker

Page 1: ...VnM 4 SignMaker User Manual Version 1 01 Updated 01 2014...

Page 2: ...ine Vertical C OSHA ANSI Haz Com D GHS Templates E RTK Labels F Lock Out Tags G Pipe Marking H Barcode Labels I VnM4 Apps VnM 4 Print Font Settings Fonts Symbols OSHA ANSI Safety Definitions Pipe Mark...

Page 3: ...40 C 41 104 F Storage Conditions 40 60 C 40 140 F Resolution 203 DPI AC Input 100 240V Power Supply DC Output 24V 3 75A external adaptor Print Speed 2 3 4 5 6 or 7 inches per second Connections VnM Ke...

Page 4: ...leader under the ink roll carriage past the printhead and attach to the ink roll take up core in front hub Easily slide new VnM Media into roll mount Feed media face up under the support bar and throu...

Page 5: ...cover open lever 6 Cutter VnM4 SignMaker Rear View 1 USB interface 2 Parallel interface 3 RS 232 DB 9 interface 4 Power jack 5 Power switch 6 Rear VnM media guide VnM4 SignMaker Interior View 1 Top co...

Page 6: ...r ink spindle with the unused portion of the ink roll Tape or adhere rear ink to front take up ink spindle Wind the front ink spindle to take up the slack make sure there are no wrinkles in the ink IM...

Page 7: ...M 4 Printer by flipping the power switch located on the back of the printer Start printing your instant signs Pull media to go under the white platten roller Adjust media guide to fit the VnM 4 Media...

Page 8: ...Make sure the power switch is OFF 3 Connect VnM4 Keypad to the VnM4 SignMaker RS 232 serial port 4 Plug power cord into AC power cord socket at the rear of printer then plug power cord into a properl...

Page 9: ...pad navigation tree to the left displays the flow and order of all the available options templates More detailed information about the templates are found further in the manual To get back to the main...

Page 10: ...mbols for your sign and once you finished the line or sign press the ENTER key 4 Enter the quantity to print and press ENTER 5 Select if you would like reverse text Press Y or 1 for Yes Press N or 2 f...

Page 11: ...he text symbols for your vertical sign and once you finished the sign press the ENTER key 3 Enter the quantity to print and press ENTER 4 Select if you would like reverse text Press Y or 1 for Yes Pre...

Page 12: ...N DANGER NOTICE SAFETY or WARNING then press ENTER 4 Select how many lines by pressing the numbers 1 2 3 or 4 Do not press enter after pressing the amount of lines 5 Enter the text symbols for your fi...

Page 13: ...ypad 2 Select a pictogram Use the icons above and below to reference your choice of pictogram then press ENTER 5 Enter the quantity to print and press ENTER The GHS template is perfect for chemical la...

Page 14: ...E EASY AND FAST PRINTING 10 Enter any additional notes ENTER QUANTITY TO PRINT 1 11 Enter the quantity to print press ENTER NFPA TEMPLATES PRESS ENTER 2 Select the NFPA Templates and press ENTER ENTER...

Page 15: ...OE 3 Enter name of employee press ENTER ENTER DATE 1 1 2014 4 Enter the date and press ENTER NTER DESCRIPTION LINE 1 LOCATION ABC 5 Enter the 1st line of job description and press ENTER NTER DESCRIPTI...

Page 16: ...TICCHILLEDWATER d 2INCH Repeat Label 1 Select the Pipe Marking Templates by pressing the ENTER key on the VnM 4 Keypad 2 Select the corresponding Pipe Marker template with the diameter pipe your are g...

Page 17: ...ID LABEL 1789S412668 BARCODE TEMPLATES PRESS ENTER a 4 X 1 ID LABEL b 4 X 2 ID BIN SHELF LABEL a 4 X 1 ID LABEL b 4 X 2 BIN LABEL 1 Select the Barcode Templates by pressing the ENTER key on the VnM 4...

Page 18: ...ath f VnM Apps Arc Flash Template 1 Ruler App Scroll down to VnM4 Apps press ENTER Select Ruler App press ENTER Enter number of feet you would like up to 3ft 2 Fire Extinguisher App Scroll down to VnM...

Page 19: ...see the VnM Print Settings and press ENTER VNM MANUAL SETTINGS PRESS ENTER 3 To manually change the VnM speed and density print settings press ENTER on the VnM Manual Settings ENTER DENSITY 5 ENTER S...

Page 20: ...s 1 A B C D E F G H I J K L Symbols 2 A B C D E F G H I J K L Symbols 3 A B C D E F G H I J K L Keypad a b c d e f g h i j k l Normal a b c d e f g h i j k l Italic a b c d e f g h i j k l Bold a b c...

Page 21: ...p q r s t u v w x y z m n o p q r s t u v w x y z m n o p q r s t u v w x y z m n o p q r s t u v w x y z m n o p q r s t u v w x y z m n o p q r s t u v w x y z m n o p q r s t u v w x y z m n o p q...

Page 22: ...esult in minor or moderate injury but not death NOTICE Indicates general information necessary to avoid any confusion SAFETY Indicates general information necessary to avoid any confusion OSHA ANSI Sa...

Page 23: ...the person and is easily identified Pipe Marker Placement VNMWT XXXX WHITE VNMBK XXXX BLACK VNMGR XXXX GRAY VNMBL XXXX BLUE VNMPR XXXX PURPLE VNMBN XXXX BROWN VNMRD XXXX RED VNMON XXXX ORANGE VNMYL XX...

Page 24: ...Action to Cut and the Occurrence to After Every Page 6 Connect USB cable to the PC s USB port 7 Plug power cord into AC power cord socket at the rear of printer then plug power cord into a property g...

Page 25: ...ibbon comes out through the cutter Remedy The Ink Roll was changed while the printer was powered on so the printer s ink sensor was not reset Turn the printer off re tape the Ink Roll to the take up c...

Page 26: ...Tape the cut ink to the take up core with a piece of scotch tape and wind up the slack Turn the printer OFF and wait two seconds then turn back ON Print a label A Make sure you are using the right pr...

Page 27: ...________________________________________ ____________________________________________________________ ____________________________________________________________ _____________________________________...

Page 28: ...VnM SignMaker is a registered trademark of Cobra Systems Inc For more information please visit www VnMSignMaker com Have questions or need product support 800 262 7298 www VnMSignMaker com...

Reviews: