background image

10 •

Important: Always read and follow the operating instructions.

Bead Sealing

1.

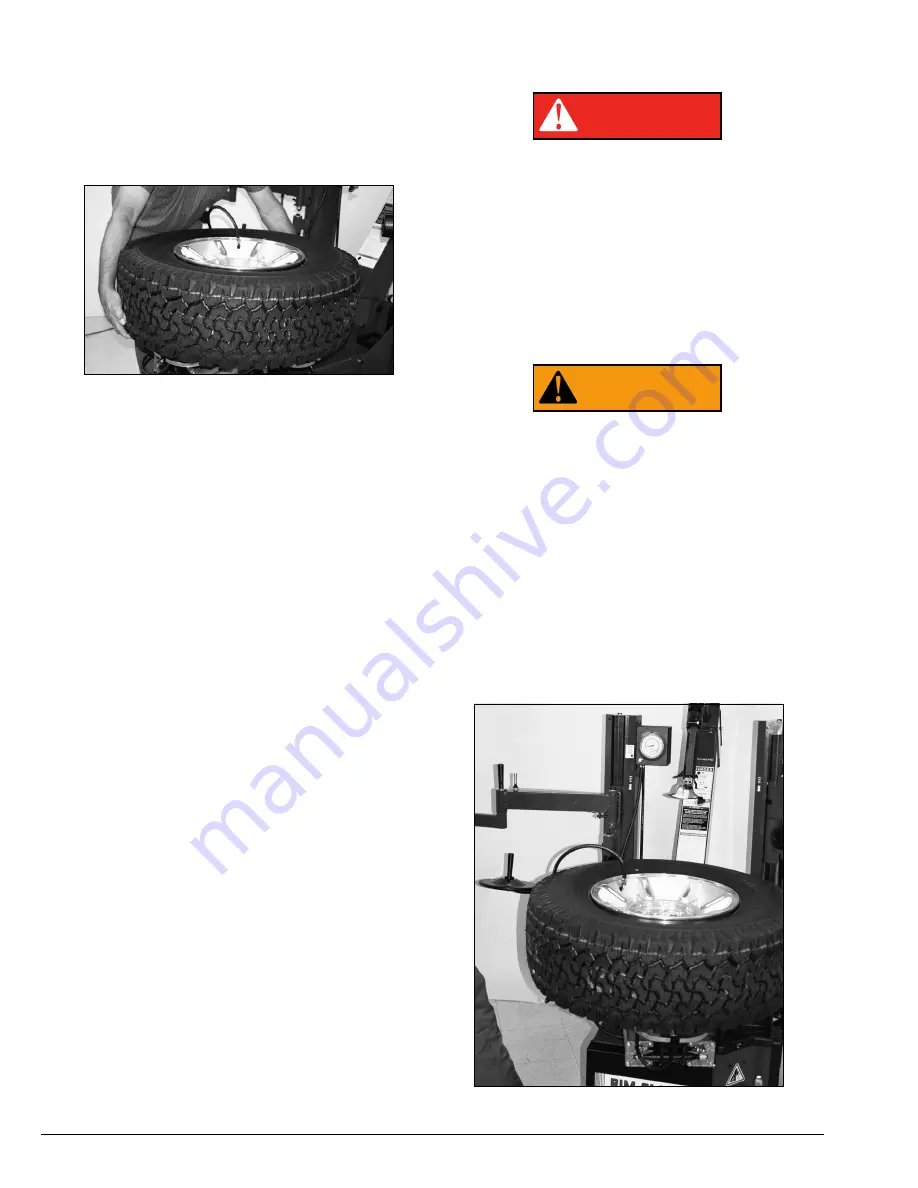
Position valve stem in front of operator and con-

nect the inflation hose with the clip-on chuck. Hold tire
up against upper edge of the wheel. Be sure tire’s top
bead does not cover the bottom of the valve stem (fig-
ure 20).

Figure 20 - Lift Tire Upwards for Bead Sealing

2.

Depress inflation pedal to position 2 and hold

about one second to begin air flow through tire valve,
then depress pedal to position 3 and hold briefly —
less than one full second. The blast of air from the jets
will expand tire and seal the beads.

3.

Release the inflation pedal and allow it to return to

position 1. Verify that both beads are completely sealed
to the wheel. Repeat these steps if beads have not
sealed. It may be necessary to wait a few seconds for
the air storage tank pressure to recover before
attempting again.

S.

If tire and wheel are properly lubricated and opera-

tor cannot achieve bead seal after three or four
attempts, the valve core may be removed from the
valve stem to allow more air flow into the tire to assist
with bead seal. After bead seal is achieved, remove the
clip-on chuck and reinstall the valve core. Reattach the
clip-on chuck after core is installed.

Bead Seating

NEVER exceed 40 PSI to seat beads while
using this tire changer. If more than 40 PSI is
permitted by tire manufacturer, ALWAYS use
safety cage and clip-on chuck. NEVER
exceed recommended pressure after seat-
ing beads. ALWAYS keep hands and entire
body back from inflating tire.

An exploding tire, wheel, or bead sealing
equipment may propel upward and out-
ward with sufficient force to cause serious
injury or death to operator or bystander.

Check tire pressure frequently. If operator is
unable to obtain Bead Seat, something is
wrong. Deflate tire completely, inspect tire
and wheel, correct any problems found,
relubricate both tire beads, and reattempt
Bead Seal and Seat procedures. Follow all
safety instructions in this manual and on
machine.

1.

Once tire pressure is indicated on the air gauge

(inflation pedal in position 1; foot removed from pedal),
continue to inject air into the tire (inflation pedal posi-
tion 2) in short intervals. Check the pressure fre-
quently. Stand back during bead seat. Keep hands,
arms, and entire body away from tire during this pro-
cedure (figure 21).

Figure 21 - Stand Back during Bead Seat

WARNING

DANGER

Summary of Contents for Rim Clamp 9024

Page 1: ...im Clamp Tire Changer For servicing single piece automotive and most light truck tire wheel assemblies Installation Instructions Operating Instructions Safety Instructions Maintenance Instructions REA...

Page 2: ...ii Important Always read and follow the operating instructions...

Page 3: ...place of safe operating practices Always wear durable work clothing during tire service activity Loose fitting clothing should be avoided Tight fitting leather gloves are recommended to protect operat...

Page 4: ...keep tire technicians safe By follow ing the basic principles of R I M technicians can avoid situations that can cause catastrophic accidents like tire explosions R I M stands for read inspect and mo...

Page 5: ...ad Sealing 10 Bead Seating 10 Inflation 11 Stages of Inflation on a Conventional Tire and Rim 12 Mismatched Tires and Wheels 13 Performance Custom and Aluminum Wheels 14 18 Performance Tires Wheels De...

Page 6: ...r horizontal and vertical slides Air Inflation Gauge Registers tire pressure when clip on chuck is attached to tire valve stem and inflation pedal is released Release Valve Allows the manual release o...

Page 7: ...of rim to seal tire to rim and allow inflation Tower Tilt Pedal Two position pedal that moves tower forward or back Clamp Control Pedal Three position pedal that opens holds or closes rim clamps Bead...

Page 8: ...tire completely to prolong the life of your machine 1 Deflate the tire completely by removing the valve core from the valve stem figure 1 Be cautious and do not smoke as a flammable gas could have be...

Page 9: ...lamps out ward toggle pedal up Figure 5 Clamp Outside on Mag Wheels Figure 6 Outside Clamped with Tire Removed 6 Take time to experiment with the duckhead lock ing system figure 7 Figure 7 With Valve...

Page 10: ...firmly on the tool to avoid possible tool disconnect Use the reversing feature to back out of jam ups A thrown tool can cause injury 10 Apply tire manufacturer s approved rubber lubri cant liberally t...

Page 11: ...match exactly Consult the Tire Guide and or Rubber Manufacturer s Association for approved rim widths for tire sizes Never mount a damaged tire Never mount a tire on a rusty or damaged wheel Damaged t...

Page 12: ...otate the tabletop until the valve stem on the wheel is 90 degrees ahead of the duckhead at the 3 o clock position Lift the upper bead of the tire up and over the rear of the duckhead With your hand o...

Page 13: ...ion Position 3 Bead Sealing This is the second and last activated position With the inflation hose attached to the tire valve and the pedal in this position line pres sure is allowed to flow through t...

Page 14: ...t with bead seal After bead seal is achieved remove the clip on chuck and reinstall the valve core Reattach the clip on chuck after core is installed Bead Seating NEVER exceed 40 PSI to seat beads whi...

Page 15: ...l cease air flow at approximately 60 PSI On smaller volume tires the pressure may be higher 4 Release air pressure from tire by pressing the manual release valve button inflation hose must be attached...

Page 16: ...oy wheels are very tight and can be difficult to bead seat Also note that asymmet rical hump and run flat tires are extremely difficult to bead seat Follow tire manufacturer s recommended procedure fo...

Page 17: ...ire and wheel combinations can explode causing personal injury or death to operator and or bystanders DANGER Even Size Tires 14 0 15 0 16 0 17 0 etc Half Size Tires 14 5 15 5 16 5 17 5 etc Even Size W...

Page 18: ...the rim These devices are expensive and should be serviced with care After deflating the tire loosen and remove the retaining nut and then tap lightly with a hammer to allow the valve sensor to fall...

Page 19: ...control pedal Slowly move the clamps inward until they securely contact the outside edge of the rim Figure 31 Figure 31A Clamp Wheel Tire Removed for Clarity Figure 31B Outside Clamped with Tire Remov...

Page 20: ...ad 14 Next raise the R H helper from the tire side wall and move to the stored position Next jog the machine rotation to start the upper bead removal fig ure 35 continue rotation until the upper bead...

Page 21: ...wer Bead 22 Next position the rim for the best mounting by assuring the valve stem or sensor devices will not pre vent the upper bead from using the wheel s full drop center Typically valves or sensor...

Page 22: ...isassembly STOP Avoid dam aging the other wheels Continue assembly only when problem is identified and cor rected Alloy Wheels Some manufacturers offer wheels with little or no drop center These are n...

Page 23: ...e serrations with a wire brush once a month F Check the tire pressure gauge function daily and check the accuracy monthly Use a pressurized tire and a high quality stick type pressure gauge If necessa...

Page 24: ...ed or by passed pressure limiter could cause an operator to acciden tally over pressurize a tire resulting in a tire explosion with severe injury or death to the operator or bystanders Always be sure...

Page 25: ...service easier Always place safety poster and instructions near the unit Location Select a location using the drawings below The area should provide the operator with enough space to use the equipmen...

Page 26: ...22 Important Always read and follow the operating instructions Notes...

Page 27: ...Important Always read and follow the operating instructions 23 Notes...

Page 28: ...tire on a rim inspect the rim for rust tough spots bent edges or cracks that could prevent the tire from seat ing right If you spot any of these problems don t mount the tire until the rim has been ch...

Reviews:

Related manuals for Rim Clamp 9024