2
Adding Device (Inclusion)
This product can be included and operated in any Z-Wave network with other Z-Wave certified devices from other
manufactures and/or other applications. All non-battery operated nodes within the network will act as repeaters
regardless of vendor to increase reliability of the network.
Put the Z-Wave gateway or control panel into
Inclusion mode
(please refer to the Z-Wave gateway or control
panel manual).
Within 1.5 seconds, press the Function Button 3 times.
Refer to the operation manual of the Z-Wave gateway or control panel to complete the adding process.
If the Sensor has already been added (included) into another Z-Wave Gateway/Control Panel, or if the device is
unable to be added into the current Z-Wave Gateway/Control Panel, try removing it first (see
Removing
Device
).
Removing Device (Exclusion)
The Sensor must be removed from existing Z-Wave network before being added into another.
Exclusion Mode
Put the Z-Wave gateway or control panel into
Exclusion mode
(please refer to the Z-Wave gateway or control
panel manual).
Within 1.5 seconds, press the Function Button 3 times and the Sensor will be removed from the Z-Wave
network, the LED will light on for 1 second to indicate.
Factory Reset
(Only use factory reset when network Control Panel/Gateway is missing or inoperable).
Remove the battery of the Sensor first.
Press and hold the Function Button. While holding the Function Button, power on the Sensor by re-inserting the
battery, wait for 10 seconds to factory reset, the LED will light on for 1 second to indicate.
<NOTE>
Factory resetting the Sensor will restore it to factory default settings (excluded from the Z-Wave network).
The Z-Wave gateway or control panel will still keep its Z-Wave settings. Please refer to the gateway or
control panel manual on how to remove the Sensor Z-Wave settings.
Range Test
To test whether the Sensor is able to communicate with the Z-Wave gateway or control panel:
Put the gateway / panel into range test mode (Walk Test).
Press the Function Button on the Sensor.
The gateway / panel should display if the device is within the operation range (please refer to the operation
manual of the gateway / panel).
Z-Wave Sleep Mode
The Sensor will enter Z-Wave Sleep mode (to conserve power) after waking up for a short period of time (
~10
seconds). While in Z-Wave sleep mode, Z-Wave gateways or control panels are unable to send commands to
the Sensor.
To program the Sensor using the Z-Wave Gateway/Control Panel, please send command(s) to the Sensor
within the wake-up period.
Installation
Mounting the Sensor
The sensor can be mounted using two methods: Self-adhesive or Screw
mounting.
Self adhesive mounting
1. Clean the surface with a suitable degreaser.
2. Remove the protective covering from one side of double-sided adhesive
pad and firmly apply to the back of the device.
3. Remove the other covering and firmly place/press the device in the desired
location.
Do not use the Self-adhesive mounting method on poorly painted and/or
rough surfaces.
Screw Mounting
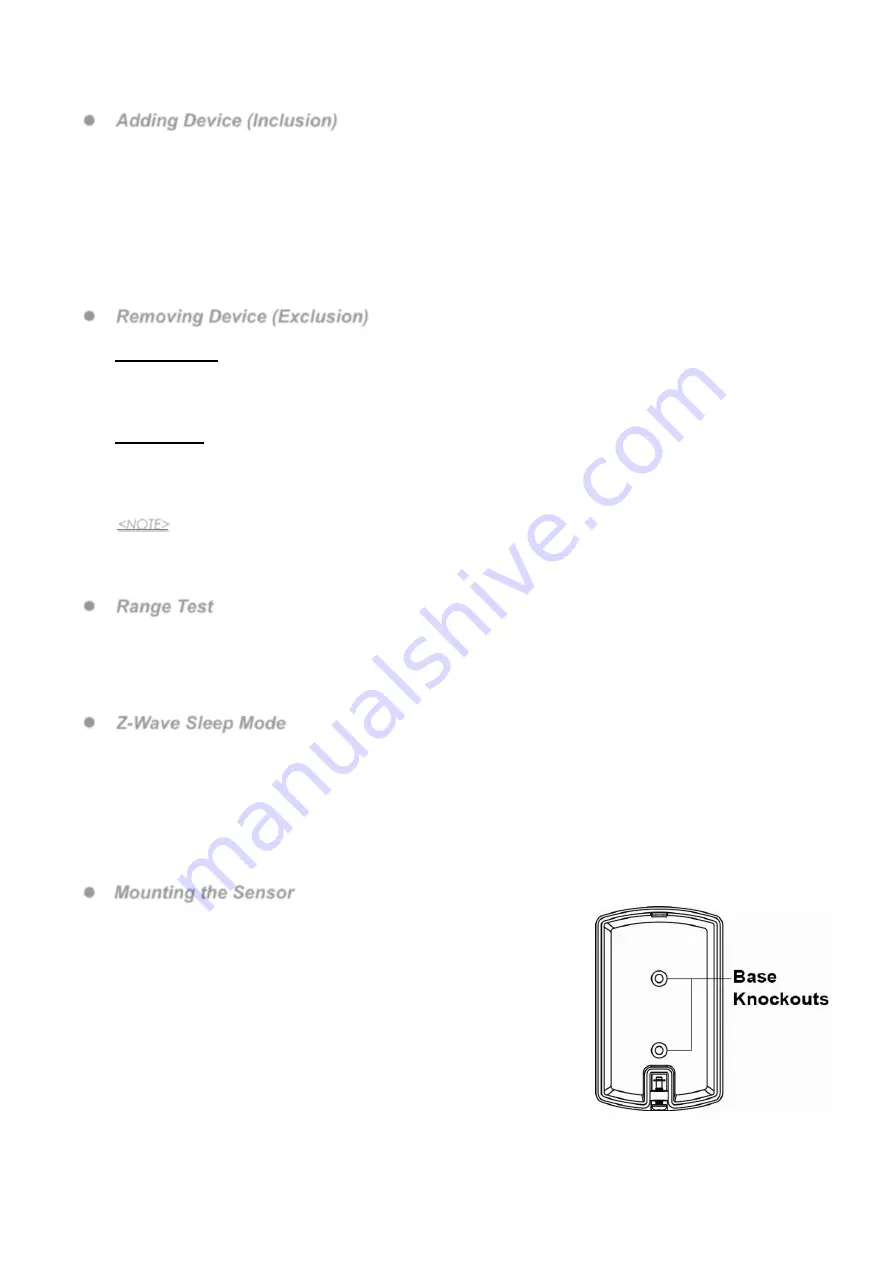
The base of the sensor has two screw knockouts, where the plastic is thinner
for mounting purposes. To mount the sensor:
1. Detach the Top Cover and Base assembly by loosening the Cover-Fixing Screw using a Philips screwdriver.


