


Disassembly
Removing the Optical (CD/DVD) Device 2 - 9
2.Disassembly
5.
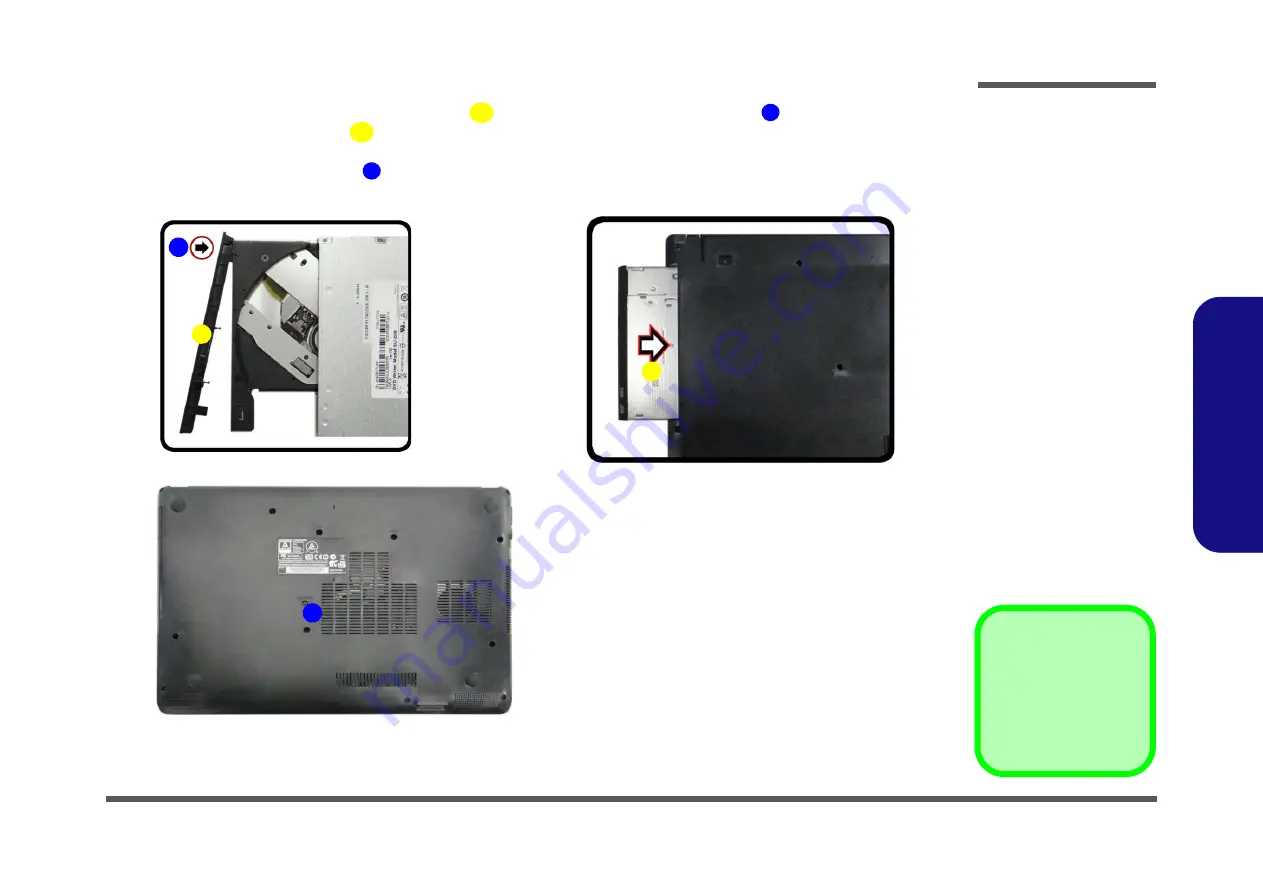
Reverse the process to attach the front bezel
with the new optical device at point
).
6.
Insert the new optical device
and carefully slide it into the computer (the device only fits one way. DO NOT
FORCE IT; The screw holes should line up).
7.
Replace and tighten the screw
(
).
8.
Restart the computer to allow it to automatically detect the new device.
4
5
1
6
1. Optical Device
4. Bezel
•
1 Screw
6
e.
d.
5
f.
4
1
Figure 6
Optical Device
Assembly
d. Install the front bezel.
e. Insert the optical device.
f. Tigthen the screw.
Summary of Contents for W940AU
Page 1: ...W940AU W941AU W945AUQ ...
Page 2: ......
Page 3: ...Preface I Preface Notebook Computer W940AU W941AU W945AUQ Service Manual ...
Page 24: ...Introduction 1 12 1 Introduction ...
Page 44: ...Disassembly 2 20 2 Disassembly ...
Page 48: ...A 4 Top Positivo W941AU A Part Lists Top Positivo W941AU 䎮䶂 Figure A 2 Top Positivo W941AU ...
Page 50: ...A 6 Top Stand W941AU A Part Lists Top Stand W941AU 䎮䶂 Figure A 4 Top Stand W941AU ...
Page 52: ...A 8 LCD W940AU A Part Lists LCD W940AU Figure A 6 LCD W940AU 姕嬲 ᶨ凔 ...
Page 53: ...LCD W941AU A 9 A Part Lists LCD W941AU Figure A 7 LCD W941AU 姕嬲 ...
Page 54: ...A 10 LCD W945AUQ A Part Lists LCD W945AUQ Figure A 8 LCD W945AUQ 姕嬲 ...
Page 57: ...Bottom W945AUQ A 13 A Part Lists Bottom W945AUQ Figure A 11 Bottom W945AUQ ...
Page 58: ...A 14 Combo A Part Lists Combo 朆侸句 Figure A 12 Combo ...
Page 59: ...DVD Dual A 15 A Part Lists DVD Dual 朆侸句 Figure A 13 DVD Dual ...
Page 60: ...A 16 HDD A Part Lists HDD Figure A 14 HDD ...
Page 100: ...Schematic Diagrams B 40 B Schematic Diagrams ...


