CLEARSPAN
™
EZ-GROW GREENHOUSES
14
Revision date: 09.12.08
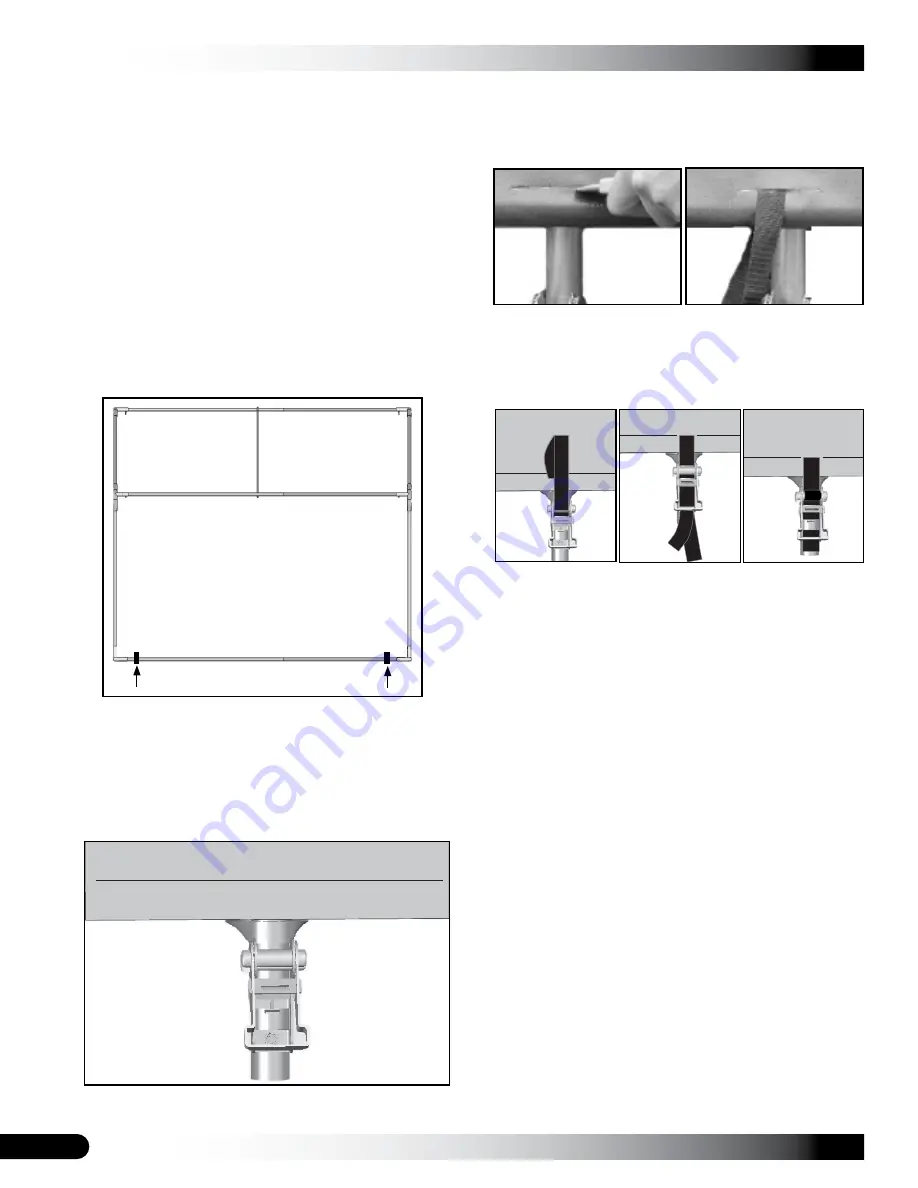
6. Using the main cover conduit as a guide, attach the
ratchets to the bottom conduit.
Fasten each ratchet to the inside of the bottom conduit
as shown above and on the Side Profile diagrams, or
to the inside or outside of the rafter leg near the bottom
conduit as shown below using a Tek screw.
4. Once the main cover is pulled into position, center the
cover on the frame and remove the ropes. Loosely
secure the ends of the cover to the ratchets attached to
the front and back end panel conduits.
ATTENTION:
Do not tighten the straps at this time.
5. Divide the remaining number of ratchets in half. Place
the ratchets on the ground next to the rafter where they
will be attached.
NOTE:
Ratchets are evenly spaced long each side of
the shelter and directly across from each other on or
near the
same rafter assembly
. Rafters are identified
by the arrows below. Consult the Side Profile diagrams
in the Quick Start section for location details.
ATTACH MAIN COVER (CONTINUED)
7. Lift the cover skirt (if present) and cut a slit in the cover
conduit pocket at the ratchet position.
8. Insert a 3' section of strap through the slit and around
the cover conduit.
NOTE:
DO NOT cut through the main cover.
Cut
through the conduit pocket only.
9. Thread the strap ends into the ratchet and slightly
tighten.
NOTE:
It may be necessary to remove excess strap if it
binds up in the ratchet.
10. Repeat the steps for the remaining ratchets.
11. Using additional help (if needed) tighten the main
cover beginning with the ratchets along the sides of the
shelter frame.
12. After the side ratchet or ratchets are tightened, return
to the front and back end ratchets and tighten.
NOTE:
Loosen the ratchets if needed to remove
excess strap and retighten. Loosen all ratchets if
needed to reposition the main cover on the frame and
retighten the ratchets.
13. Fold the skirt (if present) of main cover down and over
the ratchets to complete the installation of the main
cover.
NOTE:
Depending on the shelter, some main covers
may not include a cover skirt.
14. After the main cover is tight, read the care and
maintenance information that follows.
Frame and cover design shown above may differ from the actual
frame and cover. These are used for illustration only.


