GETTING STARTED
PLEASE NOTE: This product is not intended for use with faucets which have a pull-out
or sprayer-type faucet or uncommon threaded faucet types.
1. Select a convenient flat surface and location on the sink where you have enough
water line length to attach diverter to a faucet.
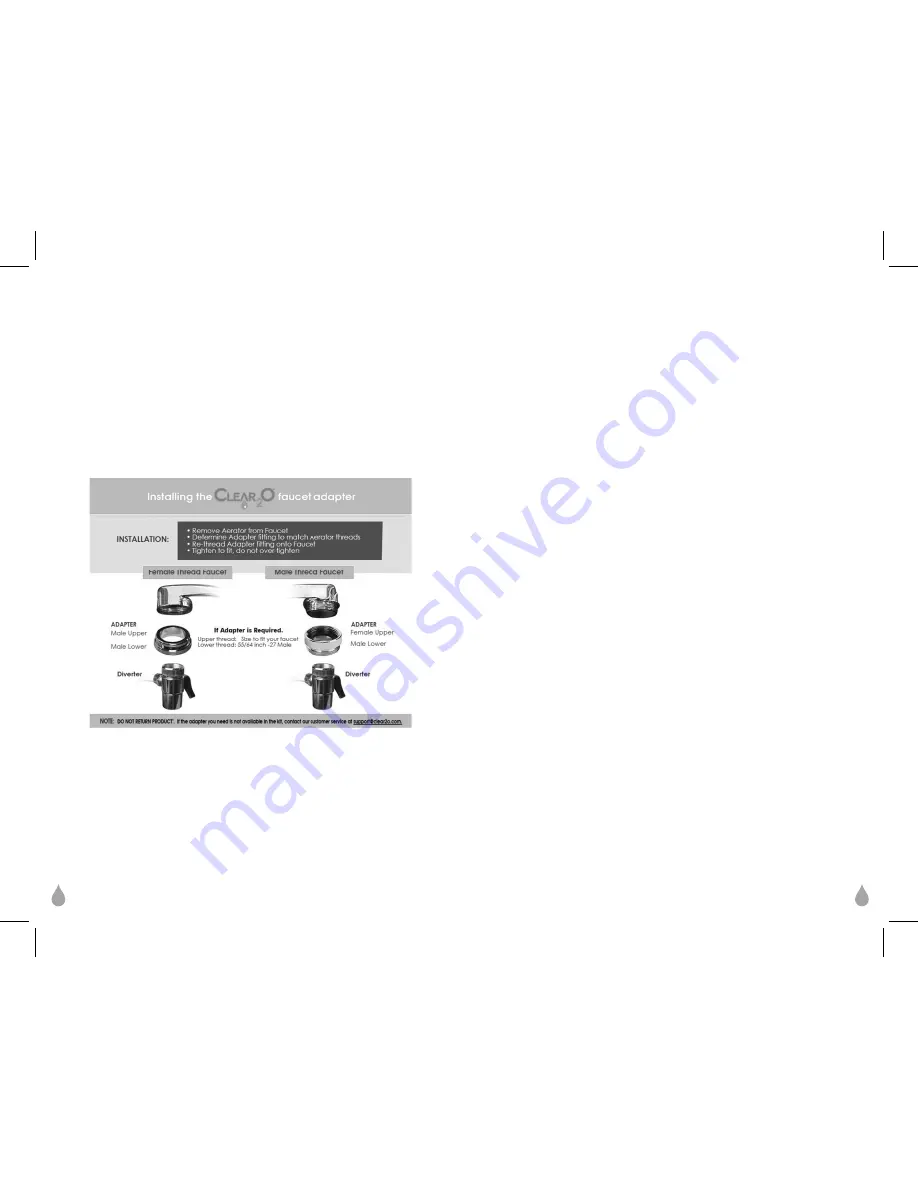
2. Determine the type of thread on your faucet.
3. To install, unscrew the current aerator from your faucet spout by turning aerator in a
counter-clockwise direction. Normally this is done by hand, but you can use pliers if
need be. Save the aerator in case you move the unit to another location. Attach the
filter's diverter valve in its place. The diverter valve will fit most faucets without an
adapter, if needed, use one of the enclosed adapters, then attach diverter to adapter.
If the included adapters do not fit your faucet,
DO NOT RETURN THE PRODUCT.
Consult your local plumbing or hardware supplier for immediate assistance in obtaining
the correctly threaded adapters to fit your faucet. Or, contact Clear2O customer service
[email protected]. for additional adapter sizes. Please measure your faucet’s
aerator thread size for recommendations and accurate fit.
The thread size of the diverter is 55/64 inch-27.
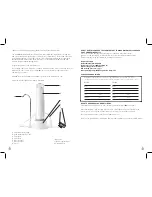
4. Unscrew the filter housing canister (A) from the base (C). Remove the filter from its
protective sleeve and screw into the base (B) until the filter’s washer resistance is felt
and tighten appropriately. DO NOT over-tighten. Make sure the pre-moistened housing
O-ring is securely placed inside the canister’s groove slot, push down gently to screw
the threaded canister (A) into the base (B). Hand-tighten only.
5. To operate the system, turn on the cold water [DO NOT USE HOT WATER] to a
moderate flow rate, turn the diverter lever and water housing will fill and begin to flow
through the filter. For initial operation, let the water run for ten minutes before drinking.
6. When finished, turn diverter valve back to access non-filtered water and turn off faucet.
Diverter valve can be left in filtered water position if desired.
7. Upon shut off, it is normal for water to continue flowing from spout for a short period
until pressure within filter decreases/stops.
IMPORTANT: Do not run hot water through the filter.
Note: It may take as much as a day for all trapped air to work out of a new filter cartridge.
If water dribbles from the end of the spout after the inlet water is turned off, or if water
appears cloudy, the problem is trapped air. It will correct itself, and in the meantime, the
water is safe to drink.
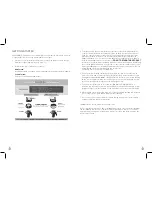
Male Thread:
No adapter should be needed, diverter may attach directly. If needed use adapter.
Female Thread:
Select the correct adapter and washer.
4
5


