


Clear-Com Intercom Systems
1
1. Introduction
Thank you for choosing this Clear-Com Product. The RS-600 Series is the most advanced party line beltpack available.
2. Quick
Start
Your Clear-Com beltpack is ready to plug in right out of the box.
1. Connect appropriate 3-pin XLR line cables from an active intercom line to the beltpack. If the beltpack is
receiving the required DC power, the Power LED will light up.
2. Turn down the listen level control(s) and plug in a dynamic mic equipped headset to the main headset jack.
3. Press the Talk button and the talk indicator will illuminate. Two taps in quick succession will latch the Talk button
on.
4. Adjust the sidetone and listen levels as you and others on the channel speak at the anticipated levels for the
application.
5. To send a Call Signal, press the button labeled CALL.
6. To talk, either press and hold the TALK button for the duration that you need to talk, or press/tap it twice quickly
to latch it on for hands-free use. Press again to unlatch. (Latching may be disabled or programmed to latch with
a single tap through the V-PACK
TM
software.)
3.
Compatibility and Use With TW
The RS-601 is backward compatible with all standard Clear-Com party line stations and beltpacks. It is also the first
single–channel Clear-com beltpack to offer Clear-Com TW compatibility. This means that the RS-601 can be part of
a number of beltpacks daisy chained (or wired in a “home run”) together on a TW line that include RS-502/522TW
beltpacks as well as other RS-600 Series TW beltpacks.
While the audio on the RS-601 will always be from pin 3 of the XLR plug (channel B), it will still pass the channel A
audio through on Pin 2.
The RS-601 is not recommended for use with RTS-TW
TM
systems as the frequency response curves and audio levels
are different. Clear-Com offers the RS-603 Series models that are RTS compatible.
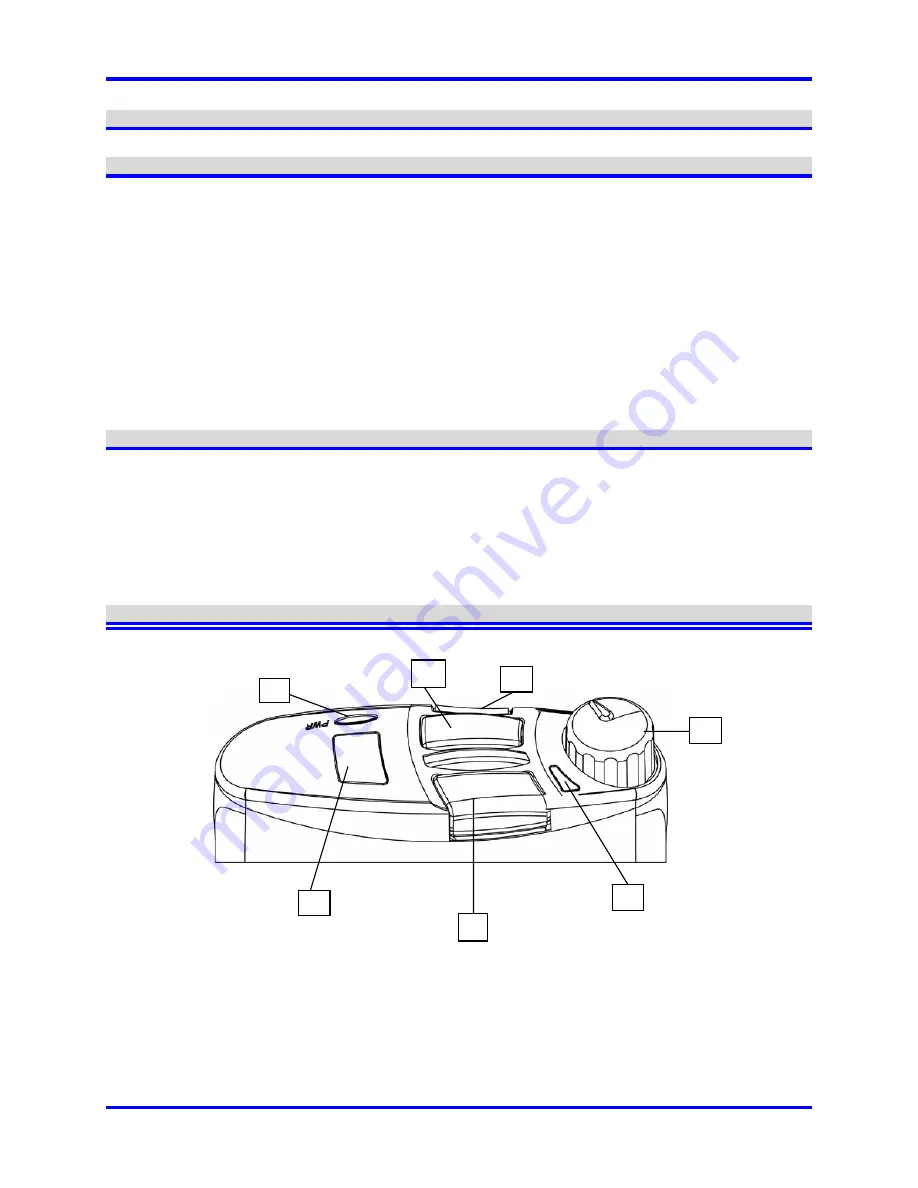
4. Operational
Figure 1: Control Panel
1
2
3
4
5
6
7


