7
English
1
2
3
4
5
5
4
3
2
1
3
2
1
5
4
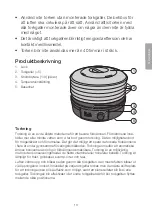
Lid
Lid
Lid
Base unit
Start
Change
Change
Base unit
Base unit
4. Spread the food over the tray in an even layer. Herbs should be dried very carefully,
just remove the stalks. They do not need to be broken down any more. Herbs
need turning from time to time to stop them sticking to the tray.
5. Make sure that the power switch is set to
0
(off) before the dehydrator is plugged
into an electrical socket.
Dehydration
The food selected for dehydrating should be fresh and fully ripe. It is impossible to
achieve good results if the food that you start with is overripe, bruised or otherwise
deteriorated. Do not dehydrate wet produce, once rinsed the food should be allowed
to air dry for a while before you begin to dehydrate it.
1. Spread the food over the tray in an even layer.
2. Place the drying trays with the food on them onto the base unit and then put the lid on.
3. Plug the dehydrator into an electrical socket and switch the power switch to
1
(on).
4. Set the temperature using the table below as a guide and let the produce dehy-
drate for the recommended time (depending on the type and amount of produce).
The greater the moisture content of the food, the longer the drying time it will need.
All of the included drying trays must be used regardless of whether they contain
any food.
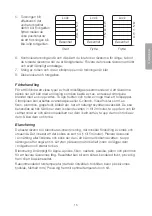
5. The contents of
the lowest tray will
be dried the most
efficiently, so
the trays should all
be circulated through
the different positions
at regular intervals
to ensure that all
the food is dried to
the same degree.
6. Check the progress of the dehydration from time to time to ensure that you do not
dehydrate the food too much. The food should be removed from the dehydrator
when it is dehydrated. The dehydrated food should be stored in a cool, dark place
in a suitable container.
7. Turn the dehydrator off and unplug it when you have finished.
8. Wash the lid and the drying trays.
Summary of Contents for SBL-1215
Page 2: ...2...

