6
English
On/settings
1. Plug the mains lead into a wall socket. The display will come on and begin flashing
after a few seconds.
2. Press [ STANDBY/ON ]. The radio will automatically begin searching for DAB
stations. The word “Scanning” will appear on the display along with a progress bar
and the total number of stations found.
3. Once scanning is completed, the first detected station will begin playing.
4. Press [ SCROLL
▼
] or [ SCROLL
▲
] in order to toggle to the next saved station.
5. Press [ SELECT ] to listen.
Note:
If no DAB stations are found, the radio will open the station search
settings menu.
6. Press [ SCROLL
▼
] or [ SCROLL
▲
] to select
Manual tune
or
Autoscan
.
Autoscan performs the same scan that was performed when the radio was
switched on. This function can be used if you have moved the radio to another
location and wish to perform the scan again.
7. Press [ SELECT ] to begin the selected method of scanning.
8. If
Manual tune
has been selected, you should press [ SCROLL
▼
] or [ SCROLL
▲
]
to search manually for a favourable DAB station.
9. Once a desirable station has been found, press [ SELECT ] to confirm your selection.
10. Press [ SELECT ] once more to listen to the station.
Secondary DAB services
Sometimes a “>” symbol will be displayed after the name of a station. This means that
there are secondary services available for that station.
For example, a sports station may have extra information or commentary.
Press [ SELECT ] to select the secondary service.
DAB display modes
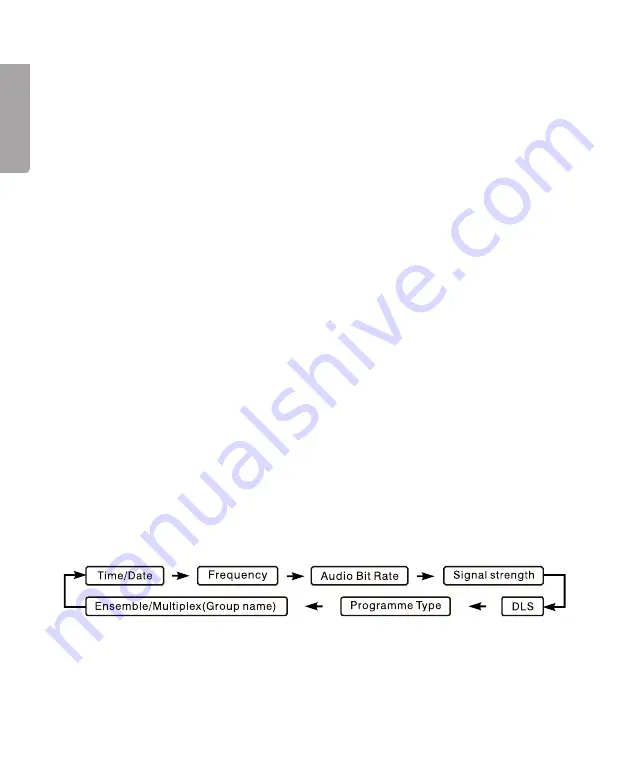
Every time [ INFO ] is pressed in DAB mode, the following information is displayed:


