8
EN
GL
IS
H
Changing drill or screwdriver bits
This tool has a keyless chuck which enables drill bits or screwdriver bits to be chan-
ged with one hand. Twist the chuck to the left to tighten, to the right to untighten.
Ensure that the bit sits securely centred in the middle of the chuck.
Operation
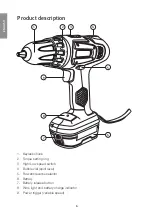
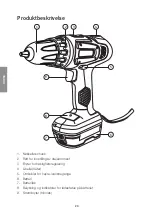
The machine is started and stopped by holding or releasing the power trigger (9).
The drill/driver is equipped with a variable speed control, which makes it extremely
practical for driving screws. The more the power trigger is pressed, the greater the
speed of the chuck. After working extensively at low speeds, the motor should be
run at no-load maximum speed for about 3 minutes to cool down the motor.
For drilling, set the torque setting ring (2) to drill mode (drill bit symbol on ring).
High/Low speed switch
There are two settings: Position 1: 0–400 rpm, position 2: 0–1100 rpm.
Work light and battery indicator
The work light will come on when the power trigger is depressed. The 3 battery
charge indicators will also come on. When the battery is fully charged, all 3 light up.
When only the red lights up, the battery needs charging.
Drilling tips and advice
• When drilling into slippery materials, like tiles, you should place a strong piece of
tape on the area in which you wish to drill to prevent the bit from wandering.
• When drilling into metal you should first use a centre punch to make a small
indentation at the spot where you wish to drill. This indentation will help hold the
bit in place and prevents it from wandering when you drill.
• When drilling into metal you should also use cutting oil to assist in drilling and to
preserve the machine and drill bit.
• Always use a clamp or vice to hold the workpiece.
• When drilling into walls, make sure not to damage water pipes, electricity cables
or gas pipes.

