- 10 -
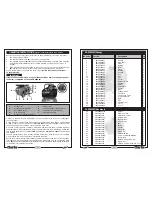
PARTS LIST (Pump)
Index No
Part No
Description
Qty
1
FN116HP0001
Housing
1
2
FN116HP0002
Main Shaft
1
3
FN116HP0003
Crank
1
4
FN033047000
Bearing
1
5
FN034139000
Rotor
1
6
FN316HP1604
Stator
1
7
FN033005000
Bearing
1
8
FN116120007
Housing
1
9
FN014002154
Bolt
3
10
FN014003003
Nut
3
11
FN116120008
Fan
1
12
FN015083000
Circlip
1
13
FN014005069
Distance Piece
1
14
FN033055000
Bearing
1
15
FN416HP0004
Piston
1
16
FN116HP0005
Special Bolt
1
17
FN116120013
Gasket
1
18
FN014003001
Nut
2
19
FN416HP0007
Cylinder Head
1
20
FN014001056
Screw M8
2
21
FN009200004
Capacitor Compl.
1
22
FN008277000
Overload/Reset
1
23
FN011117000
Olive
1
24
FN116HP0011
Nut
1
25
FN116120017
Filter Element
1
26
FN116HP0008
Cover
1
27
FN116HP0009
Cover
1
PARTS LIST (Receiver)
50
FN126HB0012V
6lt Tank
1
51
FN022020000
Drain Cock 3/8”
1
52
FN020201000
Vibration Damper
3
53
FN129HU0011
Delivery Tube
1
54
FN014013042
Screw M5x15
2
55
FN347043000
Check Valve
1
56
FN047113001
Seal
1
57
FN047113002
Spring
1
58
FN010041000
Gasket
1
59
FN046001000
Rilsan Tube
1
60
FN011017000
Nipple 1/4”
1
61
FN321028000
Pressure Switch
1
62
FN101GA0200
Power Cable With BSI Plug
1
63
FN347022000
Safety Valve
1
64
FN330004000
Pressure Gauge Ø50-1/4”
1
65
FN011017000
Nipple 1/4”
1
66
FN319044000
Pressure Reducer With Line Cock
1
- 5 -
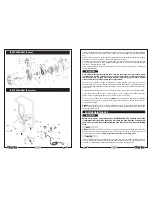
A.
Air Receiver
F.
Mains Lead
B.
Air Receiver Drain Valve
G.
Air Receiver Specification Plate
C.
Non Return Valve
H.
Air Pressure Regulator Knob
D.
ON / OFF Knob
I.
Quick Fit Coupling
E.
Air Receiver Pressure Gauge
Fig. 2
OPERATING INSTRUCTIONS
(Figures in brackets refer to Fig. 1 below)
Before connecting your Pioneer compressor to the mains supply, check the following:-
1.
The mains voltage is 230V.
2.
The ON/OFF control knob
(D)
is in the OFF (inner) position.
3.
The pressure regulator
(H)
should be set at its lowest setting, by pulling knob upwards
and turning it fully anticlockwise to required pressure, push back down to lock in
position.
4.
If the machine has not been used for 24 hours or so, open the air receiver drain valve
(B)
and turn it on its end in order to drain any condensate which may have
accumulated. When clear, close the valve, finger tight.
DO NOT rest the compressor
on the drain valve.
IMPORTANT
If the receiver is under pressure, keep your hands well away from the air being expelled....
remember, compressed air can be DANGEROUS!
Connect a suitable air hose, fitted with a quick fit adaptor, to the quick fit coupling
(I)
on
the compressor.
On the other end of the air hose, fit the spray gun or air tool to be used, using a conventionall
¼” BSP connector and or quick fit coupling,
DO NOT
use snap couplings at the tool. If a
snap coupling is used, it must be connected via a whip hose.
Once the connections are complete, CHECK AGAIN to ensure the air pressure regulator
knob (
I)
is turned fully anticlockwise, plug the compressor into the mains supply and switch
and switch
ON
, switch the compressor
ON
by pulling the
ON/Off
Switch
(B)
out, until it clicks
into position.
The compressor will now start, and the pressure will build up in the receiver to a regulated
max, pressure of 8 bar (116 psi) the motor should then stop.
Should the motor fail to start immediately, this is probably because the receiver is already
fully charged, check the pressure gauge
(E)
. If you release some air, by opening the drain
valve
(B),
the motor should start automatically once the air pressure has dropped sufficiently,
ie; when the cut in pressure is reached.
A
B
C
D
E
F
G
H
I
Fig. 1


