Clarke Metalworker CBS45MD Operating & Maintenance Manual Download Page 15

15

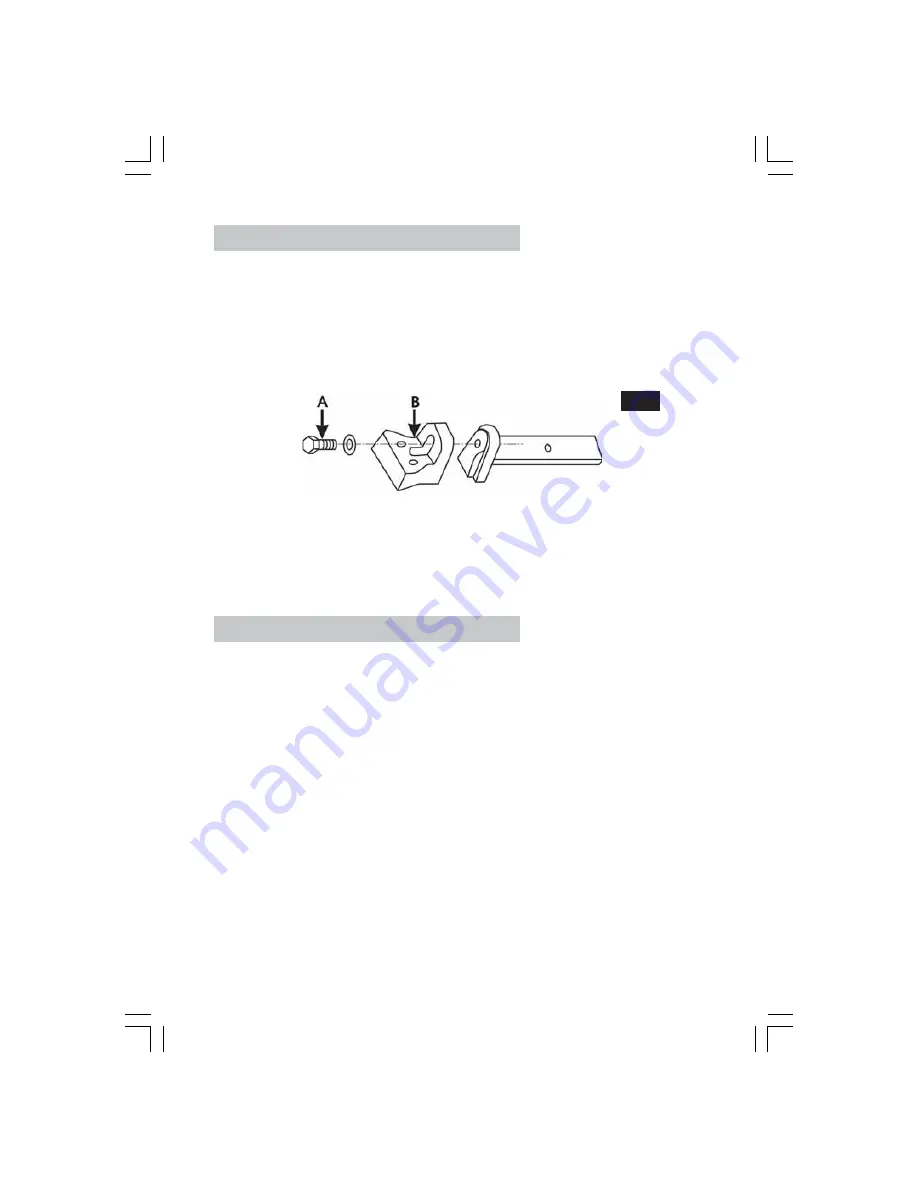
8. ADJUSTING BLADE ANGLE

Fig.4

When horizontal cutting, the blade must be at right angles (or vertical) to the
bed. To achieve this:

1.

Loosen the screw (A, Fig.4).

2.

Adjust the blade guide (B, Fig.4) to make the blade vertical to the bed.

3.

Place can engineers square on the bed to check the blade Is vertical, It not,
repeat the process. 1 to 3.

4.

Tighten the screw (11)

LUBRICATION

All bearings are lubricated for life. It is not necessary therefore to lubricate guide
bearings etc.

A thin film of oil on all unpainted surfaces will protect your saw and prevent
oxidation.

Lubricate all screw threads regularly, depending upon useage.

The drive gears run in an oil bath and will not require a lubricant change more
often than once a year.

When needing a change, first lower the arm to a horizontal position, then remove
the 4 screws securing the gearbox cover.

Open the cover (item 6).

Place a container under the right lower corner of the gear box, slowly raise the
head until the oil flows into the container.

Lower the head then wipe up excess oil and foreign matter with a soft rag, then
add Iubricant into the box until it is full. Close the cover, and tighten the 4 screws.

Summary of Contents for Metalworker CBS45MD

Page 1: ...6 152mm BANDSAW MODEL CBS45MD OPERATING MAINTENANCE INSTRUCTIONS 6 152mm BANDSAW 0707...

Page 2: ...ht unpacked 64kg net Noise Level Sound Power Level less than 78dB Whilst Cutting CLARKE CUTTING OIL Part No 1 Litres 3051059 5 Litres 3051061 Available from your Clarke dealer Please contact your near...

Page 3: ...d with in any way or not used for the purpose for which it is intended The reason for return must be clearly stated This guarantee does not affect your statutory rights Contents Specifications 2 Decla...

Page 4: ...alified technician before operating ALWAYS make workshop childproof with padlocks master switches or by removing starter keys ALWAYS keep children and visitors away All children and visitors should be...

Page 5: ...material being cut ALWAYS keep your hands and fingers clear of the blade when sawing ALWAYS set the blade guide guard assembly as close as possible to the workpiece ALWAYS switch off the saw and make...

Page 6: ...D Connect BLUE coloured cord to plug terminal marked with a letter N or coloured BLACK IMPORTANT If this appliance is fitted with a plug which is moulded on to the electric cable i e non re wireable p...

Page 7: ...r Lock Bolt F Band Saw Tracking Adjuster G Vise Jaw H Adjustable Vise Jaw I ON OFF Switch Box J Work Stop Assembly K Blade Guide Carrier Lock Bolt L Work Stop M Vise Jaw Adjuster N Manouvering Handle...

Page 8: ...ity 2 The Pulley Guard and associated components The pulley guard item B sits over two shafts one from the motor item A the other from the gearbox item O which drives the blade The gearbox shaft exten...

Page 9: ...rries three terminals See Fig 2 One of the wires should be connected to the terminal marked COM or C whilst the other should be connected to the terminal marked NO Once the terminals are connected the...

Page 10: ...ly which is hanging freely at this stage Two wires extend from the back of the assembly both of which should be earthed securely to the main body using the screw and star washer provided which is loca...

Page 11: ...en the saw is used properly If the guides do get out of adjustment It is extremely Important to readjust immediately If proper adjustment is not maintained the blade will not cut straight and if the s...

Page 12: ...straight cut without allowing it to wander or slip but must not be too tight so that it is rigid there must be a certain degree of flexibility The correct tension is 700 900kgs as measured with a blad...

Page 13: ...erials 20 Small Large 29 Medium Medium 50 Large Small When the blade becomes worn or defective in any way it should be replaced immediately The following process details how to change the blade and sh...

Page 14: ...justment This adjustment is carried out at the factory and it should not normally require readjustment If the blade is thrown first try a new blade as this should normally cure the problem If the new...

Page 15: ...film of oil on all unpainted surfaces will protect your saw and prevent oxidation Lubricate all screw threads regularly depending upon useage The drive gears run in an oil bath and will not require a...

Page 16: ...ch this occurs is effected by moving the plate shown in Fig 3 so that it makes contact with the OFF switch sooner or later as required Method Of Operation VERTICAL CUTTING To use this saw In the verti...

Page 17: ...3 Tighten loose Teeth Ripping from 1 Teeth too coarse for work 1 Use finer tooth blade Blade 2 Too heavy too slow speed 2 Decrease pressure increase speed 3 Vibrating workpiece 3 Clamp work piece sec...

Page 18: ...le Seat SD45031 2 32 Bearing Shaft Pin SD45032 2 33 Guide Pivot SD45033 4 34 Hex Nut SD45034 4 35 Bearing SD45035 6 36 Hex Nut SD45036 4 37 Blade Guard Right SD45037 1 38 Blade Guard Left SD45038 1 39...

Page 19: ...Parts Diagram 19...

Reviews: