23
SPECIAL WELDING METHODS
SPOT WELDING
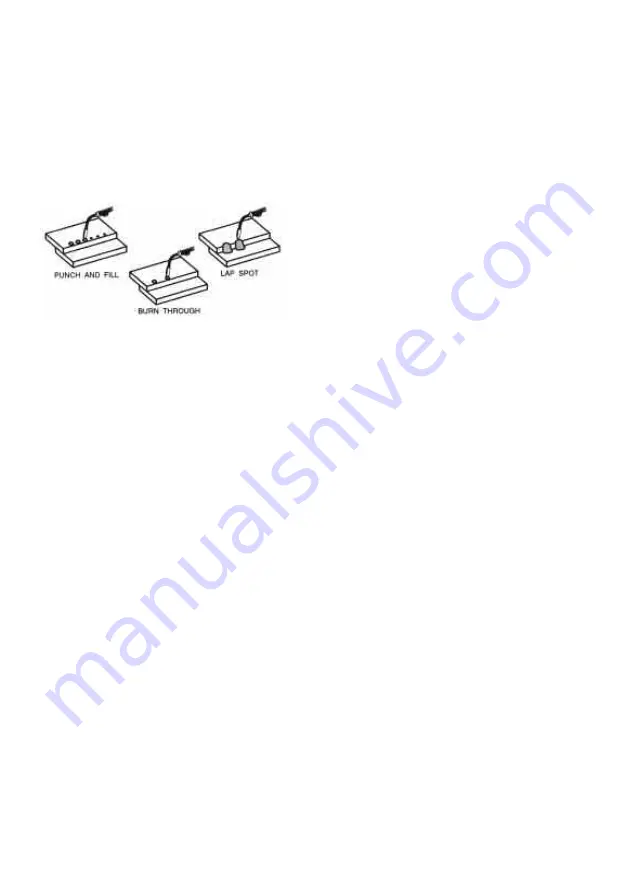
The purpose of a spot weld is to join pieces
of metal together with a spot of weld instead
of a continuous weld bead. There are three
methods of spot welding: Burn-Through,
Punch and Fill, and Lap (see Figure 27).
Each has advantages and disadvantages
depending on the specific application as well
as personal preference.
1. The BURN-THROUGH METHOD welds
two overlapped pieces of metal together
by burning through the top piece and into
the bottom piece.
With the burn-through method, larger wire
diameters tend to work better than smaller
diameters because they have greater cur-
rent carrying capabilities allowing the arc
to burn through very quickly while leaving
a minimal amount of filler metal build up.
Wire diameters that tend to work best,
with the burn-through method, are 0.030
inch diameter solid wire or 0.035 inch
self-shielding flux-core wire.
Do not use 0.024 inch diameter solid or
0.030 inch self-shielding flux-core wires
when using the burn-through method
unless the metal is VERY thin or
excessive filler metal build-up and minimal
penetration is acceptable.
Always select the HIGH heat setting with
the burn-through method and tune in the
wire speed prior to making a spot weld.
2. The PUNCH AND FILL METHOD
produces a weld with the most finished
appearance of the three spot weld
methods. In this method, the arc is direct-
ed through a hole punched or drilled into
the top piece of metal so that it penetrates
into the bottom piece. The puddle is
allowed to fill up the hole leaving a spot
weld that is smooth and flush with the sur-
face of the top piece.
Select the wire diameter, heat setting, and
tune in the wire speed as if you were
welding the same thickness material with
a continuous bead.
3. The LAP SPOT METHOD directs the
welding arc to penetrate the bottom and
top pieces, at the same time, right along
each side of the lap joint seam.
Select the wire diameter, heat setting, and
tune in the wire speed as if you were
welding the same thickness material with
a continuous bead.
SPOT WELDING INSTRUCTIONS
1. Select the wire diameter and heat setting
recommended above for the method of
spot welding you intend to use.
2. Tune in the wire speed as if you were
going to make a continuous weld.
3. Hold the nozzle piece completely
perpendicular to and about 1/4 inch off
the work piece.
4. Pull the trigger on the gun and release it
when it appears that the desired penetra-
tion has been achieved.
5. Make practice spot welds on scrap metal,
varying the length of time you hold the
trigger, until a desired spot weld is made.
6. Make spot welds on the actual work piece
at desired locations.
Figure 27.
Spot Welding
Summary of Contents for Fluxcore/MIG 135sg WE6441
Page 26: ...26 TABLE 5 TROUBLESHOOTING...
Page 27: ...27 SPOOL GUN WELDER MODEL WE6441 WIRING DIAGRAM...
Page 28: ...28 SPOOL GUN WELDER MODEL WE6441 PARTS LIST...
Page 30: ...30 SPOOL GUN WELDER MODEL WE6441 GUN PARTS LIST...
Page 56: ...26 TABLEAU 5 D PANNAGE...
Page 57: ...27 DIAGRAMME DE C BLAGE DE LA SOUDEUSE PISTOLET BOBINE WE6441...
Page 58: ...28 LISTE DES PI CES DE LA SOUDEUSE PISTOLET BOBINE WE6441...
Page 60: ...30 LISTE DES PI CES DU PISTOLET DE LA SOUDEUSE PISTOLET BOBINE WE6441...
Page 62: ...120v SPOOL GUN WELDER OPERATING MANUAL Model WE6441 UPC 052249 065371 WE6441 M001 0904...


