1. Attach the handle to the frame, using the plastic screws supplied.
2. Assemble the lance, by screwing the two halves together securely, with the
hand grip in any position convenient to the operator.
3. Two nipple sizes are supplied. That with the larger bore, is the low pressure
nipple, and should be screwed in to the tube nearest to the hand grip, using a
suitable socket.
The smaller bore nipple, is therefore screwed into the tube furthest from the
hand grip.
4.
Connect one end of the high pressure hose to the upper connection on the
unloader valve, and the other end to the connection at the lance, ensuring
theseals are correctly in place.
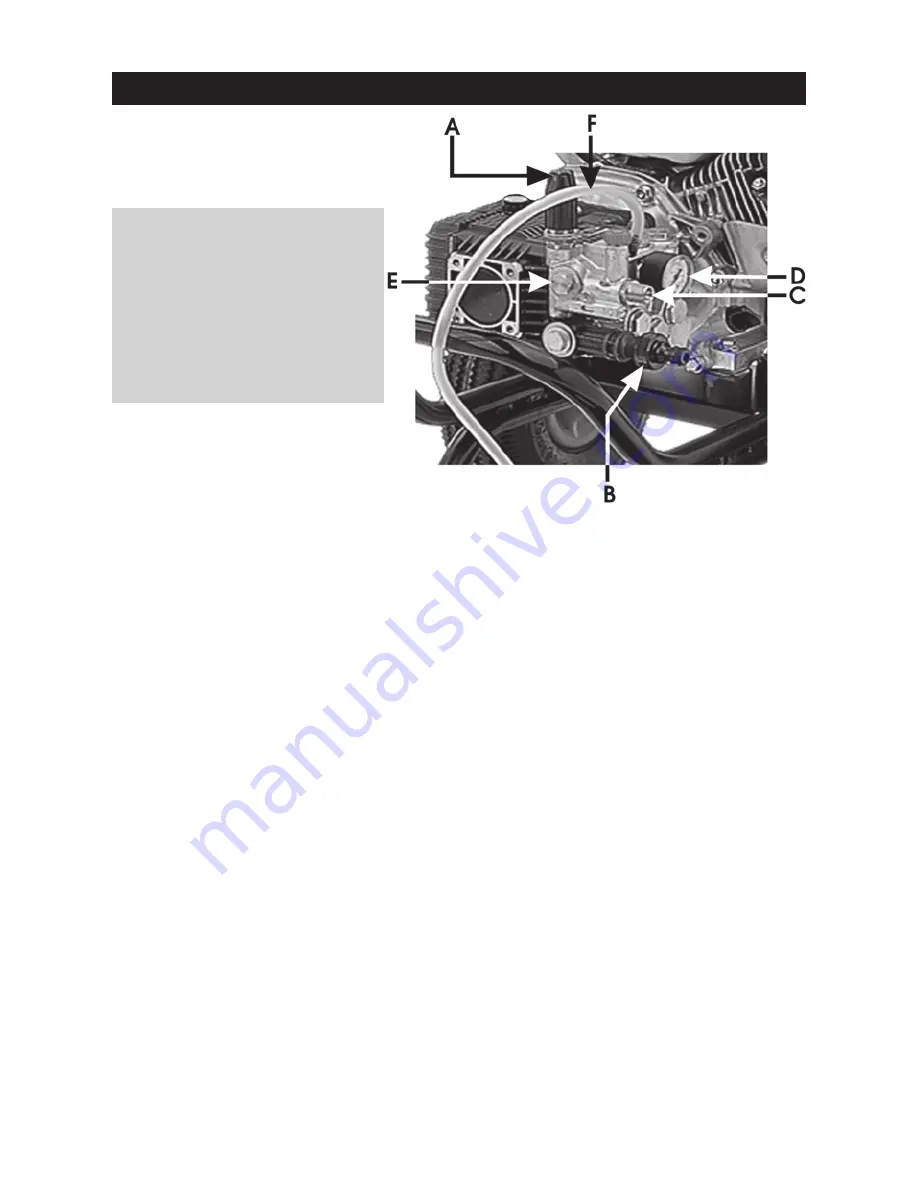
The hose from the mains supply is connected to the lower connection, as
shown in fig.1
A good quality hose of at least 1/2” should be used, and is available from DIY,
Hardware and Gardening Supply stores.
ALL connections must be tight to avoid leaks.
5. Check the pump oil level using the sight glass, but be aware that if the level is
not visible, it may be as a result of OVER filling, and should be checked by
removing the filler plug, and checking. Top up where necesary with the
recommended oil ONLY.
6. Refer to the handbook supplied for the engine, and check the engine oil level,
topping up where necessary with the recommended oil ONLY.
ASSEMBLY and PREPARATION FOR USE.
A - Pressure Regulator Knob
B - Low Pressure Water Inlet
C - High Pressure Water Outlet
D - Presssure Gauge
E - Unloader Valve
F - Detergent Hose
5


