12
Parts & Service: 020 8988 7400 / E-mail: [email protected] or [email protected]
8. Open the gas valve on the torch handle,
• This will allow gas to flow from the torch nozzle.
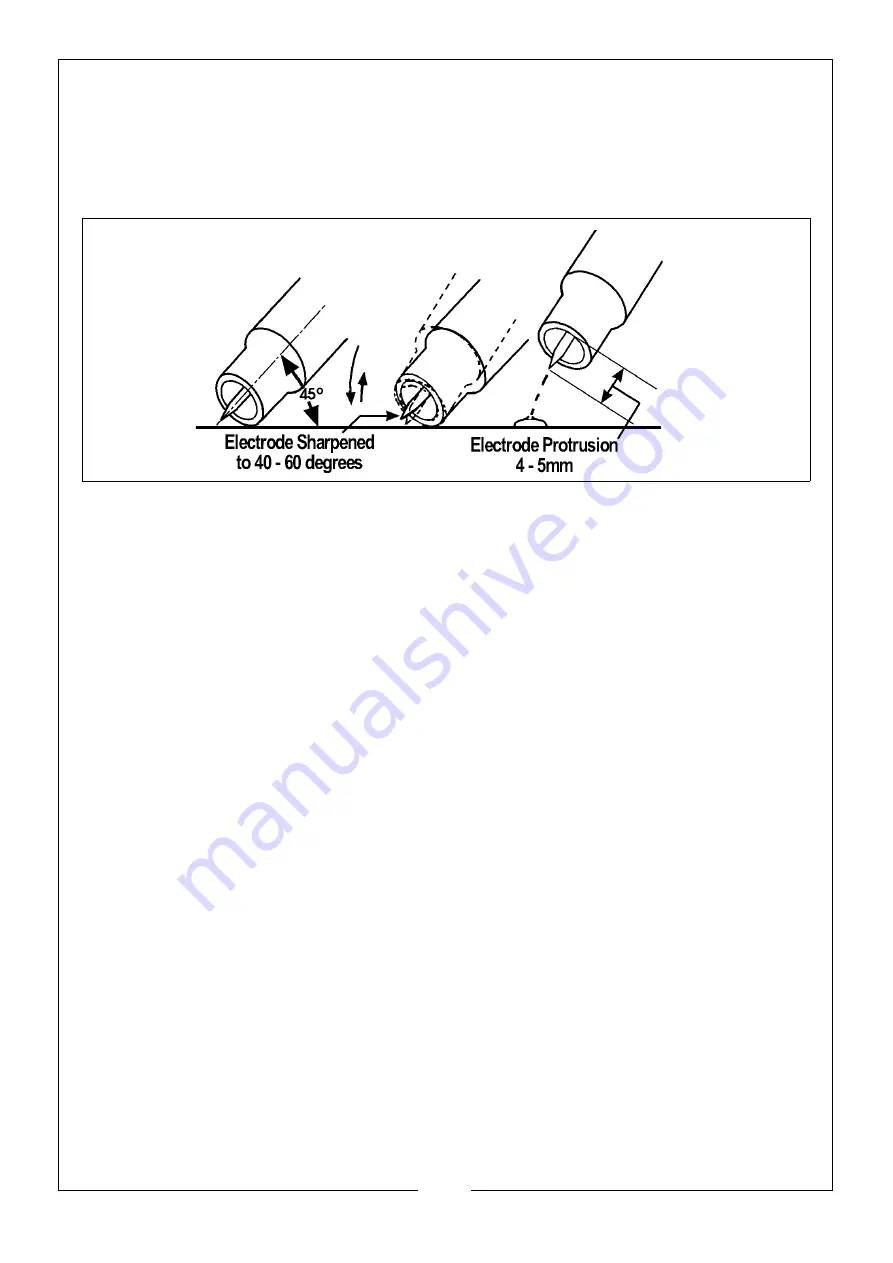
9. Cover your face with the head shield, bring the torch to within 3-4mm of
the work, and at an angle of 45°, so that the ceramic nozzle gently touches
the work surface. See fig. 3.
10. Scratch the tip of the electrode against the piece to be welded, as soon as
the welding arc starts, remove the electrode to a distance of 3-4 mm, and
continue the weld. (See notes below).
• This method is referred to as ‘Scratch Arc’.
11. To stop welding, simply remove the torch from the workpiece.
12. Turn OFF the gas as soon as you finish welding.
NOTE:
• To avoid a visible strike mark on the surface of the workpiece, it is
advisable to strike the arc in the joint, where the mark will be
concealed by the weld.
• Thin sheet and stainless steel may be welded with or without filler,
similar to gas welding.
• The filler is fed in at the edge of the pool. The rod must not touch the
tip of the electrode or enter the arc. The end of the rod must always
be shielded by the argon atmosphere to prevent as far as possible
the formation of oxides of its surface. When welding stainless steel
and copper, it is often possible to feed in the filler continuously at the
edge of the pool.
• The arc length generally varies between 3 and 6 mm depending on
the type of joint, type and thickness of material, and so on.
• The torch is advanced in the direction of welding, without lateral
movement, maintaining the torch angle of 45
o
to the workpiece.
Fig 3


