background image

5

Parts & Service: 020 8988 7400 / E-mail: [email protected] or [email protected]

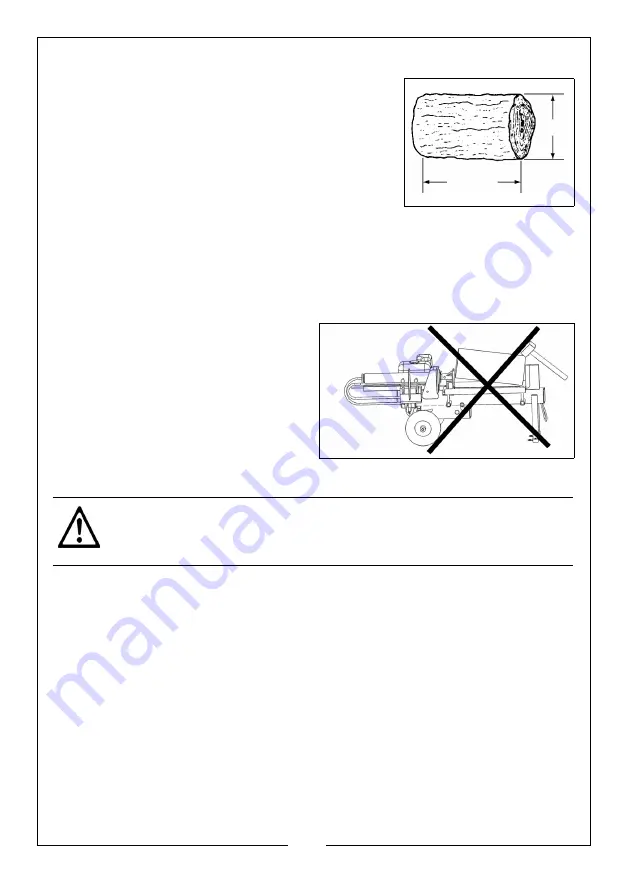
SIZE OF THE LOGS BEING SPLIT

The image on the right shows the maximum log size that 
can be split. 

• It is important not to attempt to split a log for 

longer than 5 seconds as the pump may be 
damaged by the oil overheating. This could occur 
when the wood being split is excessively fibrous, 
knotty or wet, green wood. 

NOTE: 

The diameter of the log is indicative: i.e. A small 

log can be difficult to split if it has knots or a particularly tough fibre. 

• It is therefore better to stop and rotate the log by 90

O

 to see whether it can 

be split in a different plane. 

• Not being able to split the log within 5 seconds, indicates that its hardness 

exceeds the capacity of the machine and it should therefore be discarded 
so as not to cause damage/injury.

Do not try to hit any jammed logs 
off of the log splitter, this may 
damage the machine or may 
cause the log to fly up and cause 
an accident. 

MOVING THE LOG SPLITTER

• Lift the front of the log splitter by the handle and move the log 

splitter around the working area.

CAUTION: BEFORE MOVING THE LOG SPLITTER, MAKE SURE THE BLEED 
SCREW IS TIGHTENED TO AVOID OIL LEAKING.

350mm

520mm

Summary of Contents for 3402042

Page 1: ...OPERATION MAINTENANCE INSTRUCTIONS LS1017 ISS 4 ORIGINAL INSTRUCTIONS LOG SPLITTER MODEL NO LOGBUSTER 8 PART NO 3402042...

Page 2: ...forward to your purchase giving you long and satisfactory service GUARANTEE This product is guaranteed against faulty manufacture for a period of 12 months from the date of purchase Please keep your...

Page 3: ...le work gloves eye and ear protection should always be used 3 Do not overreach Keep proper footing and balance at all times This enables better control of the log splitter in unexpected situations 4 D...

Page 4: ...hly and have been instructed in its use The machine must be used by adults only Check that the logs to be split are free from nails or wire which may fly up The ends of the logs must be cut square Bra...

Page 5: ...as knots or a particularly tough fibre It is therefore better to stop and rotate the log by 90O to see whether it can be split in a different plane Not being able to split the log within 5 seconds ind...

Page 6: ...6 Parts Service 020 8988 7400 E mail Parts clarkeinternational com or Service clarkeinternational com SAFETY SYMBOLS...

Page 7: ...he axle Make sure the air valve is on the outside of the wheel assembly 2 Secure the wheel using the circlip supplied 3 Repeat with the other wheel to the other end of the axle and secure with the rem...

Page 8: ...make it match the hole on the valve seat 3 Fit the control lever into position using the bolt supplied as shown The bolt should pass through the hole on the valve seat 4 Then tighten the nut 5 Do the...

Page 9: ...l com MOUNTING THE RAM 1 Remove the nut bolt and slide the pusher plate away from the ram 2 Remove the nuts that are on the metal studs 3 Slide the ram back over the metal studs 4 Secure the ram by re...

Page 10: ...th a clean cloth 2 Insert the oil filler cap back into place and then remove it again 3 If the oil reads low on the dipstick add oil to the reservoir Max 0 6 L We recommend the use of SAE10W 30 oil wh...

Page 11: ...within the reach of children Refuel carefully to avoid spilling fuel 1 Remove the fuel tank cap Just inside the fuel tank is a fuel strainer which should be checked periodically and any contaminants...

Page 12: ...hrough the bleed screw hole should be detectable when the log splitter is in operation Before moving the log splitter make sure the bleed screw is tightened to avoid oil leaking from this point STARTI...

Page 13: ...pull This may take 5 6 pulls to start 6 Once the engine starts move the choke to the 1 2 way position 7 After 15 seconds open the choke fully by moving it all the way to the right NOTE Moving the chok...

Page 14: ...Always place the logs on the log retaining frame Make sure the logs do not twist rock or slip while being split Do not force the log splitter by splitting the log on the upper part of the wedge This w...

Page 15: ...mplete 2 Releasing the levers at or before the end of the split stops the motion of the ram 3 Pulling the levers backwards towards the operator reverses the motion of the ram extension which will retu...

Page 16: ...ure with sharper sloped wedges of woods until the log is completely free ADJUSTING THE RETURN STOPPING POINT If you are splitting a pile of shorter logs you may want to prevent the pusher plate return...

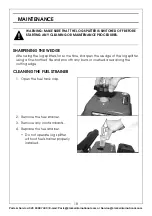
Page 17: ...splitter using a fine toothed file and smooth any burrs or crushed area along the cutting edge CLEANING THE FUEL STRAINER 1 Open the fuel tank cap 2 Remove the fuel strainer 3 Remove any contaminants...

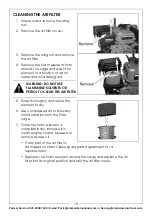
Page 18: ...and mild detergent 5 Rinse thoroughly and leave the element to dry 6 Use compressed air to blow any contamination from the filter cage 7 Once the foam element is completely dry immerse it in clean eng...

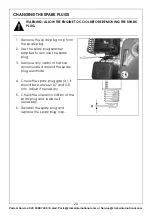
Page 19: ...spanner supplied to remove the spark plug 3 Remove any carbon that has accumulated around the spark plug electrode 4 Check the spark plug gap a it should be between 0 7 and 0 8 mm adjust if necessary...

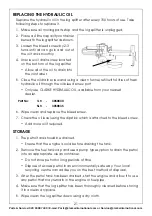
Page 20: ...t Only use CLARKE HYDRAULIC OIL available from your nearest dealer Part No 1Ltr 3050830 5Ltr 3050835 6 Wipe clean and replace the bleed screw 7 Check the oil level using the dipstick which is attached...

Page 21: ...e dealer Unauthorizedadjustment was made on Max Pressure Limiting Screw Contact your Clarke dealer The ram moves jerkily making unfamiliar noise or vibrating a lot Lack of hydraulic oil and excessive...

Page 22: ...3 8 Litres Weight 89 Kg Dimensions L x W x H 1420 x 740 x 595 mm A weighted Sound Pressure Level 91 dB A Log Capacity Maximum Length 510 mm Maximum Diameter 350 mm Minimum Diameter 70 mm Electric Chai...

Page 23: ...23 Parts Service 020 8988 7400 E mail Parts clarkeinternational com or Service clarkeinternational com DECLARATION OF CONFORMITY...

Page 24: ......

Reviews: