


VX316AU 9
English
English
Owner’s Manual
VOLUME
SRC/
MIC
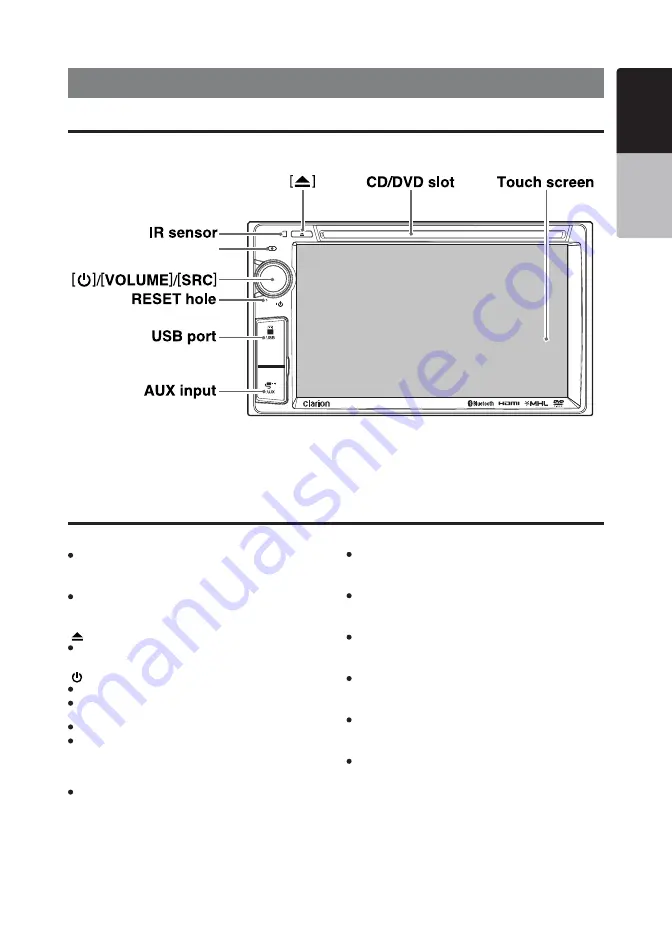
4. PANEL CONTROLS
Names of the Buttons and Their Functions
Main Unit
CD/DVD slot
CD insertion slot.
IR Sensor
Receiver for remote control unit (operating range: 30º in
all directions).
[ ] button
Eject a CD/DVD when it is loaded in the unit.
[ ]/[VOLUME]/[SRC]
Press the knob to turn on power.
Press the knob when the unit is turned on to display
Home Screen; press again to return to current source.
Press and hold the knob to turn off the power.
Rotate the knob left or right to decrease or increase the
volume.
RESET hole
Reboot the system.
Note: When the RESET button is pressed, all saved
memory in the unit are cleared.
USB port
USB mass storage device/MTP/iPod/iPhone insertion.
AUX input
3.5mm Auxiliary jack insertion
Video/ DVB-T2 input (rear)
Composite video connection (CVBS) jack insertion.
HDMI input (rear)
HDMI cable insertion.
Touch screen
Resistive touch screen display.
Microphone
For handsfree.
Microphone