11
- S t e p T h i r t e e n -
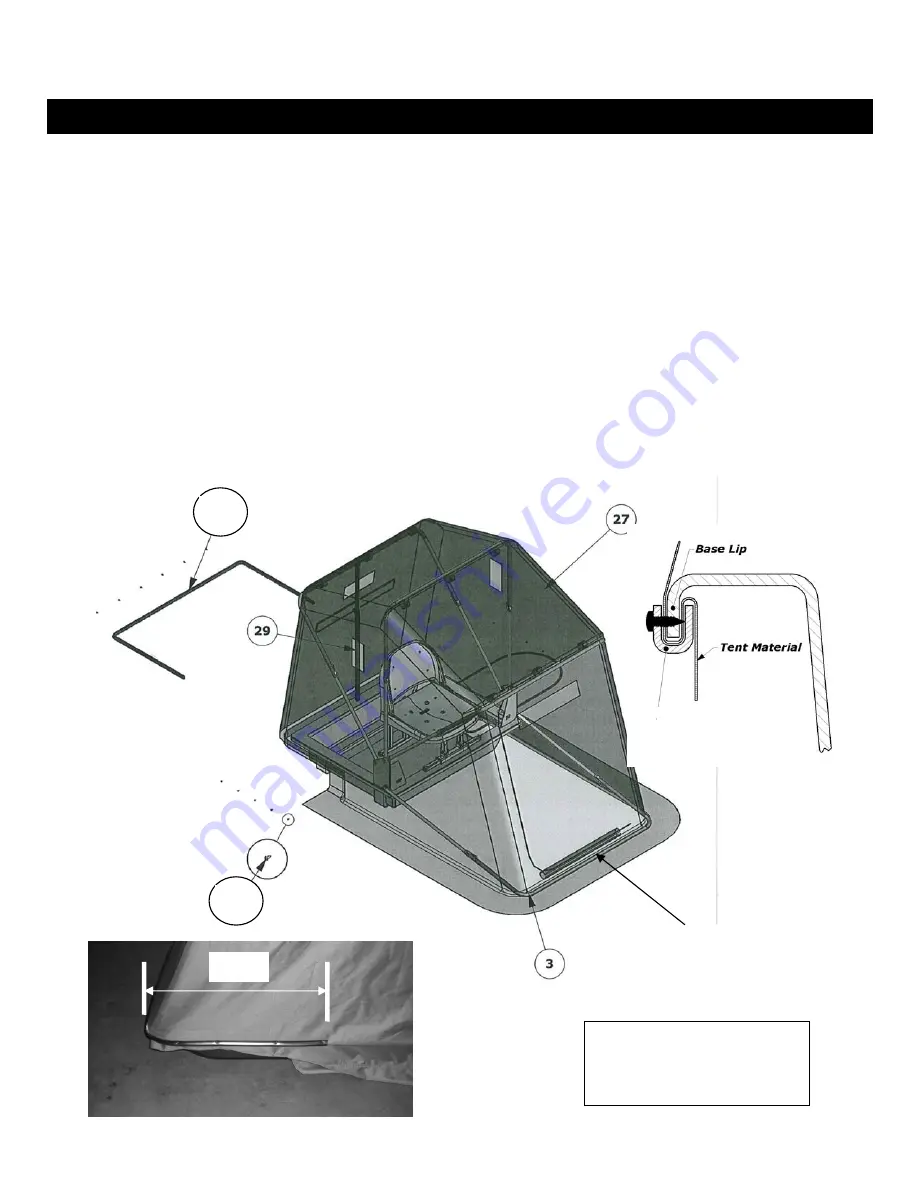
To “set” the tent, grasp the tent material at the rear of the shelter and pull it downward. Observe the
porch area of the tent lifting accordingly as you pull. When the V-channel molding (item 32) is correctly
installed, the porch hoop pole will lightly touch the floor.
From behind the unit, pull the midpoint of the tent downward until the porch hoop pole just starts to
come off the ground. Secure the tent in this position with the V-channel molding. Continue stretching the
tent around the base and secure with the molding.
Take a walk around the shelter to inspect. You may have to remove and readjust the tent until you have
verified the proper hoop pole position and also that the tent sides and corners are properly proportioned.
It is also advised to sit in the seat prior to permanently attaching the tent to ensure that the front porch
pole stays in the correct position when weight is added to the shelter seat & base.
When satisfied, secure the molding around the shelter, one direction from center and then the other,
keeping the fabric relatively wrinkle-free and snug. Use a side-cutters to trim the ends of the molding if
they are not equal relative to the base. The V-channel molding should go approximately 24” up the side
of the base toward the front.
Evenly space the screws (item 33) about every four to six inches, and also put a screw in the center of
both corners. Since there aren’t any predrilled holes, it's advisable to use a powered driver for this
operation.
Porch hoop (item 3)
should lightly touch
floor when tent is set
correctly.
V-Channel Molding
~24”
33
32
TIP:
Heat up the V-channel
molding with a hair dryer, heat
gun, or soak in a bucket of hot
water for ease of installation.


