background image

Introduction 

Thank you for selecting City Theatrical’s Three Channel Dimmer!  
 
Every effort has been made to anticipate your questions in this manual, but if you have 
any questions that are not answered here, or you want to discuss a special application, 
please feel free to contact us directly at City Theatrical.  The D3 Dimmer includes a wide 
range of products which you may review at our website (www.citytheatrical.com) or in 
our catalog.  For basic wireless operation, a minimum of one SHoW DMX Transmitter 
and one SHoW DMX Receiver is required. D3 Dimmers are fully RDM/DMX compliant 
wired devices and may also be used in conventional wired DMX or RDM/DMX systems.


The Three Channel 10A D3 Dimmer serves as a versatile lighting control module, 
providing three channels of 9-12VDC incandescent ISL and Linear dimming, Non Dim 
control, and RGB LED control in a single feature-packed unit. 


BUTTON PAD 

LCD DISPLAY 

ENT

UP

DOWN

R

I

G

H

T

L

E

F

T

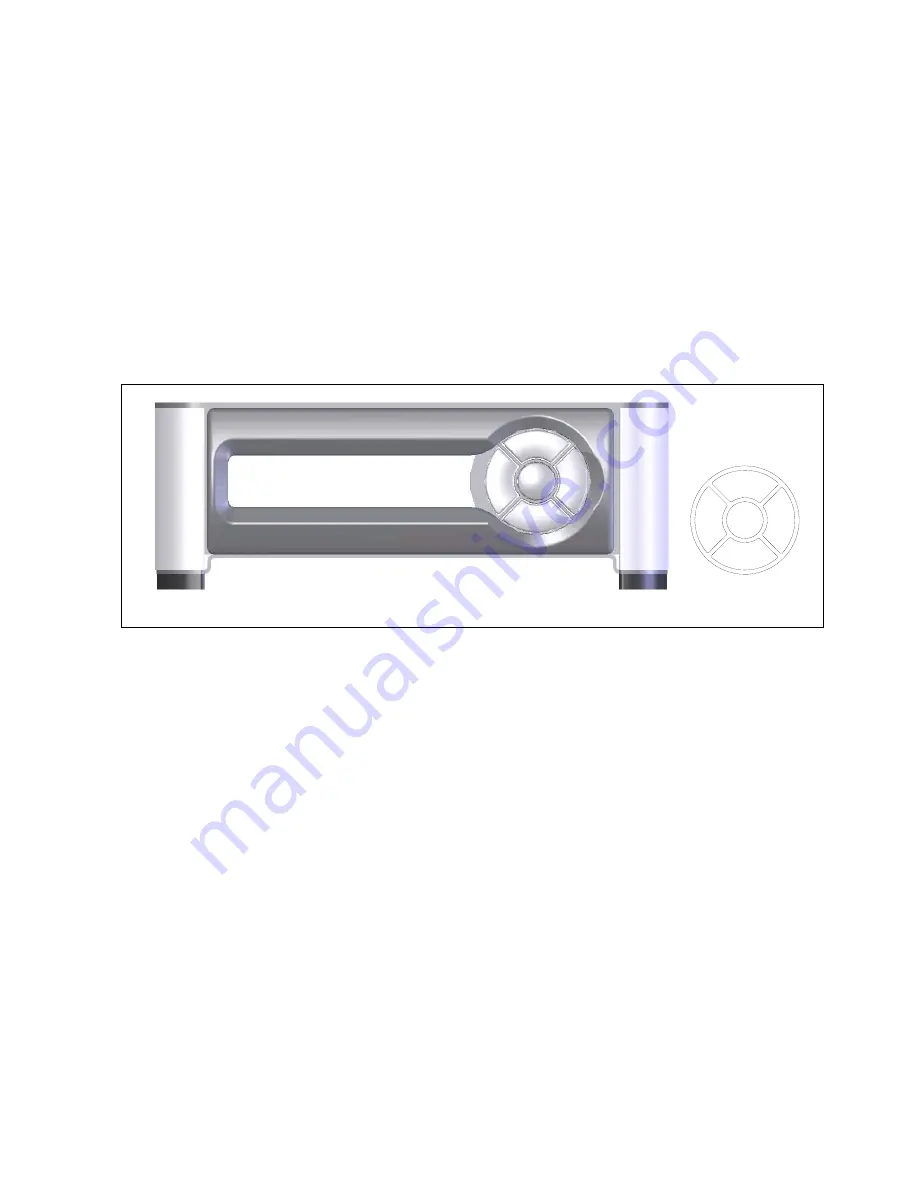
Figure 1, D3 Dimmer Front Panel 

 
The D3 Dimmer User Interface 

Press the Enter (center) Button to access the menus, and press the UP or Down Buttons 
to move through the menus. When you reach a menu that you want to work in, press 
Enter to select that menu and then use the UP or Down Buttons to move through that 
menu’s options. To scroll through a menu’s selection options hold the Up or Down 
button. 
 
When you reach an option that you want to modify, press enter to select it.  A blinking 
cursor in the option line will appear.  Use the UP and Down arrows to move through the 
available options and use the Enter Button to select the option you want. If you have 
selected a menu option to edit but don’t actually want to edit it, press and hold the Back 
Button for 1 second to escape the edit command. 
 
Once you have made the choices you want, simply press the back button to back out of 
the menu level.  Continue to press the back button to move back to the Main Menu. If 
you want to back out of a particular selection at any time, press the Back Button.   


Page 4 


Summary of Contents for D3

Page 1: ...D3 Dimmer User s Manual Rev 4 2011 2013 City Theatrical Inc ...

Page 2: ...r Interface 4 The D3 Dimmer 5 Controls Connections and Features 5 Front Panel 5 Back Panel 5 Menu System 6 Menu 7 Addressing 7 Level Tests 7 Curve Selection 7 RDM Basics 7 Figures Figure 1 D3 Dimmer Front Panel 4 Figure 2 the D3 Dimmer Channel Dimmer 5 Figure 3 D3 Dimmer Menus 6 Page 2 ...

Page 3: ...The D3 Dimmer is intended for use only by qualified professionals Connection installation and hanging of this equipment must be performed in accordance with all pertinent local regional and national safety codes and regulations D3 Dimmer equipment is intended for indoor use only unless specified for outdoor use Keep the equipment dry Do not operate the equipment if it gets wet Do not operate in ex...

Page 4: ...PAD LCD DISPLAY ENT UP DOWN R I G H T L E F T Figure 1 D3 Dimmer Front Panel The D3 Dimmer User Interface Press the Enter center Button to access the menus and press the UP or Down Buttons to move through the menus When you reach a menu that you want to work in press Enter to select that menu and then use the UP or Down Buttons to move through that menu s options To scroll through a menu s selecti...

Page 5: ...nu see below Control Button Pad This five button pad is the main control interface for the D3 Dimmer The button functions are UP DOWN LEFT BACK RIGHT FORWARD and ENTER During normal operation default configuration the Left Down and Right Buttons serve as Bump Buttons for the three dimmers in the unit Back Panel Anderson 45A Power Pole DC Power Input Connectors Red Black This is the VDC power input...

Page 6: ...ess if required 5P XLR Male Connector DMX RDM Input Connect your DMX512 source here using any ESTA compliance DMX512 cable 5P XLR Female Connector DMX RDM Pass Thru Output When the Transmitter is connected to a conventional DMX controller this connector serves as a DMX pass thru DMX Termination Switch The D3 Dimmer DMX Input is provided with a conventional manual termination switch Switch the hand...

Page 7: ...by Default Battery Voltage Displays connected battery voltage RDM Label This is an editable field that allows the user to create a unique alpha numeric 16 character RDM label for the unit RDM Unique ID This is a non editable field that displays the RDM Unique ID Input Status Displays input status as DMX OK or DMX No Data Restore Defaults Restores factory defaults as DMX start 1 Triple Dimmer ISL C...

Page 8: ... its data link Once the controller has discovered all of the connected responders they can be monitored adjusted configured and generally managed individually over the RDM data link During normal RDM operations the Discovery process is periodically repeated so that added removed or failed devices can be identified and the controller s list can be updated There are a few caveats that should be unde...

Reviews: