


ID 19
OPERATION No. ID 00 : Hydraulic system
21
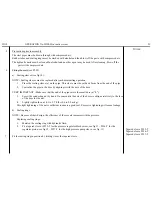
IMPORTANT NOTE
If any irregularity of working occurs make certain that the hydraulic system is under pressure before doing anything else. To do this:
With the engine idling :
- Unscrew the bleed screw on the pressure control valve (one should be able to hear the release of pressure in the control valve).
- Screw up the bleed screw and the valve should cut out in less than 60 seconds (the point of cut out is indicated by a reduction in
the noise of operation).
If the above is not the case, check in the order shown, the following points:
- That there is sufficient hydraulic fluid in the reservoir.
- That the filter in the reservoir is perfectly clean and in good condition.
- That air is not being sucked in through the pump inlet pipe.
- That the bleed screw has been screwed up.
TOOLS
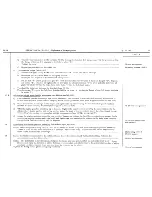
IMPORTANT NOTE – For correct functioning of the hydraulic system, it is essential that the fluid and the units
of the hydraulic system should be perfectly clean. The strictest precautions must be observed during work
on the car and for the storage of the fluid and spare parts.
1
Storage
Pipes, units and spare parts must be protected from exposure to dust and from impact.
Seals and rubber pipes must be protected from exposure to dust, air, light or heat.
The fluid must be kept in its original container, securely sealed.
2
Precautions during work.
Before starting work, carefully wash the area in which work is to be carried out.
Example:
when replacing a rear suspension cylinder, wash the wheel arch.
Before disconnecting a union, carefully wash it and the surrounding area with alcohol.
Then proceed as follows :
a)
Unscrew the bleed screw on the pressure regulator.
b)
Move the manual height control lever to the low position.
NOTE - These precautions should be observed during work on the master cylinder (2nd position).
3
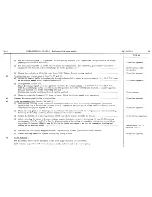
Precautions to be taken after disconnecting a union.
Seal all open ends of pipes and oil passages with plugs (see Pl. 89, fig. 9 ):
a)
Metal pipes with screw connections.
3
mm dia. . . . . . . . . . . . . . . . . . . . . . . . . . . . .
plug D 435-91
4. 5 mm dia. . . . . . . . . . . . . . . . . . . . . . . . . . . . .
plug D 453-131
6.35 mm dia . . . . . . . . . . . . . . . . . . . . . . . . . . . .
plug D 453-132
8
mm dia. . . . . . . . . . . . . . . . . . . . . . . . . . . . .
plug D 391-60
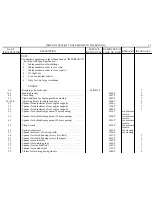
Summary of Contents for ID 19
Page 1: ......
Page 2: ......
Page 149: ......
Page 174: ......
Page 336: ......
Page 342: ...OPERATION ID 100 3 ENGINE ID 19 2 CROSS SECTION...
Page 357: ......
Page 367: ...OPERATIONS ID 142 4 ENGINE ID 453 6 ACCELERATOR CONTROL 6 ID 19 27 d 6Omm I...
Page 368: ...I 1 2 ENGINE HIOFILTRE AIR FILTER 11 4 9 5 9 7 6 0...
Page 369: ...OPERATION ID 171 3 ENGINE ID 19 VOKES AIR FILTER 29...
Page 371: ...ID 173 3 PETROL PUMP ID 19 INSPECTION FOR LEAKS a b...
Page 375: ...OPERATIONS ID 231 3 ID 231 C ENGINE WATER PUtiF ID 19 35...
Page 380: ...OPERATIONS ID 314 O ID 314 4 CLUTCH CLUTCH CONTROL li i lf ID 19 41 2 5 4 I a...
Page 389: ...OPERATIONS ID 330 2 GEARBOX ID 19 FIRST SPEED SELECTOR LEVER Fig 1 21 98 422 48 Fig 2 98 21...
Page 400: ...OPERATIONS ID 334 o ID 334 1 1 GEARBOX GEAR CHANGE CONTROL ID 19 59 32 T...
Page 403: ...ID 372 l ID 410 3 ID 413 1 8 FRONT AXLE ID 19 SECTIONS 62 23 24 7 OPERATIONS _ 22 i 29...
Page 413: ...OPER ATION3 ID 420 l ID 420 3 REAR AXLE ARM PIVOT BEARING ID19 71 33 34 52 24 23...
Page 425: ...1 5 4 6 Fig 1 Fig 2 _ _ _ __ ID 391 O ID 391 3 SUSPENSION HIGH PRESSURE PUMP ID 19 84 2 3...
Page 426: ...OPERATIONS ID 391 O ID 391 3 SUSPENSION HIGH PRESSURE PUMP Fig 1...
Page 436: ...OPERATIONS ID 443 l ID 443 3 STEERING SECTION OF THE RELAY i ID 19 94 46 53 142...
Page 444: ...OPERATIONS ID 420 3 ID 420 4 ID 451 4 BRAKES ID19 REAR BRAKE BACKPLATE 102 Fig 1 Fig 4 Fig 2 1...
Page 449: ...BRAKES ID 19 107 PEDAL GEAR...
Page 452: ...OPERATIONS ID 454 O ID 454 1 ID 454 4 BRAKES CABLE ADJUSTMENT ID 19 110 I I I I 4 I I I...
Page 455: ...GAUGE RODS sold under No 2307 T ADJUSTMENTS ID 19 PRE ADJUSTMENT 0 F THE FRONT HEIGHT 113 J...
Page 457: ...OpERATlON ID 532 3 ELECTRICAL ID 19 OUCElLlER DYNAMO 7158A 115 29 32 1 1 12 39...
Page 458: ...OPERATION ID 532 3 ELECTRICAL PARIS RHONE DYNAMO GllR91 25 28 30 29 27 19 18 5 11 Pi I 33 c...
Page 459: ...OPERATION ID 532 3 ELECTRICAL ID19 PARIS RHONE DYNAMO GllR91 117 Fig 1 Fig 2...
Page 460: ...OPERATION ID 533 3 ELECTRICAL DUCELLIER STARTER 6003A 6 29 10 4 ID 19 118...
Page 461: ...OPERATION ID 533 3 ELECTRICAL DUCELLIER STARTER 6003A 16 22 21 9...
Page 466: ...ELECTRICAL WIRING DIAGRAM FRONT HARNESS 10 c s t 15 4 47 l I ID 19 123...
Page 467: ...ELECTRICAL WIRING DIAGRAM REAR HARNESS 28 __ P 1 I 6 I ID 19 124 33 c J _ ___ _ J r 4 I 29 30...
Page 468: ...HYDRAULIC ID19 TEST BENCH 125 CONNECTION OF THE IS00 P S I 100 kg cm 2 GAUGE...
Page 469: ...M2 HYORAUL IC ID 19 TEST BENCH 126 CONNECTION OF THE 3000 P S I 200 kg cm2 GAUGE b...
Page 470: ...HYDRAULIC TEST PIPES AND UNIONS ID19 127 K sold under the No 2295 T...
Page 471: ...OPERATION ID 391 O HYDRAULIC HIGH PRESSURE PUMP ID19 128 INSPECTION FOR LEAKAGE S...
Page 473: ...OPERATION ID 393 O HYDRAULIC ID19 PRESSURE DlSTRl6UTlON BLOCK 130 INSPECTION FOR LEAKAGE...
Page 475: ...0DE A T ON IC 391 0 HYDRAULIC MAIN ACCUMULATOR PRESSURE TEST ID 19 132...
Page 481: ......