background image

b.6 SHARPNESS: 

Change the value of the sharpness with the

keys, in 

the range of 0 to 100. 

b.7 COLOR TONE: 

Set the color temperature preset to 

STANDARD

WARM

COOL

STANDARD by using the

keys. 

b.8 SCALE: 

Set the picture size preset to FULL

ZOOM 

 4


PANORAMA

FULL by using the

keys. 

NOTE: 

z


Press 

  to move cursor to the relevant item. 

z


Press 

to tune the value. 

z


Press 

to enter into the picture menu. 

z


HUE will only show when the color system is NTSC. 

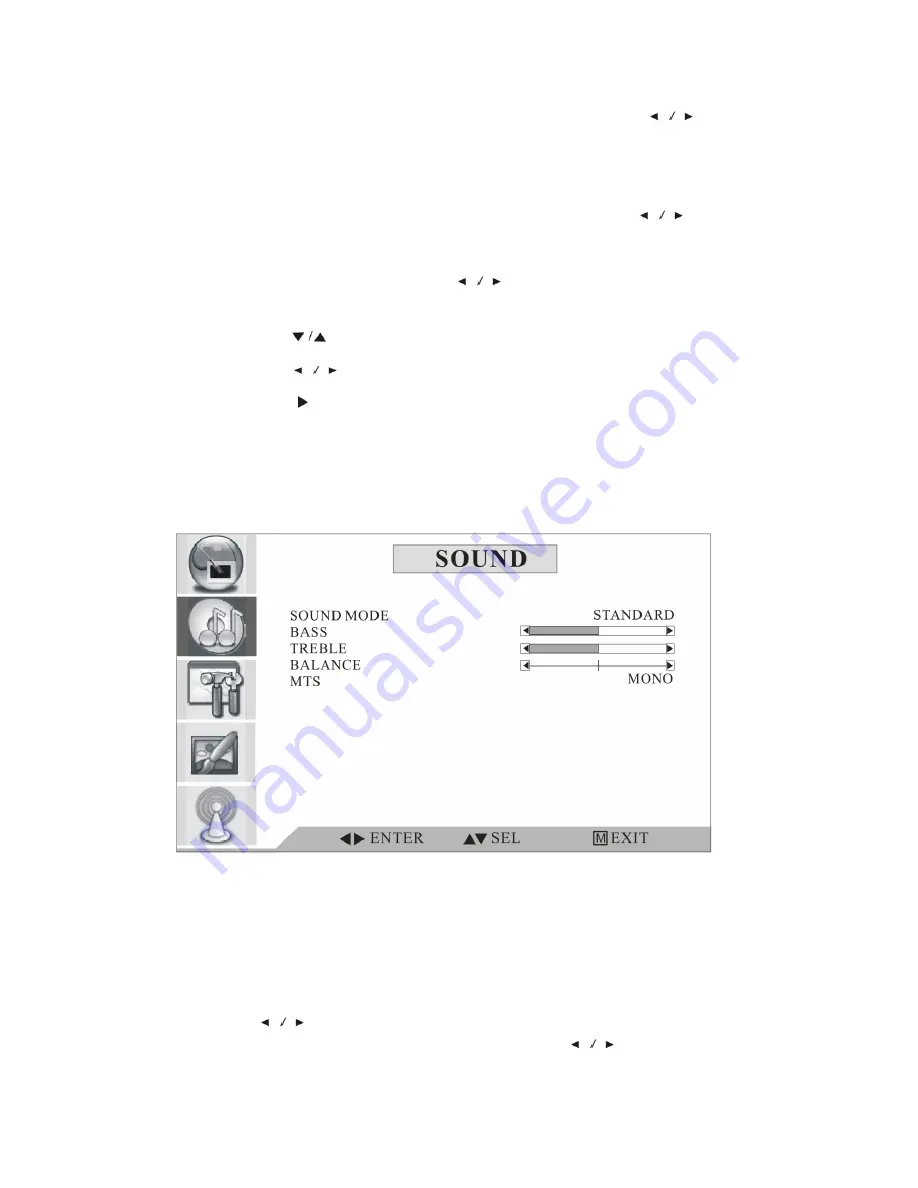
7.1.2. SOUND MENU: 


SOUND MENU 


a.    The above image is a sample of the display menu. 
b.    The definition of each option: 


b.1 SOUND MODE: 

Set the sound mode to 

STANDARD

NEWS

MUSIC

PERSONAL

STANDARD by using 

the

keys.


b.2 BASS: 

Change the value of the bass with the

keys in the rang of 

0 to 100 .


16

Summary of Contents for C32612HD

Page 1: ...For Custom 1 800 66 USER MANUAL VGA Input 8ms Response Time HDMI High Definition Multimedia Interface 32 High Definition LCD Television C32612HD Requires HD Signal www citizen electronics com...

Page 2: ...l Up Down 11 5 5 Volume Control 11 5 6 Closed Caption 11 5 7 QV 12 5 8 SCAN 12 5 9 ZOOM 12 5 10 MENU 12 5 11 MUTE 12 5 12 OK 13 5 13 Picture Mode 13 5 14 Sound Mode 13 5 15 SLEEP 13 5 16 CALL 14 5 17...

Page 3: ...service technician High voltages are used in the operation of this product Warning To prevent fire or risk of electric shock do not expose the main unit to rain or moisture Warning Do not drop or push...

Page 4: ...uild up can reduce the service life of your television and can also be dangerous Caution Never stand on lean on or push the product or its stand Pay special attention to children accidental tipping ma...

Page 5: ...other products which give off heat E g video cassette players and audio amplifiers Do not block the ventilation holes on the back cover Ventilation is essential to prevent failure of electrical compon...

Page 6: ...2 Descriptions of Main Unit and Remote Control Unit 2 1 Main Unit Buttons Display Sockets Main Power Switch 5...

Page 7: ...2 2 Remote Control Unit 6...

Page 8: ...3W Parameters of the product Full Function Remote Control Supported Channels and Frequencies VHF L 55 25 139 25 MHz VHF H 145 25 391 25 MHz UHF 397 25 801 25 MHz Color system NTSC PAL M PAL N Audio sy...

Page 9: ......

Page 10: ...ce on the rear of the cabinet 4 2 Power Supply 1 Press on the Power Switch on 1 to power on the LCD TV 4 3 Battery Installation of Remote Control Unit 1 Turn the remote control unit upside down Open t...

Page 11: ...Channel Search Press the key till AUTO SCAN is highlighted in the menu 5 Operation of Remote Control Unit 5 1 POWER ON OFF When the unit is turned on a green indicator light turns on When the unit is...

Page 12: ...lower or raise the volume The range is 0 100 Press once to display Source List Using and select the video input from TV AV SVIDEO YPBPR YPBPR2 HDMI and PC The OSD display will disappear after several...

Page 13: ...utton again will stop scan 5 9 ZOOM Press this key repeatedly to change aspect radio as follows FULL ZOOM 4 3 PANORAMA 5 10 MENU See MENU Operation on Chapter 7 5 11 MUTE Pressing this button will mut...

Page 14: ...ure mode among STANDARD DYNAMIC SOFT and PERSONAL STANDARD DYNAMIC SOFT PERSONAL 5 14 Sound Mode Press repeatedly to select audio mode among STANDARD NEWS MUSIC and PERSONAL STANDARD NEWS MUSIC PERSON...

Page 15: ...Pressing again releases back to normal state Pressing displays 1 the name of current the program or source 2 Current aspect ratio 3 Current mts mode 4 Current picture mode 5 Current sleep time 6 TELE...

Page 16: ...et to STANDARD DYNAMIC SOFT PERSONAL STANDARD by using the keys b 2 BRIGHTNESS Change the value of the brightness with the keys in the range of 0 to 100 b 3 CONTRAST Change the value of the contrast w...

Page 17: ...ng the keys NOTE z Press to move cursor to the relevant item z Press to tune the value z Press to enter into the picture menu z HUE will only show when the color system is NTSC 7 1 2 SOUND MENU SOUND...

Page 18: ...ve image is a sample of the display menu b The definition of each option b 1 NR Set the noise reduction mode to WEAK MIDDLE STRONG OFF WEAK by using the keys b 2 CCD Press keys to decide whether to di...

Page 19: ...er the password change menu You are now instructed to enter the new password twice as confirmation Press enter to confirm your new password b 4 2 VCHIP SWITCH Set the V CHIP switch on or off by using...

Page 20: ...Press the keys to adjust the English rating to E C C8 G PG 14 18 b 4 6 FRENCH Press the keys to adjust the French rating to E C C8 13 16 18 b 5 SCAN FORMAT Set the scan format by changing the value f...

Page 21: ...b 2 BLUE SCREEN When set to ON the blue screen indicated there is no signal to the current input channel b 3 SLEEP Set the sleep time to OFF 15 30 45 60 75 90 105 120 OFF by using the keys b 4 OSD HP...

Page 22: ...the display menu b The definition of each option b 1 AUTO SCAN Press the key to auto scan the channels and display the auto scan sub menu Press the MENU key to exit auto scan and return to TV b 2 FINE...

Page 23: ...tion is PC SOUND GEOMETRY SYSTEM PC SCALE Only has two modes NORMAL CENTER GEOMETRY menu is different from TV z H POSITION Adjust the horizontal position of the image by using the keys z V POSITON Adj...

Page 24: ...tion Picture lacks color or picture too dark Check color brightness and contrast controls are correctly adjusted All channels lose color intermittently Check if the antenna is broken Check if the ante...

Page 25: ...24...

Reviews: