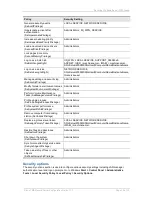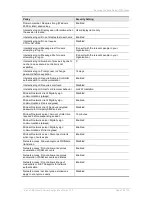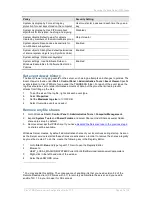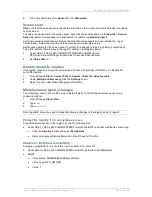
Securing IIS
Cisco TMS Secure Server Configuration Guide 13.0
Page 31 of 34
mainstream browsers Internet Explorer and Firefox support NTLM so basic authentication should be
disabled if not accessing Cisco TMS through a proxy
6
.
1. Go to Windows Start > Control Panel > Administrative Tools > Internet Information Services
(IIS) Manager.
2. Expand the ‘Web Sites’ folder and right-click the website where Cisco TMS is installed
3. Select Properties.
4. In the Directory Security tab > Authentication and Access Control, click Edit.
5. Uncheck Enable Anonymous Access, Digest authentication for Windows domain server,
Basic Authentication and .NET passport authentication and check only Integrated Windows
Authentication..
6. Click OK twice
7
.
7. When prompted about Inheritance Overrides for the child node, see the table below and only
select those listed as enabled.
8. Click OK to apply the permissions.
Table 11 Nodes to select when applying permissions
Node
Select to Inherit
TMSAgent
Yes
Pwx
No
TMS
Yes
TMS/Public
No
TMSConferenceAPI
No
XAPSite
No
Note: You cannot remove anonymous access to the entire website. Anonymous access is required on
several nodes so that devices can send data to Cisco TMS. Applying permissions as stated above
from a standard Cisco TMS installation will maintain the required access rights.
Delete unused application mappings
1. Go to Windows Start > Administrative Tools > Internet Information Services (IIS) Manager.
2. Expand the ‘Web Sites’ folder and right-click the website where Cisco TMS is installed
3. Select Properties.
4. Under Virtual Directory, click the Configuration button.
5. Under Application Extensions, remove the following extension mappings.
Table 12 Extensions to remove
Extension
.idc
.shtm
.shtml
6
Some External Integration products cannot support NTLM or Kerberos Authentication and basic may need to
be enabled in those situations
7
If Basic is already unchecked, you must enable it to make a change and save it (do not apply to any child
nodes), and then open the Security properties again and uncheck it and follow the remainder of the instructions.


