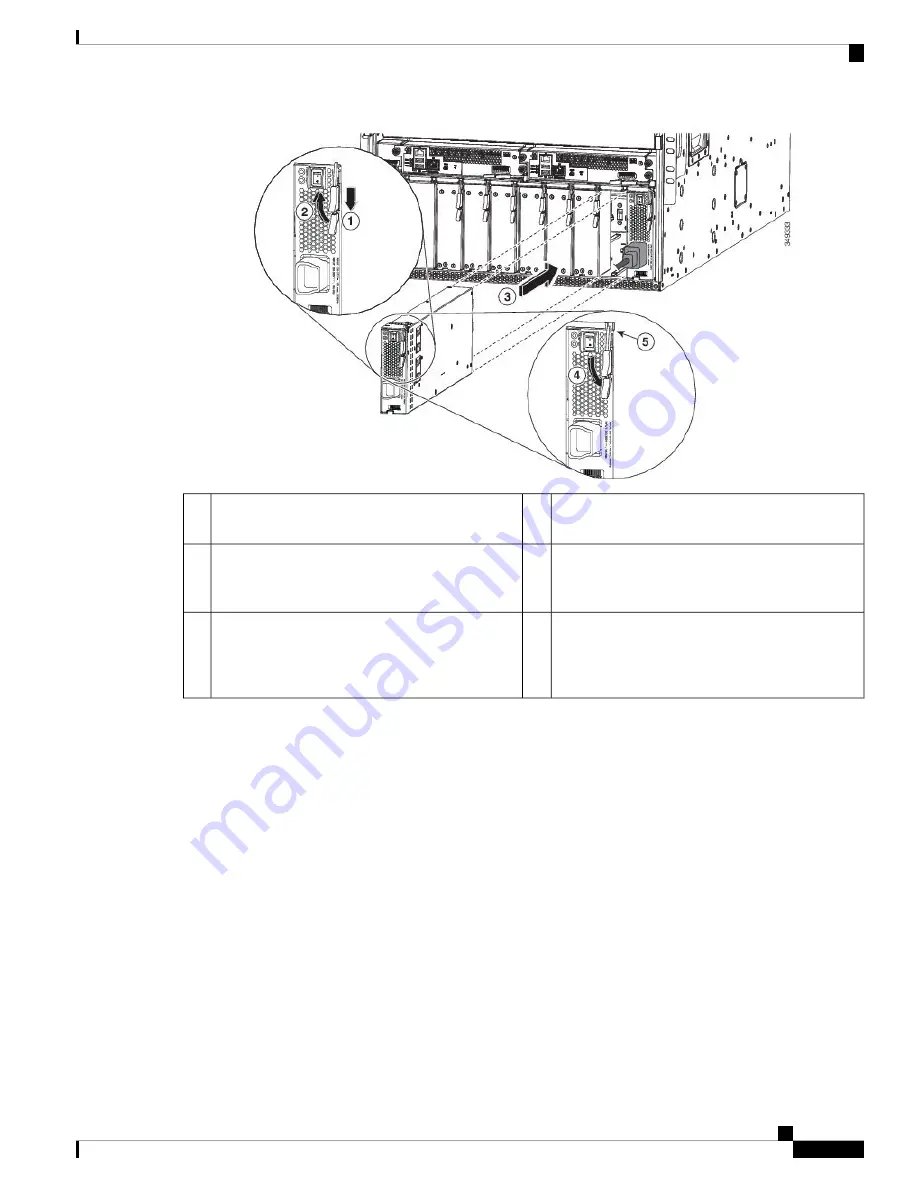
Rotate the lever toward the front of the module.
4
Slide and hold the middle handle next to the outer
handle.
1
Make sure that the other end of the lever grabs the
front of the chassis to push the module onto the
connectors inside the slot.
5
Fully rotate the release lever away from the front
of the module.
2
Slide the power supply into the open power supply
slot in the chassis until it stops. The front of the
module is about 0.25 inches (0.6 cm) in front of the
chassis.
3
f)
Carefully rotate the ejector lever toward the front of the power supply and be sure that the other end of the lever
grabs the chassis. This pushes the module onto its connectors inside the slot.
The lever will click when you rotate it all the way to the front of the power supply. Be sure that the power supply
is fully inserted into the slot. The front of the power supply will be even with the surface of the chassis.
g)
Attach the power cable to the power receptacle on the power supply.
h)
Make sure that the other end of the power cable is attached to the power source in one of the following ways:
• If you are using the combined power mode or the
n
+1 redundancy mode, you can connect the power cable to
the same power source as used by the other power supplies in the same switch.
• If you are using the
n
+
n
redundancy mode, you must connect the power cable to the same power source as
used by the other power supplies in the same set of power supply slots in the chassis. The power cables for
slots 1 through 5 must be connected to one power source and the power cables in slots 6 through 10 must be
connected to another power source.
i)
If you connected the power supply to a DC power source do the following:
1.
Turn on the circuit breaker for the DC power source.
2.
Turn on the power supply by setting the power switch to on (1).
Cisco Nexus 9516 NX-OS Mode Switch Hardware Installation Guide
87
Replacing or Installing Modules, Fan Trays, and Power Supplies
Installing or Replacing a 3-kW Universal AC/DC Power Supply


