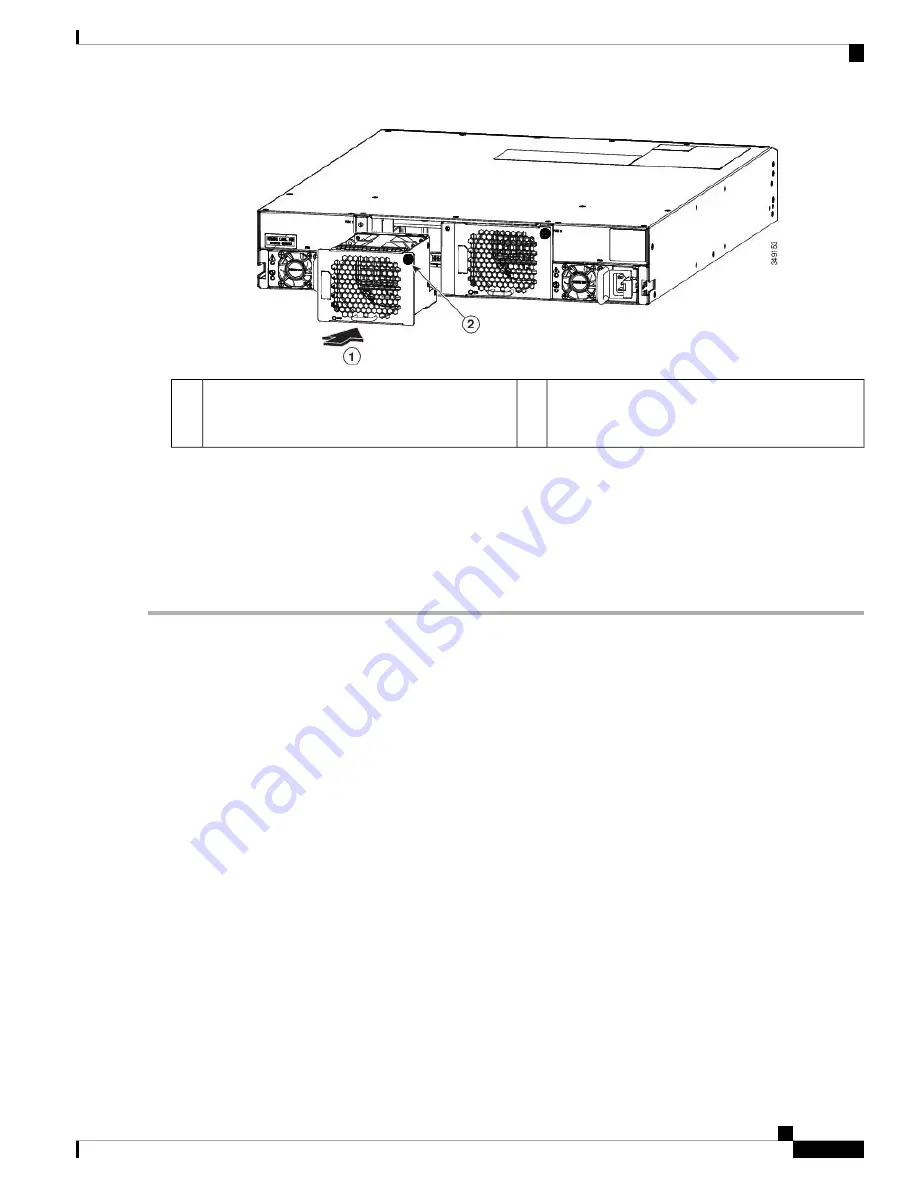
Screw in the captive screw to attach the module to
the chassis.
2
Holding the handle on the fan module, slide its
connector end into the fan slot until the front of the
fan module is touching the chassis.
1
d) Verify that the STS LED turns on and becomes green.
If the STS LED does not turn on, slide the module out of the chassis, and visually check the electrical connectors on
the back side of the chassis for damage. If damaged, contact Cisco Technical Assistance for help. If undamaged,
repeat the previous step to reinstall the module.
e) Secure the fan module to the chassis by screwing in the captive screw to the chassis. Tighten the screw to 5 to 7 in-lb
(0.56 to 0.79 N·m).
Replacing a Power Supply Module
The switch requires two power supplies for redundancy. With one power supply providing the necessary
power for operations, you can replace the other power supply during operations so long as the new power
supply has the same airflow direction as the other modules in the chassis.
You can replace a power supply with another supported power supply that has the same power source type
and the same wattage rating as the other installed power supply. Additionally, the airflow direction of the
power supply must match or conform to the airflow direction of the installed fan modules. For the airflow
direction used by the switch, see the coloring of the fan modules.
Removing an AC Power Supply
To remove an AC power supply, you must first disconnect the power cable and then remove the module from
the chassis.
Before you begin
• To replace a power supply during operations, you must have a functioning power supply providing power
to the switch while you replace the other power supply. If there is only one power supply installed in the
switch and you need to replace it, install the new power supply in the open slot and power it up before
removing the original power supply.
Cisco Nexus 9336PQ ACI-Mode Switch Hardware Installation Guide
37
Replacing Modules
Replacing a Power Supply Module


