background image

Linksys E2500

Appendix A: Troubleshooting

32

Advanced Dual-Band N Router

Appendix A: Troubleshooting

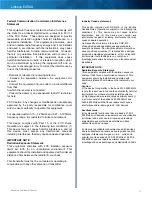
Your computer cannot connect to the Internet. 

Follow these instructions until your computer can connect 
to the Internet:

 •

Verify  that  the  power  adapter  is  connected  to  the 
Router and to a power outlet . If connected to a power 
strip, make sure the power strip is turned on .

 •

Make  sure  that  the  Power  LED,  Internet  LED,  and 
Wireless LED are on . If you have any wired computers 
connected to the Router, make sure the appropriate 
port LED is lit . 

NOTE:

 The  Power  LED  flashes  after  the  power 

adapter is plugged in to the Router . If the light 
remains  flashing  for  more  than  30  seconds, 
it  may  indicate  the  Router  is  not  working 
properly .  For  assistance,  use  a  computer  or 
device  with  Internet  access  to  refer  to  our 
Linksys  E2500  support  section  on  the  web  at  

www.linksys.com/support

 •

Make sure that your DSL or cable modem is connected 
to your Router’s Internet port using an Ethernet cable .

 •

Reset all of the devices on your network:
1 .  Turn  off  all  of  your  network  computers  and 

devices,  and  then  unplug  the  power  adapter 
from your Router .

2 .  Unplug  your  modem’s  power  cord  (and  coaxial 

cable if you have a cable modem), and wait two 
minutes .

3 .  Reconnect  your  modem’s  power  cord  (and 

coaxial cable) and wait two more minutes .

4 .  Reconnect the power adapter to the Router, and 

then  power  on  all  of  your  network  computers 
and devices .

The modem does not have an Ethernet port.

The  modem  is  a  dial-up  modem  for  traditional  dial-up 
service . To use the Router, you need a cable/DSL modem 
and high-speed Internet connection .

You cannot use the DSL service to connect manually to 
the Internet.

After  you  have  installed  the  Router,  it  will  automatically 
connect to your Internet Service Provider (ISP), so you no 
longer need to connect manually .

The  DSL  telephone  line  does  not  fit  into  the  Router’s 
Internet port.

The Router does not replace your modem . You still need 
your DSL modem in order to use the Router . Connect the 
telephone  line  to  the  DSL  modem,  and  then  insert  the 
setup CD into your computer . Click 

Set up your Linksys 

Router 

and follow the on-screen instructions .

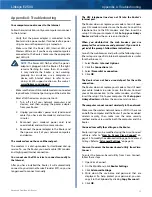
When  you  double-click  the  web  browser,  you  are 
prompted for a username and password. If you want to 
get rid of the prompt, follow these instructions.

Launch the web browser and perform the following steps 
(these steps are specific to Internet Explorer but are similar 
for other browsers):

1 .  Select 

Tools

 > 

Internet Options

 . 

2 .  Click the 

Connections

 tab .

3 .  Select 

Never dial a connection

 . 

4 .  Click 

OK

 .

The  Router  does  not  have  a  coaxial  port  for  the  cable 
connection.

The Router does not replace your modem . You still need 
your  cable  modem  in  order  to  use  the  Router .  Connect 
your  cable  connection  to  the  cable  modem,  and  then 
insert the setup CD into your computer . Click 

Set up your 

Linksys Router 

and follow the on-screen instructions .

The computer cannot connect wirelessly to the network.

Make sure the wireless network name or SSID is the same 
on both the computer and the Router . If you have enabled 
wireless  security,  then  make  sure  the  same  security 
method and key are used by both the computer and the 
Router .

You need to modify the settings on the Router.

Router settings can be modified using the Cisco Connect 
software,  refer  to  “

How  to  Access  Cisco  Connect

”  on 

page 12 . To modify the advanced settings, go to 

Advanced 

Settings

 . Refer to “

Advanced Settings

” on page 12 .

You want to access the browser-based utility  from Cisco 
Connect.

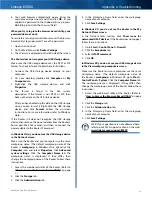
To  enter  the  browser-based  utility  from  Cisco  Connect, 
follow these steps:

1 .  Open Cisco Connect .
2 .  On the Main Menu, click 

Router Settings

 .

3 .  Click 

Advanced Settings

 . 

4 .  Write  down  the  username  and  password  that  are 

displayed .  (To  help  protect  your  password,  you  can 
copy it to the Clipboard by clicking 

Copy Password

 .)

5 .  Click 

OK

 . 

Summary of Contents for LINKSYS E2500V

Page 1: ...Linksys E2500 Advanced Dual Band N Router User Guide ...

Page 2: ...ecurity Firewall 26 Security VPN Passthrough 27 Access Restrictions Internet Access Policy 33 Applications and Gaming Single Port Forwarding 34 Applications and Gaming Port Range Forwarding 35 Applications Gaming Port Range Triggering 35 Applications and Gaming DMZ 36 Applications and Gaming QoS 36 Administration Management 39 Administration Log 40 Administration Diagnostics 40 Administration Fact...

Page 3: ...Linksys E2500 Table of Contents ii Advanced Dual Band N Router ...

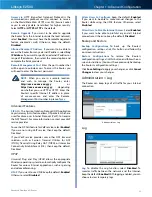
Page 4: ... 7 users will see a similar screen In the User name field enter admin Then enter the password created during the setup software If you did not run the setup software then use the default password admin You can set a new password on the Administration Management screen Refer to Administration Management on page 21 Click OK to continue Windows 7 Login Screen NOTE You can also access the browser base...

Page 5: ... cut the Internet connection after it has been inactive for a specified period of time Max Idle Time If your Internet connection has been terminated due to inactivity Connect on Demand enables the Router to automatically re establish your connection as soon as you attempt to access the Internet again To use this option select Connect on Demand In the Max Idle Time field enter the number of minutes...

Page 6: ...ternet connection has been terminated due to inactivity Connect on Demand enables the Router to automatically re establish your connection as soon as you attempt to access the Internet again To use this option select Connect on Demand In the Max Idle Time field enter the number of minutes you want to elapse before your Internet connection terminates The default is 5 minutes Keep Alive Redial Perio...

Page 7: ...ve a DHCP server on your network or you do not want a DHCP server then select Disabled no other DHCP features will be available DHCP Reservation Click DHCP Reservation if you want to assign a fixed local IP address to a specific device on your network This is helpful if you have a device you need to access at the same address all the time such as a media server or print server You can reserve the ...

Page 8: ...down menu Automatically adjust clock for daylight saving changes Select this option to have the Router automatically adjust for daylight saving time Click Save Settings to apply your changes or click Cancel Changes to clear your changes Reboot Reboot Reboot Use this option to reboot your Router Setup DDNS The Router offers a Dynamic Domain Name System DDNS feature DDNS lets you assign a fixed host...

Page 9: ...or click Cancel Changes to clear your changes Setup MAC Address Clone A MAC address is a 12 digit code assigned to a unique piece of hardware for identification Some ISPs require you to register a MAC address in order to access the Internet If you do not wish to re register the MAC address with your ISP you can use the MAC Address Clone feature to assign the currently registered MAC address to the...

Page 10: ...able For each route the Destination LAN IP address Subnet Mask Gateway and Interface are displayed Click Refresh to update the information Click Close to exit this screen Click Save Settings to apply your changes or click Cancel Changes to clear your changes Wireless Basic Wireless Settings The basic settings for wireless networking are set on this screen There are two ways to configure the Router...

Page 11: ...less N 5GHz devices in your network select Disabled Network Name SSID The Service Set Identifier SSID is the network name shared by all devices in a wireless network It is case sensitive and must not exceed 32 keyboard characters The default is Ciscoxxxxx xxxxx are the last five digits of the Router s serial number found on the product label on the left side of the Router s bottom panel The setup ...

Page 12: ...ents survey the local area for wireless networks to associate with they will detect the SSID broadcast by the Router To broadcast the Router s SSID keep the default Enabled If you do not want to broadcast the Router s SSID then select Disabled Click Save Settings to apply your changes or click Cancel Changes to clear your changes Wi Fi Protected Setup There are three methods available Use the meth...

Page 13: ...your client device asks for the Router s PIN number a On the client device enter the PIN number listed on the Router s Wi Fi Protected Setup screen It is also listed on the label on the bottom of the Router b After the client device has been configured click OK on the Router s Wi Fi Protected Setup screen Then refer back to your client device or its documentation for further instructions The Netwo...

Page 14: ...ssword The setup software that you use to install your Router and set up your wireless network changes the default passphrase WEP WEP is a basic encryption method which is not as secure as WPA IMPORTANT If you select WEP as your Security Mode each device in your wireless network MUST use WEP and the same encryption and shared key WEP Encryption Select a level of WEP encryption 64 bits 10 hex digit...

Page 15: ...ter a Passphrase enter the WEP key s manually TX Key Select a default TX Transmit Key choose which Key to use The default is 1 Click Save Settings to apply your changes or click Cancel Changes to clear your changes Wireless Wireless MAC Filter Wireless access can be filtered restricted by specifying theMACaddressesofthedevicesinyourwirelessnetwork Wireless Wireless MAC Filter Wireless MAC Filter E...

Page 16: ...e setting is not actually one rate of transmission but a series of rates at which the Router can transmit The Basic Rate is not the actual rate of data transmission If you want to specify the Router s rate of data transmission configure the Transmission Rate setting TheRouterwilladvertiseitsBasicRatetotheother wireless devices in your network so they know which rates will be used The Router will a...

Page 17: ...ceiving an RTS the wireless station responds with a Clear to Send CTS frame to acknowledge the right to begin transmission The RTS Threshold value should remain at its default value of 2347 Click Save Settings to apply your changes or click Cancel Changes to clear your changes Security Firewall The Firewall screen is used to configure a firewall that can filter out various types of unwanted traffi...

Page 18: ...tings to apply your changes or click Cancel Changes to clear your changes Security VPN Passthrough The VPN Passthrough screen allows you to enable VPN tunnels using IPSec L2TP or PPTP protocols to pass through the Router s firewall Security VPN Passthrough VPN Passthrough IPSec Passthrough Internet Protocol Security IPSec is a suite of protocols used to implement secure exchange of packets at the ...

Page 19: ...address or IP address You can also enter a range of IP addresses if you want this policy to affect a group of PCs After making your changes click Save Settings to apply your changes or click Cancel Changes to clear your changes Then click Close List of PCs 5 Select the appropriate option Deny or Allow depending on whether you want to block or allow Internet access for the computers listed on the L...

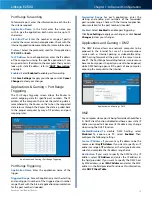
Page 20: ...ormation Internal Port Enter the internal port number used by the server or Internet application Check with the Internet application documentation for more information Protocol Select the protocol s used for this application TCP UDP or Both To IP Address For each application enter the IP address of the computer that should receive the requests If you assigned a static IP address to the computer th...

Page 21: ... Check with the Internet application documentation for the port number s needed Forwarded Range For each application enter the starting and ending port numbers of the forwarded port number range Check with the Internet application documentation for the port number s needed Enabled Select Enabled to enable port triggering Click Save Settings to apply your changes or click Cancel Changes to clear yo...

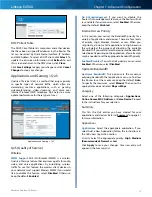
Page 22: ...eature so the Router will not re send data if an error occurs select Enabled Otherwise keep the default Disabled Internet Access Priority In this section you can set the bandwidth priority for a variety of applications and devices There are four levels of priority High Medium Normal or Low When you set priority do not set all applications to High because this will defeat the purpose of allocating ...

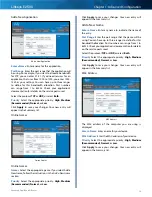
Page 23: ...ct Add a New Game follow the instructions in the Add a New Game section Priority Select the appropriate priority High Medium Recommended Normal or Low Click Apply to save your changes Your new entry will appear in the Summary list Add a New Game Enter a Name Enter any name to indicate the name of the entry Port Range Enter the port range that the game will be using You can have up to three ranges ...

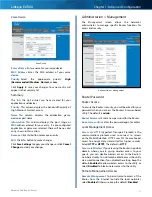
Page 24: ...s administrator to manage specific Router functions for access and security Administration Management Router Password Router Access To ensure the Router s security you will be asked for your password when you access the Router s browser based utility The default is admin Router Password Enter a new password for the Router Re enter to confirm Enter the password again to confirm Local Management Acc...

Page 25: ...r VoIP service provider To use the SIP ALG feature forVoIP service select Enabled If you are not using VoIP service then keep the default Disabled If your VoIP service provider uses other NAT traversal solutions such as Session Traversal Utilities for NAT STUN Traversal Using Relay NAT TURN or Interactive Connectivity Establishment ICE then keep the default Disabled UPnP Universal Plug and Play UP...

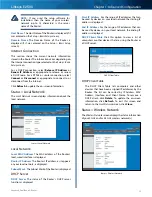
Page 26: ...ve the Log to save this information to a file on your computer s hard drive Click Refresh to update the log Click Clear to clear all the information that is displayed Administration Diagnostics The diagnostic tests Ping and Traceroute allow you to check the connections of your network devices including connection to the Internet Administration Diagnostics Diagnostics Ping Test Ping checks the stat...

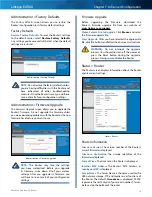
Page 27: ...ettings After you upgrade its firmware you will have to re enter all of your configuration settings Firmware Upgrade Before upgrading the firmware download the Router s firmware upgrade file from our website at www linksys com support Please Select a File to Upgrade Click Browse and select the firmware upgrade file Start Upgrade After you have selected the appropriate file click this button and fo...

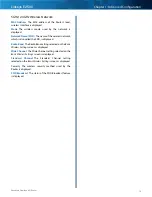
Page 28: ... Network Local MAC Address The MAC address of the Router s local wired interface is displayed Router IP Address The Router s IP address as it appears on your local network is displayed SubnetMask The Subnet Mask of the Router is displayed DHCP Server DHCP Server The status of the Router s DHCP server function is displayed Start IP Address For the range of IP addresses that can be used by devices o...

Page 29: ... network which is also called the SSID is displayed Radio Band The Radio Band setting selected on the Basic Wireless Settings screen is displayed Wide Channel The Wide Channel setting selected on the Basic Wireless Settings screen is displayed Standard Channel The Standard Channel setting selected on the Basic Wireless Settings screen is displayed Security The wireless security method used by the ...

Page 30: ...27 Advanced Dual Band N Router Linksys E2500 ...

Page 31: ...28 Advanced Dual Band N Router Linksys E2500 ...

Page 32: ...29 Advanced Dual Band N Router Linksys E2500 ...

Page 33: ...30 Advanced Dual Band N Router Linksys E2500 ...

Page 34: ...installed and operated with minimum distance 20cm between the radiator your body This transmitter must not be co located or operating in conjunction with any other antenna or transmitter Industry Canada statement This device complies with RSS 210 of the Industry Canada Rules Operation is subject to the following two conditions 1 This device may not cause harmful interference and 2 this device must...

Page 35: ...ect manually The DSL telephone line does not fit into the Router s Internet port The Router does not replace your modem You still need your DSL modem in order to use the Router Connect the telephone line to the DSL modem and then insert the setup CD into your computer Click Set up your Linksys Router and follow the on screen instructions When you double click the web browser you are prompted for a...

Page 36: ...etwork screen Make sure the Router and your computer use the same workgroup name The default workgroup name of the Router is workgroup In Windows Vista right click the Computer icon and select Properties Click Advanced system settings Click the Computer Name tab The workgroup name is displayed If they differ then change the workgroup name of the Router Follow these instructions 1 Access the web ba...

Page 37: ...11a 70 dBm 54Mbps 802 11n 20MHz 66 dBm MCS23 802 11n 40MHz 62 dBm MCS23 Antenna Gain in dBi 2 4GHz Antenna 1 right rear 2 94 dBi Antenna 2 front right 3 78 dBi 5GHz Antenna 1 right front 5 86 dBi Antenna 2 front left 4 88 dBi UPnP Supported Security features WEP WPA WPA2 Security key bits Up to 128 bit encryption Environmental Dimensions 8 86 x 1 38 x 7 09 225 x 35 x 180 mm Unit Weight 15 94 oz 45...

Page 38: ...ys are trademarks or registered trademarks of Cisco and or its affiliates in the United States and certain other countries All other trademarks mentioned in this document or website are the property of their respective owners 2011 Cisco All rights reserved ...

Reviews: