background image

Flip Solutions Ltd t/a Flip Connect 
Phone: 020 3056 5060 | Fax: 0870 421 5411 | E-Mail: [email protected] 


User Guide | Cisco 232D & 302D 

| 02/07/2014 


Configuring Phone Settings 

To reach the Settings menu, press the centre Select button, scroll to Settings, and press the Select button again. In the 
Settings menu, press the arrow buttons to select the settings you want to change and press the  Select button. You can 
perform the following tasks: 

Ringtones: 

There are 5 different ringtones. For private contacts the user can select a different melody 

Tones: 

You can configure a tone to play when keys on the handset are pressed or when a phone call 

is parked. 

Backlight Settings: 

You can configure the amount of time that the handset display screen remains lit 

before it is turned off to conserve battery power. 

Date/Time: 

The handset date and time is synchronized with the Cisco SPA232D. You can also enter 

the date and time manually from the handset. 

Handset Settings:  

A unique handset name can be defined which is reflected 

in the upper right corner of the display. The handset name is used to identify 

the SPA302D with the Intercom and handset deregistration. 

Factory Reset: 

Performing a factory reset removes all of the information from your handset (for 

example, contacts, speed dials, and call records) and restores it to the original factory software 
state. The Cisco SPA302D remains registered to the Cisco SPA232D after a factory reset, and 
must be manually deregistered. 

Phone Info: 

Information can be viewed such as Software version, IP Address, MAC Address, etc. 


Handset Registration & Update Software is described in detail below 


Pair the handset with the base station 

Described below is the process to associate the SPA302D handset to the SPA232D base station. This would be used if an 
extra handset is purchased.  

Registering the handset / Steps 


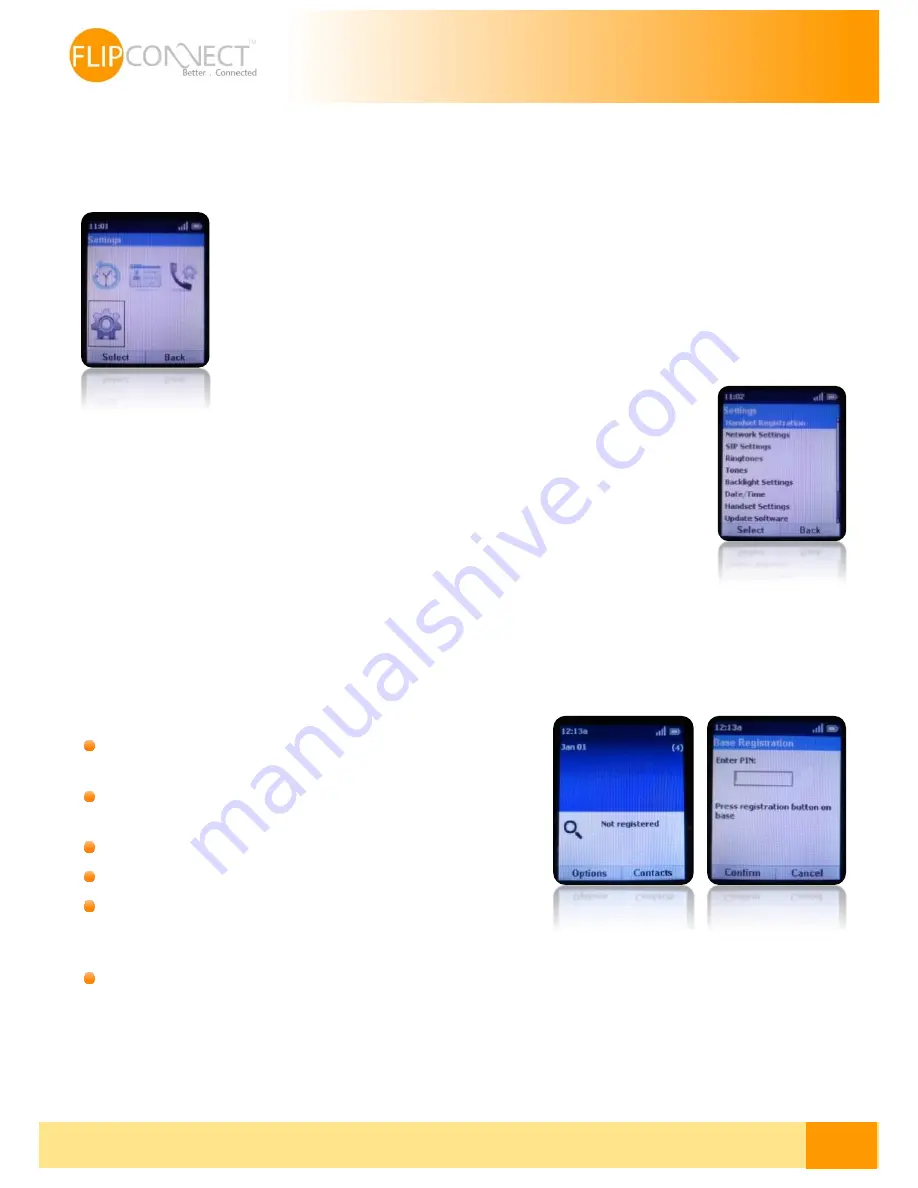
On the Cisco SPA302D handset, press the Select button in the centre 
of the 4-way navigation keypad 


Using the navigation arrow buttons, scroll to the Settings icon and 
select it. 


Select Handset Registration. 


Select Register. 


On the Cisco SPA232D, press the Page/Registration button and hold 
it down for at least seven seconds until the green status light flashes 
quickly. 


Enter the PIN code. By default, there is no PIN code (leave it blank). Then press the left softkey to confirm that you want 
to register the handset. The “registering” message appears. 

Note 1: 

To verify that the handset is registered to the base station, confirm that the DECT signal strength icon is solid (not 

flashing) and that the handset ID, such as Handset 1 (or Handset 2), appears near the top right corner of the display screen. 

Note2: 

In case that the batteries are removed from the handset or go dead the handset will still be registered on the base 

station 

Summary of Contents for 232D

Page 1: ...lip Connect Cisco 232D 302D User Guide _ Flip Solutions Ltd t a Flip Connect Unit 5 6 29 Mill Lane Welwyn Hertfordshire AL6 9EU 020 3056 5060 0870 421 5411 support flipconnect co uk www flipconnect co uk ...

Page 2: ...2D 3 Using your phone 3 Hold Call 3 Resume Call 3 Redial a call 3 Voice Mail 3 Transfer Attended Blind a call 3 Conference Call 3 Intercom Feature 4 Contacts Private Shared 4 Configuring Call Settings 4 Speed Dials 4 Call Preferences 4 Call Forwarding 4 Configuring Phone Settings 5 Pair the handset with the base station 5 Registering the handset Steps 5 Upgrade the handset SPA 302D Software 6 Who ...

Page 3: ...2 07 2014 Introduction Cisco 232D and 302D This user guide will help you to navigate and use your new DECT handset and base station It will give you an overview of your phone and walk you through tasks so you can successfully use your phone to perform basic and advanced phone functions Handset and Base Station Rear View of Base Station ...

Page 4: ...l appear and this can now be selected To access the voice mail press and hold the 1 and then press the Select option on the left softkey Then follow the instructions in order to access your voice mail Transfer Attended Blind a call Conference Call Press the left softkey to select Options Scroll to Transfer or Blind Transfer and press the Select button Enter the number that the call is being transf...

Page 5: ...s menu press the centre Select button scroll to Call Settings and press the centre Select button again In the Call Settings menu press the up and down arrow buttons to select the settings you want to change and press the Select button Available configuration options are described in the following sections Speed Dials Call Preferences You can configure up to 9 speed dials numbers 2 through 9 and 0 ...

Page 6: ...nd call records and restores it to the original factory software state The Cisco SPA302D remains registered to the Cisco SPA232D after a factory reset and must be manually deregistered Phone Info Information can be viewed such as Software version IP Address MAC Address etc Handset Registration Update Software is described in detail below Pair the handset with the base station Described below is th...

Page 7: ...the upgrade a message appears indicating the status of the upgrade for example if the upgrade succeeded Press Reset to reboot the handset Note 1 If the upgrade fails press Reset to reboot the handset Check the status lights on the Cisco SPA232D to make sure the unit is powered on and functioning Repeat the upgrade Note 2 If the handset has a software version less than 2 55 2 40 or 2 50 this proces...

Reviews: