Cirus Controls DB-02 Installation And Operation Manual Download Page 15


h.


Click on express setup. Change the SSID to “DRIVEBYDOWNLOAD” 

i.


Select WLAN security type to “Enabled”. Cirus default encryption is Wep 64- 

key 1 is “8B0EA37480” 
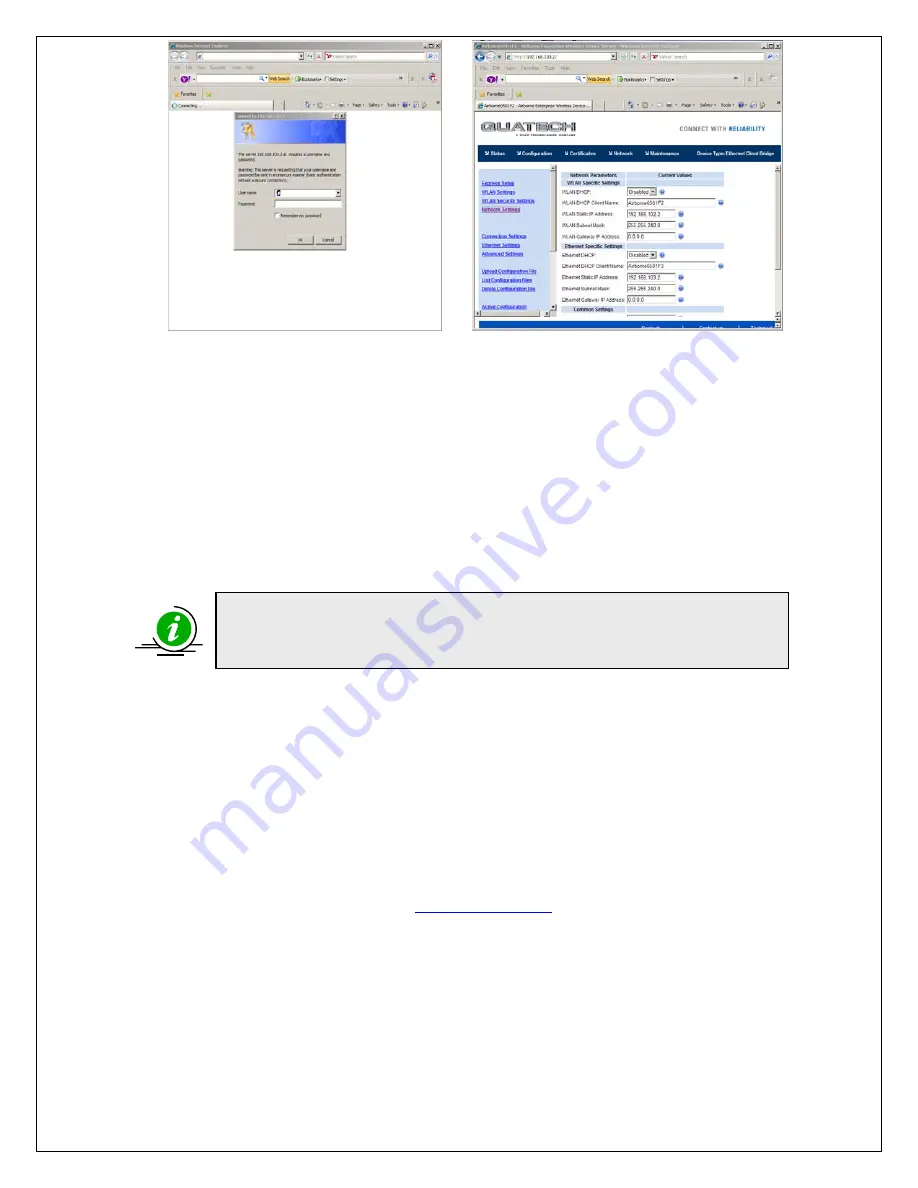
j.


Set WLAN DHCP  & Ethernet DHCP to disabled 

k.


Set the WLAN address to the same as the Spreadsmarts IP address 

l.


Set the Ethernet static IP address to the bridge IP address on the silver sticker.  

m.


Set the WLAN and Ethernet subnet to 255.255.240.0 

n.


Change the Telnet port to 9023. Press commit & restart 

o.


Configuration is now completed 


Configuring the DB-02 Access Point DLINK DWL-2100AP 


1.


Connect the power adapter to the receptacle on the back panel, and then plug the 
other end of the power adapter to a wall outlet (120Vac) or power strip.   

2.


Insert in one end of the Ethernet cable into the Ethernet port on the back panel of the 
access point, and the other end of the cable into your computer. 

3.


Set computer to talk to the access point in the 

Configuring the computer to talk to 

the Bridge/Access Point” section

,

 use IP address 192.168.0.51.


4.


Open your web browser and type 

http://192.168.0.50


for the DWL-2100AP. Press 

ENTER

 to connect. 


Rev C 

Page 15 

11/30/2011 

Copyright © 2011 by Cirus Controls, LLC.   All Rights Reserved. No part of this material may be 
reproduced in any form without the express written permission of Cirus Controls LLC. 


NOTE: determine whether the Bridge IP address changed. To confirm that 
the settings took place you will need to set your computer to be in the same 
subnet as what was just programmed into the device.


Summary of Contents for DB-02

Page 1: ...P Access Point Installation and Operation Manual Rev C Page 1 11 30 2011 Copyright 2011 by Cirus Controls LLC All Rights Reserved No part of this material may be reproduced in any form without the exp...

Page 2: ...stem 5 Pre Delivery 6 Step 1 Wireless Ethernet Bridge Install 6 Step 2 Installation Removal of Digital Storage Card 7 Step 3 Base Station Hardware Installation computer side 9 Step 4 Base Station Comp...

Page 3: ...tory The repair or replacement of defective parts under this warranty will be made without charge to the owner except for transportation of the part to our authorized repair location What is not cover...

Page 4: ...lowing items 1 One DWL 2100AP Access Point 2 One 120Vac Power adapter 3 One Ethernet cable Unpack the wireless devices that were ordered and compare the contents with the items listed above If any of...

Page 5: ...martTM and DatasharkTM systems The CC501 2100AP is shipped from Cirus Controls ready to use Should you need to change any of the preconfigured settings refer to the configuration section Signal Flow C...

Page 6: ...b or on the dashboard In either case the wireless bridge must be installed in a protected location where the antenna is visible through the windshield Choose the location with cable length in mind wit...

Page 7: ...torage Card Shut off the power and remove the 4 screws on the access plate that has the Drive By Data port figure 2 0 Grasp the opposite end plate by the silver handle and carefully slide out the PC b...

Page 8: ...nect all previously attached cables keypad LCD hydraulic sensor and power cables 6 Insert the RJ 45 plug on the bridge into the Drive By Data port figure 2 2 Make sure the cable latches clicks to prev...

Page 9: ...cable into the Ethernet port on the back panel of the access point and the other end of the cable into your network switch router or computer 3 When both cables are connected and a link is establishe...

Page 10: ...ow ready to send receive data via from the access point 8 Open your web browser and type the IP address that is located on the silver sticker on top of the access point into the address bar and press...

Page 11: ...IP address and the DNS server values are present verify that the Internet works if the Internet is available If it does proceed to step 10 if not verify settings this needs to work before proceeding...

Page 12: ...ettings did not take effect You may not have clicked the Save button on the AMC page Click this button after making your changes on the page After changing the Bridge s static IP address the AMC stops...

Page 13: ...C Install the Quatech CD only if the AMC utility is not installed on the computer you re using Note if the DataManagement Suite is 3 8 this will be located in C Program Files Cirus Controls Data Manag...

Page 14: ...t settings f Under the tree view you should see an IP address of 169 254 2 100 This is the CC501 bridge Right click on OEM cfg 1 followed by connectivity tools launch web browser g Type dpac for usern...

Page 15: ...wer adapter to a wall outlet 120Vac or power strip 2 Insert in one end of the Ethernet cable into the Ethernet port on the back panel of the access point and the other end of the cable into your compu...

Page 16: ...7480 leave all other keys blank verify that your typing is correct Press OK and recycle the system 9 Retype in the username admin and password CIRUS this will bring you back to the home page Rev C Pag...

Page 17: ...the settings affected by installing a Drive by Download TM system IP Address Rev C Page 17 11 30 2011 Copyright 2011 by Cirus Controls LLC All Rights Reserved No part of this material may be reproduc...

Page 18: ...o take messages destined for components outside of it s own subnet and hand them off to the upstream message handler who then determines what to do with it Gateways are commonly referred to as routers...

Page 19: ...unicate with each other Gateway The gateway was discussed in the previous section Its function is to pass messages from its own subnet to other subnets In order for it to receive messages from its own...

Page 20: ...allows people to just plug into a network jack and get a live Internet connection This works through a protocol called DHCP or Dynamic Host Control Protocol Basically when a computer connects to a phy...

Reviews: