CR:270 Series User Manual
Page 13
Calibration
It is vital that the calibration of ANY sound level meter is checked before and after each
measurement. If this is done, it is reasonable to assume that the calibration during the
measurement was correct. If this is NOT done, you will not subsequently be able to be
certain that the instrument calibration was correct and you can never be certain the
sound level was as measured.
The sound level meter is calibrated acoustically using an external reference, e.g the
Sound Level Calibrator CR:511E, which is placed over the microphone. This calibrator
generates a stabilised Sound Pressure of 94dB (+- 0.3dB) at a frequency of 1kHz.
Recommended Calibrators
The normal field calibrator is the CR:511E which meets the requirements of IEC 942.
The gain of a sound level meter is the same for all weighting networks and thus it can
be calibrated on dBA or dBC. However, a calibration correction is required for different
microphones.
The CR:272 and CR:274 instruments are fitted with the MK:215 microphone capsule,
whilst the CR:271 and CR:273 instrument are fitted with the MK:224 capsule. Both of
these microphones have a calibration correction of -0.3dB. Refer to the Acoustic
Calibrator manual for details.
This correction is required because of the differing pressure and free field sensitivities of
the microphones. Thus with an MK:215 and CR:511E set on 94 dB, the instrument
should be adjusted to read 93.7 dB.
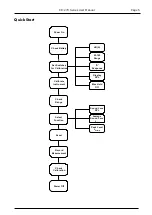
Procedure
Remove any dust cover or windshield from the microphone, and fit the correct adaptor
to the acoustic calibrator.
Check that the battery in the sound level meter is adequate. If not, replace the battery
before calibrating the instrument.
Turn on the calibrator and check that the battery condition is adequate in the calibrator
by turning it on. A 1kHz signal should be audible and if the Green LED is lit, the
calibration signal is accurate.
Place the calibrator over the microphone and select a suitable measurement range on
the sound level meter. This range should be the one that covers the 94dB calibration
level.
Select the SPL Measurement Function, and ensure that the Maximum Hold function is
switched off.
Now adjust the front panel CAL potentiometer so that the scale reading is 94dB minus
the correction factor ie 93.7dB


