background image


Electronic Chlorine Generator 

RJ

+

 PLUS

 Series


Summary of Contents for RJ PLUS series

Page 1: ...Electronic Chlorine Generator RJ PLUS Series ...

Page 2: ...Installing the Control Module 7 Wiring 7 Adding Salt 10 Installation Checklist 12 OPERATION How it Works 12 Initial Start Up 13 General Operation 13 Using the Control Module 14 MAINTENANCE General Maintenance 17 Ideal Chemistry Levels 17 Maintaining the Electrolytic Cell 19 VOLTAGE CONVERSION 21 HELPFUL HINTS 22 TROUBLESHOOTING 24 WARRANTY 26 TABLE OF CONTENTS ...

Page 3: ...ing your new unit Your generator must be installed and operated as specified READ ENTIRE MANUAL FIRST As with any electrical device it is very important that the installation and service of this equipment be performed by a qualified person with the skills and experience required to do it safely and correctly Improper installation or service can result in severe electrical shock to the installer or...

Page 4: ... a minimum water flow rate of 20 gpm Never operate the unit when the flow of water is restricted Always turn unit off when operating any plumbing control valves such as for backwashing water exhaust or during operation of spa or water features if operation restricts water flow to the cell A build up of flammable gases will result in hazardous conditions WARNING We strongly recommend against the us...

Page 5: ...AGE is equal to the volume of the spa water in gallons divided by 10 times the maximum number of daily spa users Refill spa with water and repeat initial startup instructions on page 13 of this manual Ensure that the RJ PLUS Series installation does not constitute a cross connection with the local potable water supply Consult local plumbing codes Note Some local codes may require external groundin...

Page 6: ...chlorine as the water inside passes through and returns to the pool The Electrolytic Cell Cell contains a set of titanium plates that use a low level of electrical power to generate chlorine from salt in the water The Cell comes with Unions to connect to the plumbing each Union has a Threaded Collar that secures the Cell to the Unions and enables the Cell to be easily removed for cleaning and insp...

Page 7: ...before cutting and gluing The Cell and Flow Switch are to be fitted into the return line as the last pieces of equipment the water passes through before returning to the pool always after the pump filter heater if applicable etc If a heater is present all equipment must be a minimum distance away per heater manufacturer recommendations Lay out your equipment to ensure there is enough pipe space av...

Page 8: ... Cell measure out and mark the selected area 1 To install the Flow Switch cut out a section of pipe at the desired installation location Use PVC Primer to clean and prepare the pipe ends and interior of Flow Switch Using plumbing Solvent Cement glue the Flow Switch to the pipe ends Ensure excess glue does not become affixed to movable parts within Flow Switch IMPORTANT To insure proper operation v...

Page 9: ... pool edges and follow all applicable codes Verify that the Cell and Flow Switch cables can reach the Control Module from the section of pipe selected for plumbing Overview Using screws secure the Control Module s mounting bracket at a comfortable level on a wall or vertical support at least 3 feet above ground level Hang Controls on bracket Minimize direct exposure to rain sunlight water runoff a...

Page 10: ...r Source The Control Module comes with an un terminated Power Cord AC Input which is typically connected to an external timer which will turn the pump and Control Module on and off together Have the Control Module wired to the load side of the timer by a qualified person See the following diagram for typical wiring See voltage warning on page 9 The RJ Series is shipped from the factory with a 240 ...

Page 11: ...necting At this point this installation of your equipment is complete If the water has not yet been prepared then you are ready to begin adding salt and balancing your water chemistry Turn to Control Module to the Power Off mode until enough salt has been added to the water The following information will give you more information about the process of adding salt Be sure to familiarize yourself wit...

Page 12: ...nown as Water Conditioning pellets is an economical way to buy large quantities of salt However only salt that is at least 99 pure NaCl can be used Pellets are compressed forms of evaporated salt that may take longer to dissolve Avoid using salt with anti caking agents Sodium Ferrocyanide also known as YPS or Yellow Prussiate of Soda that could cause discoloration of fittings and surface finishes ...

Page 13: ...longevity of the cell The salt in your pool is constantly recycled and the loss of salt throughout the swimming season should be small This loss is due primarily to the addition of extra water to replace water lost from splashing backwashing and draining Salt is not lost due to evaporation Calculating Gallons Measurements in Feet Rectangular Length x Width x Average Depth x 7 5 Round Diameter x Di...

Page 14: ...your pool from the salt molecules NaCL in your water A small electric charge is applied across a set of titanium plates inside the Electrolytic Cell This produces Sodium Hypochlorite NaOCl In water Sodium Hypochlorite dissociates into sodium NA and hypochlorite OCl ions It is the hypochlorite ions that form with the hydrogen H ions from the water to form hypochlorous acid HOCl which is the active ...

Page 15: ...ned it should only take minor adjustments throughout the season General Operation By familiarizing yourself with the operation of the RJ PLUS Series you can achieve the maximum performance for your pool There are typically three factors that you can control which directly contribute to the free chlorine level that will be available in the pool 1 The chosen percentage of Chlorine Output on the Cont...

Page 16: ...ine production in order to customize operation for your pool s needs 3 Super CL Temporarily boosts Chlorine Output to Maximum Power for 24 hours or until power is removed from the system 4 Salinity Displays the average measurement of the most recent salinity levels in the pool water The average is constantly being updated by real time salinity readings TIP When first installed this reading may dis...

Page 17: ...are revision level 7 Cell Version LED INDICATOR LIGHTS Power Located on the Power Button this LED indicates that the Control Module is receiving input power when illuminated SAFETY TIP Using the Power Button to turn the system OFF does not remove power from the control box Always disconnect power at the circuit breaker prior to attempting any service procedure Generate This LED is illuminated duri...

Page 18: ...alt level is too high and the Cell has shut down The pool water must be diluted with fresh water before operation is restored See also Check Cell below Check Cell This LED is illuminated when Cell efficiency is greatly reduced When illuminated the Cell has stopped producing chlorine The Electrolytic Cell must be inspected and cleaned remove power from the system and clean Cell according to the ins...

Page 19: ...cell may require more frequent cleaning see below If the Check Cell LED remains on after a thorough cleaning it may require additional cleaning or the cell may be at the end of its life cycle and may require replacement See Maintaining the Electrolytic Cell for cleaning instructions Ideal Water Chemistry Levels It is important to maintain these chemistry levels in order to ensure that the pool can...

Page 20: ...st and recommend methods of removal Chloramines Chloramines should not be present in pool water When organic materials are not fully oxidized by Free Chlorine Chloramines are formed This ties up the Free Chlorine in your pool and does not allow the chlorine in your pool to disinfect Chloramines also cloud pool water and burn the eyes Super Chlorinate shock to remove Chloramines at the initial star...

Page 21: ...aning Cap sold separately available at www circupool com and orient the Cell vertically Place on the ground and stabilize so as to remain upright and prevent spilling 2 In a separate bucket mix one part muriatic acid into four parts water Pour this weak acid solution directly into Cell Ensure that the cleaning solution COMPLETELY fills the inside of the Cell 3 Allow solution to soak for NO MORE TH...

Page 22: ... capable of withstanding any winter weather and does not need to be removed Spring Start up When opening the pool after a period of inactivity do not power on and use the chlorine generator until the pool s water chemistry has been balanced and brought to ideal levels Replacing the Cell When the titanium blades inside the Electrolytic Cell have reached the end of their lifespan replacements are av...

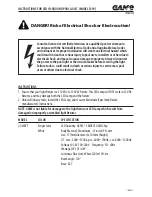
Page 23: ... ordered If 120VAC is needed move the internal jumpers as shown below If unsure seek professional advice This set of terminal screws can be located inside of the Control Module and accessed by removing the six screws from the Control Module s aluminum base The factory voltage setting is the 240V configuration with a jumper clip inserted between the second and third terminals The Control Module can...

Page 24: ...ints Recommended List Read and keep your manual in a safe place Increase Chlorine Production when temperature goes up Increase Chlorine Production when number of guests goes up Use Stabilizer Cyanuric Acid to protect free chlorine in pool Mount Control Module in shade or out of the direct sunlight whenever possible Decrease Chlorine Production when temperature goes down Take pool water sample to a...

Page 25: ... to the water to provide proper bacteria and algae control Chlorine Residual The amount of chlorine left over after the demand has been met Combined Chlorine Weak chlorine which is combined with the contaminants in the water Free Chlorine Active chlorine in the water with the potency to destroy contaminants Shock Treatment The removal by means of oxidation of those materials that have chlorine dem...

Page 26: ...emistry was not balanced prior to system installation and a high chlorine demand persists Contact pool professional ensure all chemicals on p 17 are within range chemically shock pool if necessary System is connected to incorrect voltage and is not operational Have a professional test power source and ensure correct connection Check Cell LED is on Has priority over salinity LED indicators if also ...

Page 27: ...ormal rest cycle No action is required Will rise after rest cycle or raising output Incorrect voltage Have professional check wiring Incorrect Cell Version set Verify Cell Version in Status Menu No Flow Lo Salt High Salt or Check Cell LED on See above Cell frequently has mineral buildup This is due to imbalanced water chemistry and a high Saturation Index Ensure that your Saturation Index is at or...

Page 28: ...p Warranty claims must be initiated in a timely manner Upon discovery of a defect the warranty department will issue a Return Merchandise Authorization RMA and defective items and parts are to be shipped by customer to an authorized service representative freight prepaid Upon examination the determination of the cause of failure shall be made solely by CircuPool Products The date upon which the cl...

Page 29: ...lems resulting from tampering accident fire flood freezing lightning insects or other natural elements or other circumstances beyond the control of CircuPool Products G Damage due to over tightening of threaded components or excessive pressure or stress The liability of CircuPool Products shall not exceed the repair or replacement of defective items or parts under the referenced limited warranty t...

Page 30: ...28 RJ PLUS Series Owner s Manual Notes ...

Page 31: ...29 ...

Page 32: ...30 For models RJ 16 RJ 20 RJ 30 RJ 45 RJ 60 ...

Reviews: