background image

17


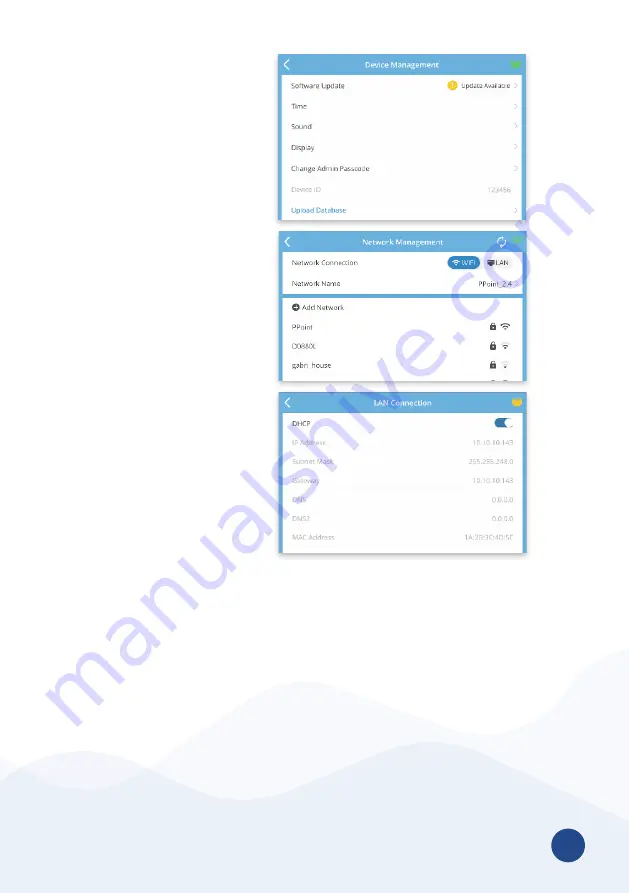
 f.   Device  ID 

The number used to 

identify the clock in the 

uAttend portal . 


 g.   Upload  Database 

This will send your 

database to Workwell 

Technologies for 

diagnostic purposes . 

3. Network

  a. Network Connection: 
  i . 

WiFi

       1 .  Scroll the list 

of available 

networks to locate 

your network’s 

name . 

       2 .  Use the onscreen 

keyboard to 

enter your WiFi 

password and 

press 

Next .


     3 .   The  screen 

will display a 

confirmation 

that the clock is 

connected to your 

WiFi network . 

  ii . 

LAN

       1.  The configuration for your 

LAN network will be displayed 

on this screen . 

4. Support

   a .  A screen will display showing the methods for requesting 

support . 

Summary of Contents for uAttend DR Series

Page 1: ...DR Series Time Clocks Product Manual DR2000 Voice Control and Facial Recognition DR2500 Voice Control Facial Recognition Temperature Reader...

Page 2: ...04 EMPLOYEES 7 05 TEMPERATURE READER SETTINGS 8 06 TIME CLOCK ACTIVATION 10 07 WALL MOUNT 13 08 FACE TEMPLATES 14 09 MENUS 15 10 TROUBLESHOOTING 18 11 LIMITED WARRANTY 19 12 SAFETY INFORMATION 20 13...

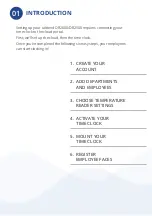
Page 3: ...et up the cloud then the time clock Once you ve completed the following six easy steps your employees can start clocking in 1 Create Your Account 3 CHOOSE TEMPERATURE READER SETTINGS 4 Activate Your T...

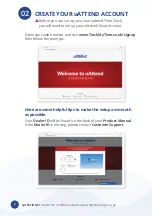
Page 4: ...the prompts Here are some helpful tips to make the setup as smooth as possible Your Dealer ID will be found on the back of your Product Manual If the Dealer ID is missing please contact Customer Supp...

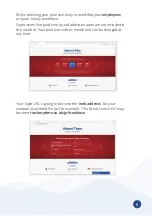
Page 5: ...pervisors not paid hourly and administrators are not included in this number Your plan is month to month and can be changed at any time Your login URL is going to become the web address for your compa...

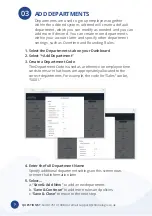
Page 6: ...mployees together within the uAttend system uAttend will create a default department which you can modify as needed and you can add more if desired You can create more departments within your account...

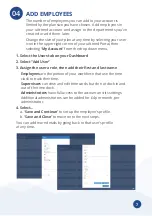
Page 7: ...ded for 4 per month per administrator 4 Select a Save and Continue to set up the employee s profile b Save and Close to move on to the next steps You can add more details by going back to that user s...

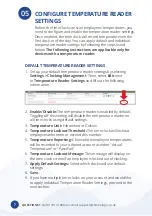
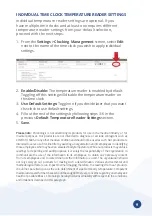
Page 8: ...be recorded in your uAttend account as either Actual Temperature or Pass Fail 6 Temperature Lockout Message This message will display on the time clock screen if an employee is locked out of clocking...

Page 9: ...ntended to diagnose or exclude contagions such as COVID 19 SARS oranyothermedicalconditionandshouldnotbeusedassuch Ourproductsare intended to serve as a first line filter by assisting an organization...

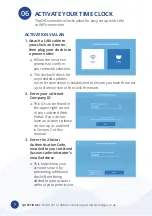
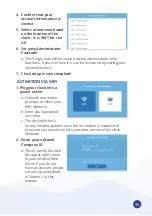
Page 10: ...sion of the clock firmware 2 Enter your uAttend Company ID a This ID can be found in the upper right corner of your uAttend Web Portal If you do not have an account please set one up as outlined in Se...

Page 11: ...k setup is now complete activation via WiFi 1 Plug your clock into a power outlet a Follow the onscreen prompts to select your WiFi Network b Enter your password onscreen c The clock will check for an...

Page 12: ...ng any additional clocks from being added to your account without your permission 4 Confirm that your account information is correct 5 Select a time zone based on the location of the clock it is GMT f...

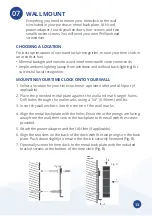
Page 13: ...a location for your time clock near a power outlet and LAN port if applicable 2 Place the provided metal plate against the wall and mark target holes Drill holes through the wall marks using a 1 4 6...

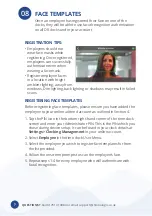
Page 14: ...dows may result in failed scans REGISTERING FACE TEMPLATES Before registering face templates please ensure you have added the employee to your online uAttend account as outlined in Section 4 1 Tap the...

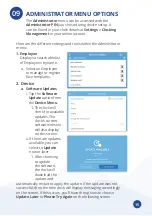
Page 15: ...plates 2 Device a Software Updates i Tap the Software Update option from the Device Menu 1 The clock will check for available updates The clock s current software version will also display on this scr...

Page 16: ...setting for all sounds on the clock iii Time Clock Voice Select the voice for confirmations on clockings or disable this entirely d Display i Brightness Level The default brightness level of the scree...

Page 17: ...on i WiFi 1 Scroll the list of available networks to locate your network s name 2 Use the onscreen keyboard to enter your WiFi password and press Next 3 The screen will display a confirmation that the...

Page 18: ...erver CANNOT ACCESS THE INTERNET If a clock is connected to the local network but is unable to communicate with the Internet CANNOT LOCATE UATTEND SERVER USING DNS If a clock is not able to properly r...

Page 19: ...body temperature While our products may archive readings for reporting and audit purposes it is solely the responsibility of the organization to communicate the use of the information to its employees...

Page 20: ...ock into its own electrical outlet 7 Do not operate the time clock with a damaged cord or plug 8 If an extension cord is used the marked electrical rating of the extension cord should be at least as g...

Page 21: ...s Dimensions W 7 1 2 H 7 3 16 D 1 1 4 DR2500 Weight 11 3oz DR2000 12 5oz DR2500 Power DC 5V 2A cord length 5 8 Operating Temperature 0 45C Operating Humidity 20 80 Screen 5 Speaker 1W internal PIN on...

Page 22: ...hide the on screen keyboard 5 Press the Next button If your network does not appear on the list hidden network tap the Add Network button to manually enter the network information 6 Enter the SSID for...

Page 23: ...rewalls security or filtering rules No Response from DHCP Server Make sure the network is configured to use DHCP to assign connected devices an IP address Make sure the network is not blocking access...

Page 24: ...Call 01761 410084 Email support chronologic co uk Visit help portal uattend co uk Designed Developed and Supported by Workwell Technologies Inc Workwell Technologies Inc All rights reserved 2777 Loke...

Reviews: