Warning! If not avoided, the following could result in death or serious injury.
•
Only use this frame with the specified products.
•
Safety straps must be used when stacking two or more rigging frames.
•
Always install safety straps when the frame and projector are installed overhead.
•
Do not stack empty frames.
•
Projectors must be installed in frames before stacking.
Notice. If not avoided, the following could result in property damage.
•
Use appropriate packaging when shipping the product installed in the frame.
Preparing the projector
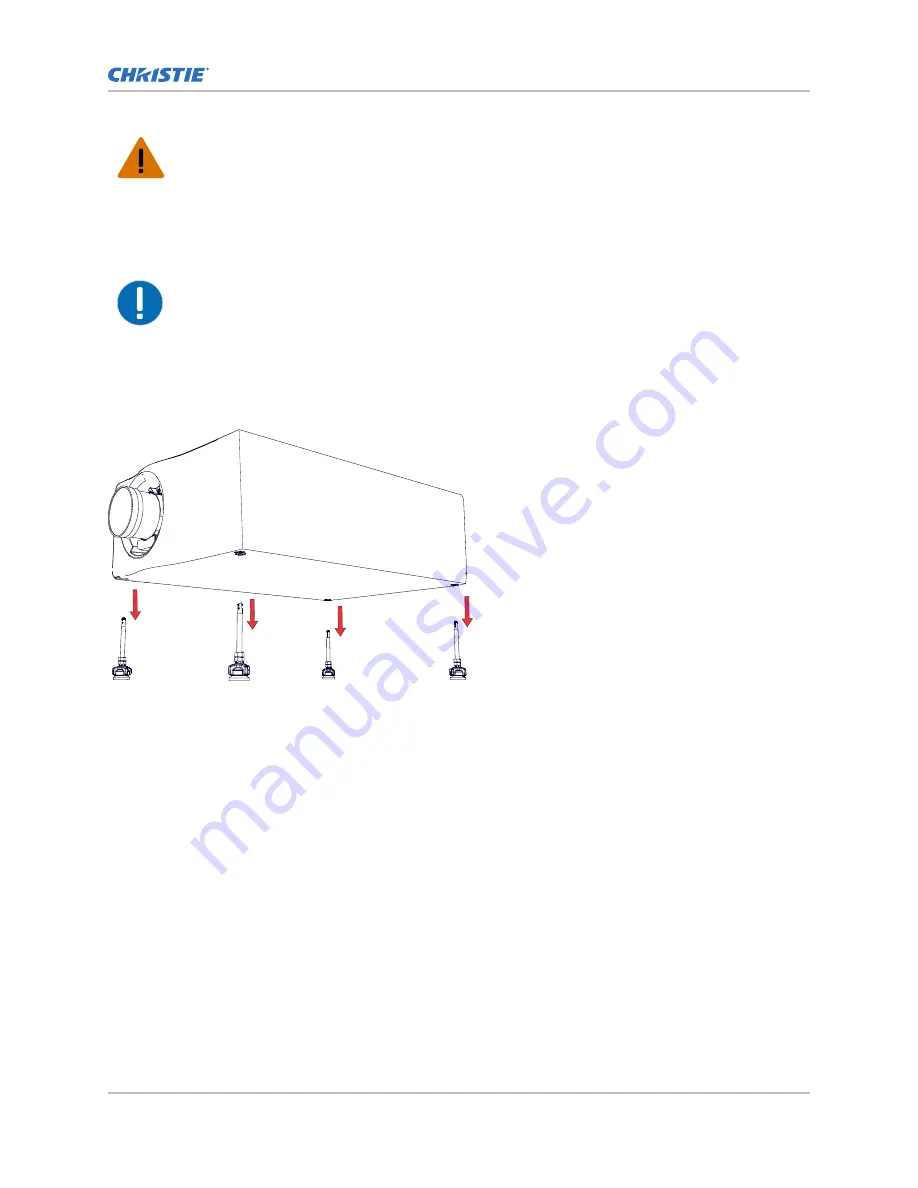
Remove the projector feet prior to installing it into the adapter plate.
1. Ensure the projector is in a secure position.
You can set the projector on a table in portrait orientation with the user interface facing up.
Christie does not recommend having the projector overhang when removing the feet, unless
the projector is securely positioned.
2. Loosen the lock nuts on the feet.
3. Uninstall the feet.
Securing the adapter plate to the projector
Secure the projector to the adapter plate before installing in the rigging frame.
1. If installed, remove the lens and fiber strain relief, and uninstall the fiber connection.
2. Position the adapter plate on the bottom of the projector.
3. Align the two countersink holes with the two threaded holes in the projector as per the
required configuration.
Installing the Mirage SST Rigging Frame Adapter Plate
Installing the Mirage SST Rigging Frame Adapter Plate Instruction Sheet
2
020-103164-02 Rev. 1 (08-2019)
Copyright
©
2019 Christie Digital Systems USA, Inc. All rights reserved.


