


Installing the touch panel
The touch panel controls projector functions and provides quick access to projector information.
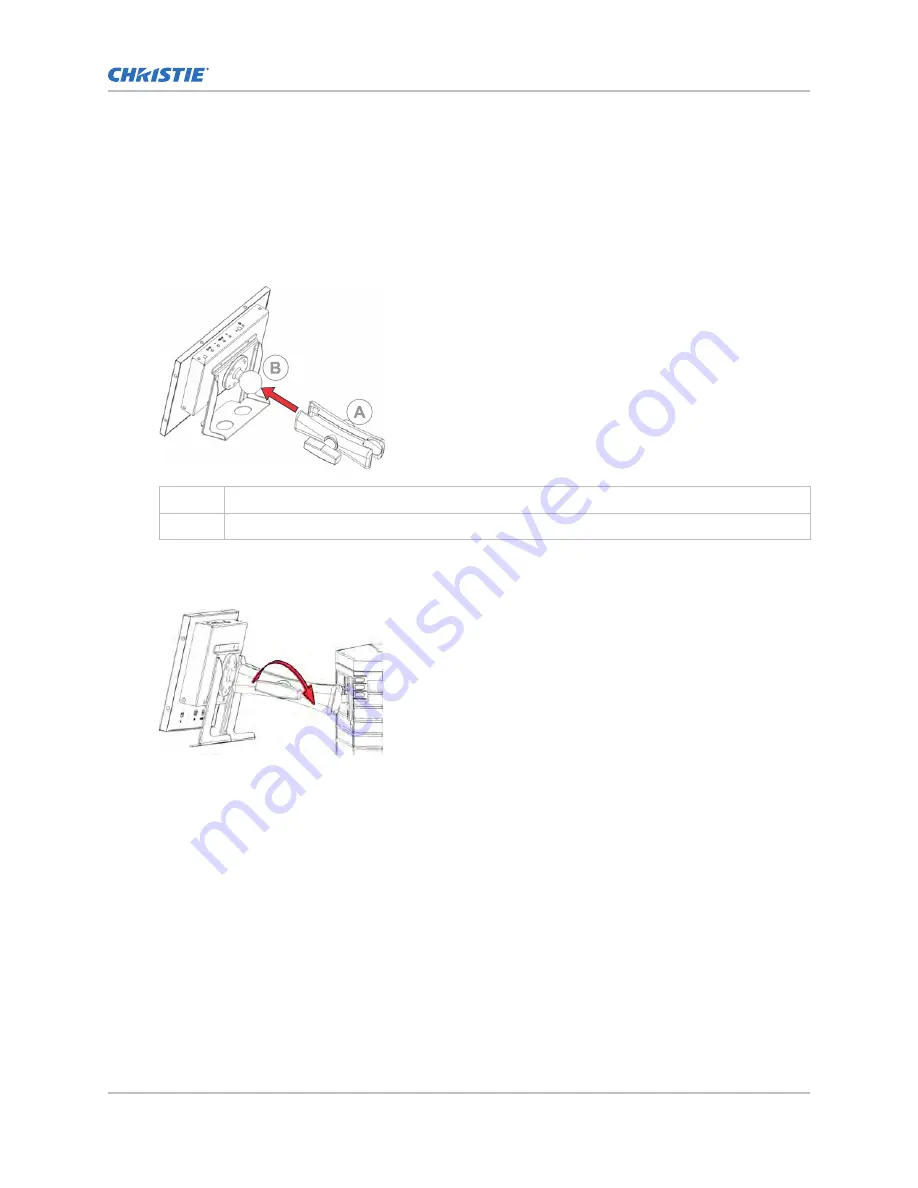
1. Remove the touch panel and the mounting arm from their packaging.
2. Attach one end of the touch panel mounting arm over the ball joint on the rear of the touch
panel.
A
Mounting arm
B
Ball joint
3. While supporting the touch panel, fit the other end of the touch panel mounting arm over the
ball joint on the rear panel or electronics side of the projector.
4. Tighten the mounting arm until it fits tightly on the ball joint.
5. Connect the touch panel harness to the touch panel:
a) Connect one end of the USB cable to the USB port on the rear of the touch panel.
b) Connect one end of the touch panel power cable to the DC IN 12V port on the rear of the
touch panel.
c) Connect one end of the VGA connector to the VGA port on the rear of the touch panel.
6. Connect the touch panel harness to the projector:
7. To turn the touch panel on, press the power button on the top of the panel.
Projector power modes
The CP2309-RGB projectors track laser operation hours for the laser optical sub-system (LOS).
The projector operates with the following power modes:
Installing and setting up
CP2309-RGB Installation and Setup Guide
22
020-103078-01 Rev. 1 (06-2019)
Copyright
©
2019 Christie Digital Systems USA, Inc. All rights reserved.
Summary of Contents for CP2309-RGB
Page 1: ...Installation and Setup Guide 020 103078 01 CP2309 RGB...
Page 44: ......


