


RSM Elite Series Projector Mounts
Installation Instructions
10
PROJECTOR INSTALLATION
WARNING:
IMPROPER INSTALLATION CAN
LEAD TO PROJECTOR FALLING RESULTING IN
SERIOUS PERSONAL INJURY OR DAMAGE TO
EQUIPMENT. DO NOT substitute hardware. Use only
the hardware provided by the manufacturer.
1.
Secure interface bracket to mount using installation
instructions and hardware provided with interface
bracket.
NOTE:
Interface brackets can be installed using the
optional All-Points Security Kit from Chief.
Contact a Chief customer service
representative for additional information.
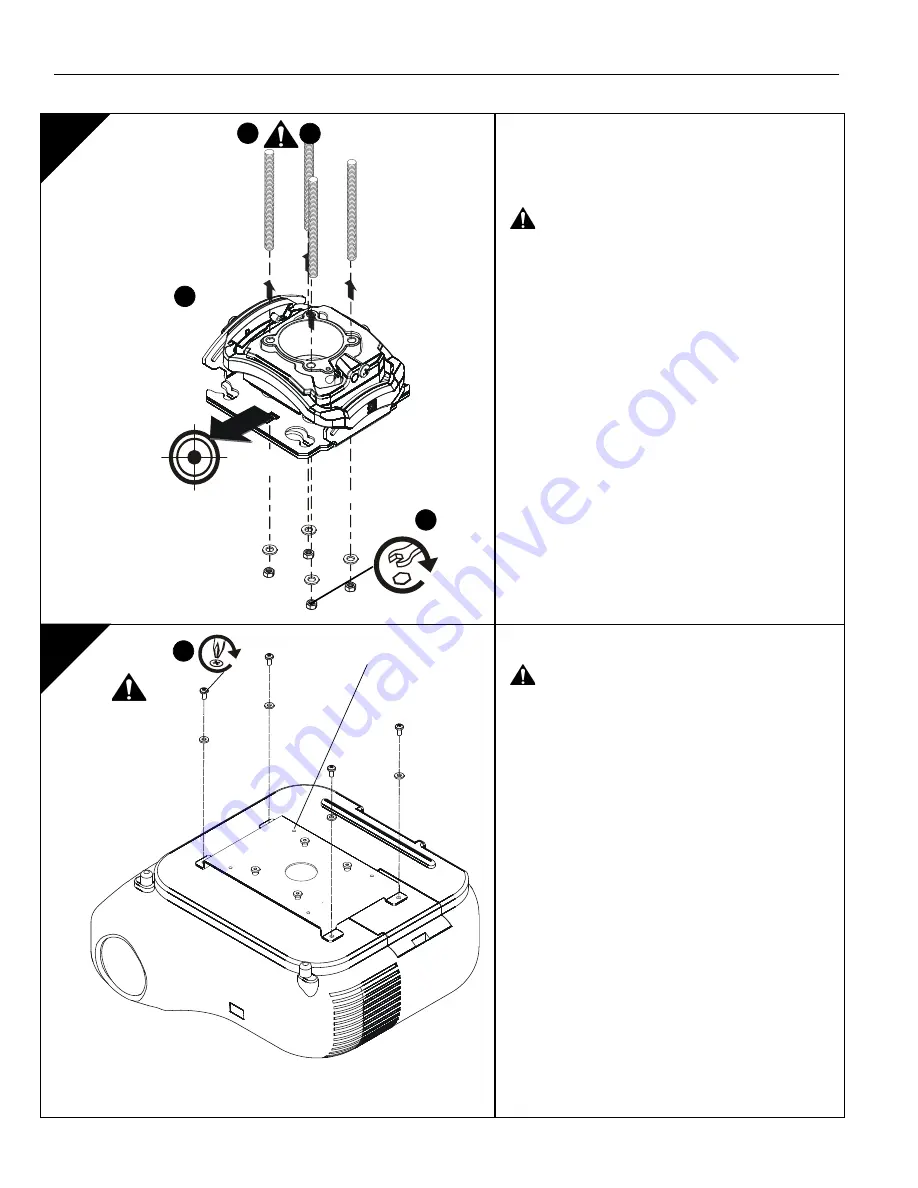
Threaded Rod Installation
The RSM can be secured to unistrut, angle or channel
assembly overhead structural members (trusses or I-
beams) using four #10-24 diameter threaded rods.
WARNING:
IMPROPER INSTALLATION CAN
RESULT IN SERIOUS PERSONAL INJURY OR
DAMAGE TO EQUIPMENT! Structural members
MUST
be capable of supporting five times the
combined weight of all equipment being mounted.
1.
Carefully determine required mount position.
IMPORTANT ! :
This will require knowing the lens
to screen distance. See projector specifications
for determining this distance.
NOTE:
Threaded rod and installation hardware not
included.
2.
Secure one end of the threaded rod to the structural
member.
3.
Install four #10-24 jam nuts on each threaded rod.
4.
Install the RSM on the threaded rod.
NOTE:
Hole in the RSM allows socket wrench access
without unit disassembly.
5.
Secure the RSM to the threaded rod using four #10-
24 nuts.
(A)
2
1c
1
2
4
X 4
5
1
Example Only
(Interface bracket
varies dependent
on projector model)