PAC253
Installation Instructions
6
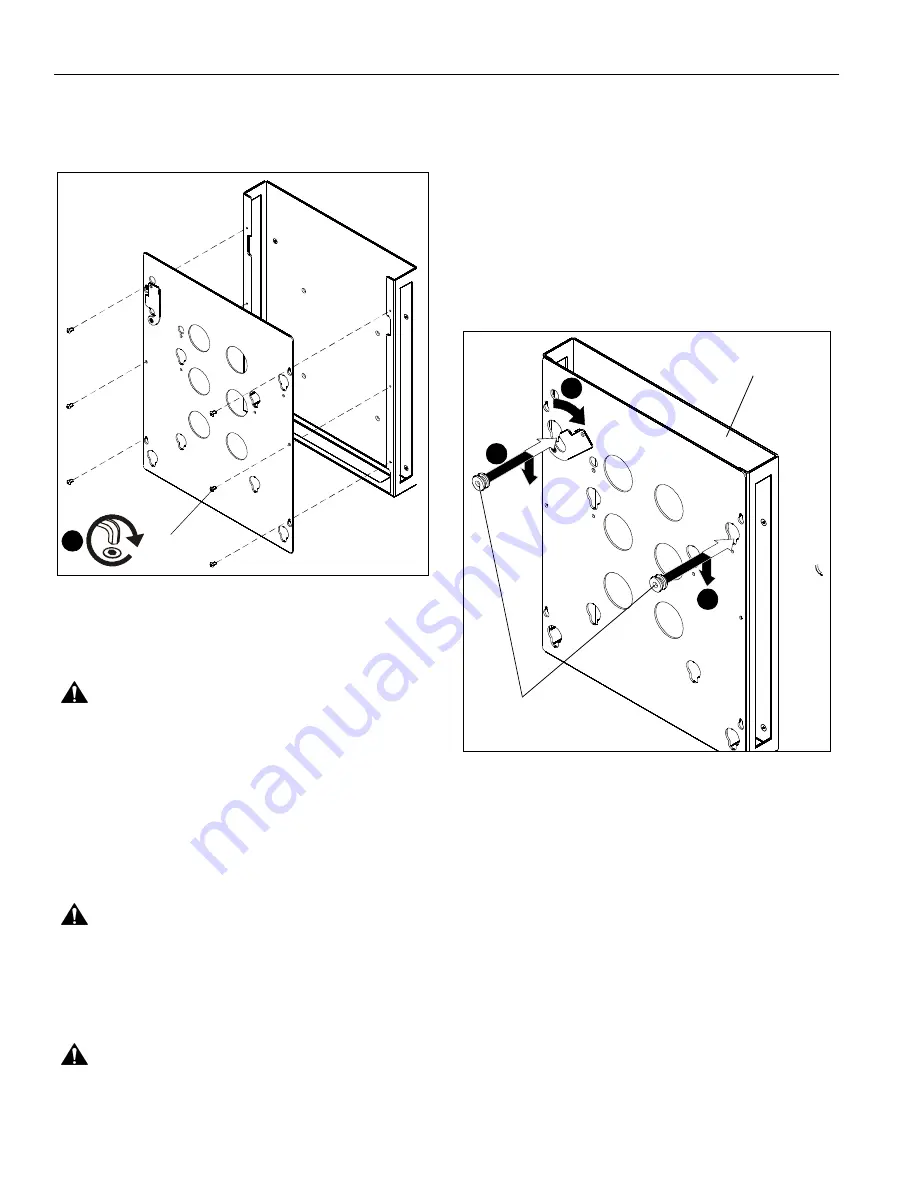
Attaching Faceplate to CPU Box
1.
Attach faceplate (B) to CPU box (A) using six 10-24 x 3/8"
button head cap screws (K). (See Figure 4)
Figure 4
INSTALLATION
Installing CPU Holder with CPU to Mount
WARNING:
Exceeding the weight capacity can result in
serious personal injury or damage to equipment! It is the
installer’s responsibility to make sure the combined weight of
all components located between the CPU Accessory and the
display does not exceed the weight limits for the specific wall
mount being used. The CPU Accessory weighs 17 lbs
(7.7 kg) which needs to be included in this combined weight
total.
Install the CPU holder, with CPU, onto mount and route wires
and cables following the instructions provided with the mount.
Cable ties (E) are provided for cable management.
WARNING:
IMPROPER INSTALLATION CAN LEAD TO
CPU HOLDER FALLING! Make certain mounting buttons on
CPU holder are fully engaged in teardrop holes in mount and
latching flag on mount is fully closed before installing the
display.
Installing Display
WARNING:
DISPLAY MAY WEIGH IN EXCESS OF 40
LBS. ALWAYS use two people when lifting and follow proper
lifting techniques when installing!
IMPORTANT ! :
The following procedure assumes that
the proper interface bracket for display being mounted
has already been installed on display. If no interface
bracket is present on display, install bracket to display
using instructions included with interface bracket before
proceeding.
To install the display:
1.
Ensure that locking flag is in open position. (See Figure 5)
2.
While supporting each side of display, align four mounting
buttons on display or interface bracket with four teardrop
slots in CPU holder (See Figure 5).
3.
Lower display firmly into place. (See Figure 5)
Figure 5
4.
Ensure mounting buttons are fully seated in teardrop slots.
5.
Close locking flag.
6.
Connect cables to display.
(K) x 6
1
Mounting Button
(On interface bracket or display)
3
(A)
1
2


