background image

Safety and operating instructions

Red Hawk

13

9800 0658 93

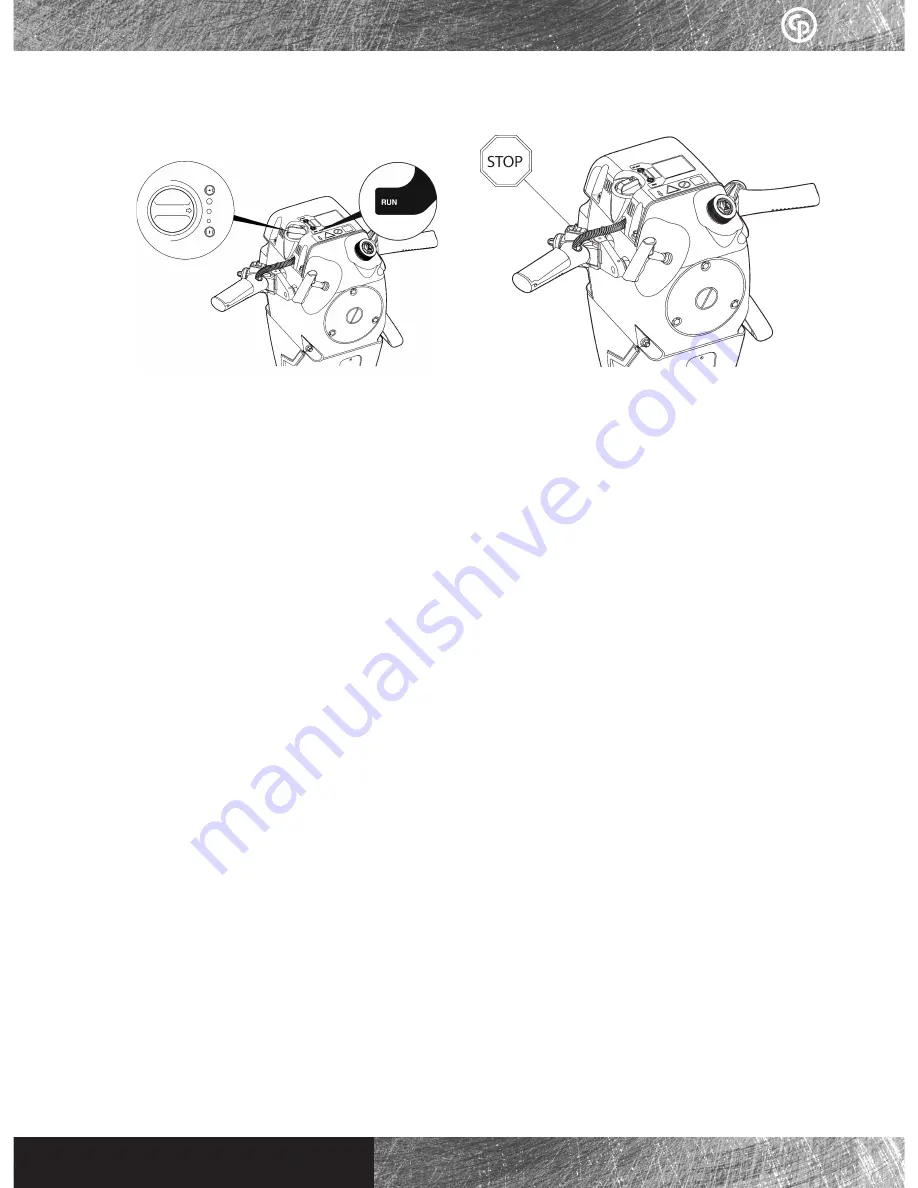
When the machine starts, slowly turn the 
choke clockwise towards position (RUN) 
during a 2–3 minutes warm-up period. 
 

Restarting a warm machine

Check that the choke is open (i.e. knob in 
position RUN). 
Pull the starter handle.

If the machine stops after a short while, or does 
not start at all, follow the procedure for cold 
starting.
If the machine does not start, it may have been 
flooded (i.e. too much fuel in the combustion 
chamber).
Open the choke (RUN position) and try starting 
the engine again.
If the machine still does not start, see the section 
entitled "Trouble shooting".

Number of revs

The engine speed is regulated by means of the 
throttle lever:
Lever released    – idling speed
Lever depressed – full engine speed

Ground probing

If the machine is started on top of long tools such 
as probing rods, a starter-cord bracket must be 
used to prevent the cord from damaging the fuel 
tank.

3.

1.

2.

Stopping the engine

Stop the engine by depressing the stop button. 
Drain the fuel tank before transporting the 
machine, also drain the fuel tank when the 
machine is not to be used for a long period of 
time.

Summary of Contents for Red Hawk

Page 1: ...www cp com Safety and operating instructions Red Hawk...

Page 2: ...CP Red Hawk Safety and operating instructions 9800 0658 93 2006 08 No 9800 0658 93 Copyright STOCKHOLM SWEDEN...

Page 3: ...7 Projectile hazard 7 Noise hazard 8 Silica Dust hazard 8 Vibration hazard 9 Machine modification hazard 9 Additional safety instructions 10 Protective equipment 10 Service and maintenance 10 Machine...

Page 4: ...ol industry Chicago Pneumatic has always focused on providing powerful and reliable products that are easy to maintain and that give good value for money It s a philosophy that has made us the market...

Page 5: ...se and oil Warning Unintended start of the machine may cause injury Keep your hands away from the start and stop device until you are about to start work Warning The working tool is exposed to heavy s...

Page 6: ...ath To reduce such risks of explosion Never operate the equipment near any explosives including dynamite or other explosives in the rock Make sure that there are no explosives in the rock Never break...

Page 7: ...use the machine near flammable materials fumes or dust During breaks in work do not place the machine near flammable materials Do not operate the machine near any materials that create sparks Remove...

Page 8: ...ure below permissible levels Participate in air monitoring medical exams and training programs offered by your employer and when required by law Wear washable or disposable protective clothes at the w...

Page 9: ...Avoid any other contact e g supporting any part of the body against the machine or leaning onto the machine trying to increase the feed force It is also important not to keep the trigger engaged whil...

Page 10: ...sure that the all attached and related equipment is properly maintained Signs and stickers that are important for your safety and the care of the machine are included with every machine New signs and...

Page 11: ...dimension of the working tool s shank can result in that the working tool may being dropped or ejected A dropped or ejected working tool can cause personal injury Before the working tool is mounted m...

Page 12: ...your nearest Chicago Pneumatic representative for advice on the correct two stroke oil Starting and stopping Warning Unintended start of the machine may cause injury Keep your hands away from the sta...

Page 13: ...tion chamber Open the choke RUN position and try starting the engine again If the machine still does not start see the section entitled Trouble shooting Number of revs The engine speed is regulated by...

Page 14: ...osits and cleaned if necessary Pull the starting handle until the arrow in the centre of the flywheel which can be seen through the fan cover points upwards This indicates that the engine piston is in...

Page 15: ...screw cap See image under Main parts Remove the three bolts from the protective cover of the starting mechanism 1 2 3 4 5 1 Lift off the cover grasping the starter pulley as well Let the cover rotate...

Page 16: ...utput check the points mentioned below See image under Main parts Check that the Stop button See C under Starting and stopping is in the ON position Check the fuel level Check the spark plug s electro...

Page 17: ...1 2 in 470 mm Noise and Vibration Declaration Statement Sound effect according to EN ISO 3744 in accordance with directive 2000 14 EG Lp measured r 1m dB A rel 20 Pa 105 Lw guaranteed dB A rel 20 Pa 1...

Page 18: ...18 Red Hawk Safety and operating instructions 9800 0658 93...

Page 19: ...Safety and operating instructions Red Hawk 19 9800 0658 93...

Page 20: ...2006 08 No 9800 0658 93 Copyright STOCKHOLM SWEDEN...

Reviews: