4
3. Aligning the Projector
Turn GalacTix on and check whether the projector needs to be adjusted. The projector may also need to
be adjusted after removing or servicing it. There is no definitive way to align the projector. Rather, you
may have to make a couple adjustments, then go back and adjust it again.
With GalacTix on, enter the Service Menu, and then enter the Diagnostics Menu. Select
Video
and open
the WHITE screen. This will project a pure white screen that is the exact size of the gameplay screen.
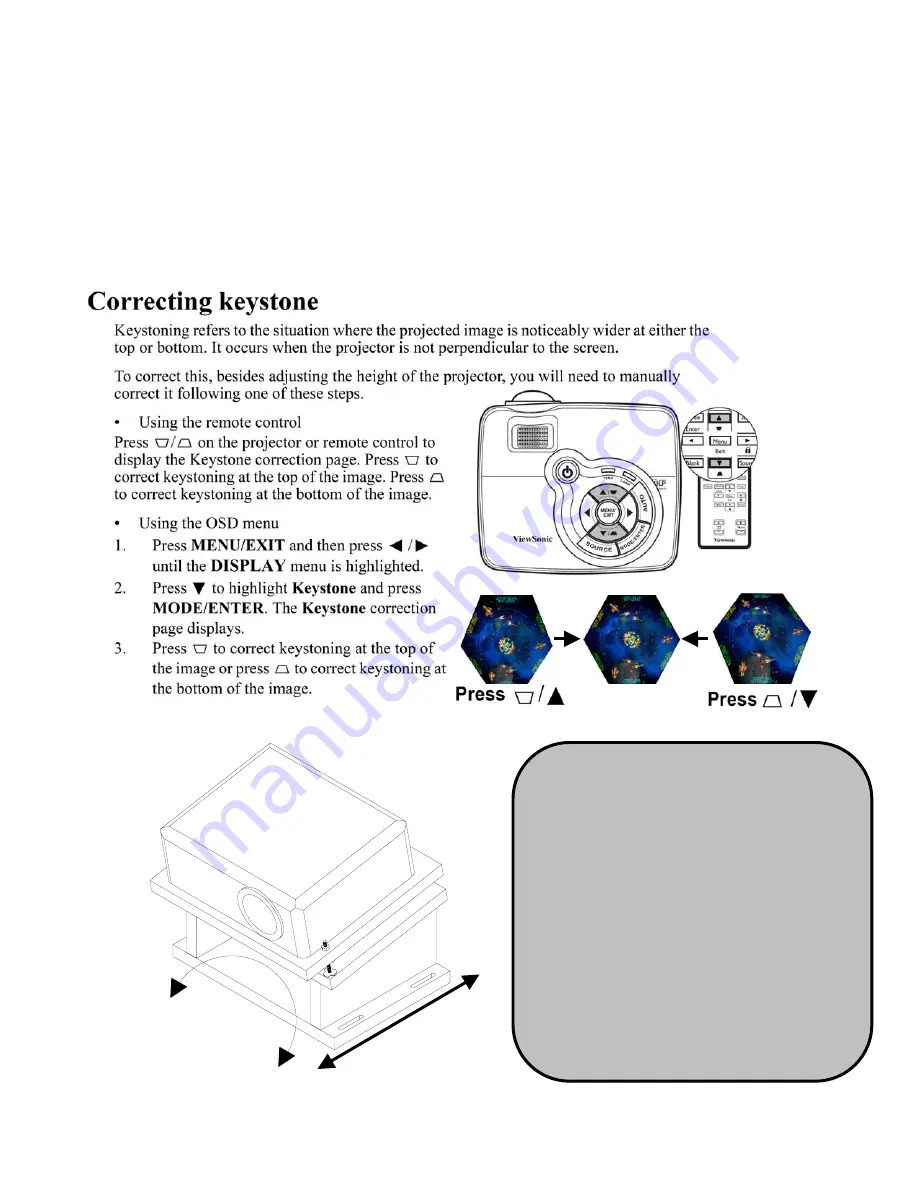
Use the projector menu to set the keystone to -10. To make the image fit perfectly on the screen, you
may need to adjust the keystone to -8 through -11, but -10 is the GalacTix default setting and the best
place to start.
The projector base is mounted with slots so
the entire unit can move forward or
backward on the
Projector Mount Board
.
There is also enough room to aim the
projector right or left.
Slide projector BACK to increase the
size of the projected image.
Slide projector FORWARD to shrink the
size of the projected image.
Turn the base LEFT or RIGHT to center
the projected image.
When in the correct position, tighten the
4 screws at the base.
(On Screen Display)
Summary of Contents for GalacTix
Page 21: ...21 ...
Page 22: ...22 ...
Page 23: ...23 ...
Page 24: ...24 ...
Page 25: ...25 ...
Page 26: ...26 ...
Page 27: ...27 ...
Page 48: ...48 15 Wiring Schematic ...
Page 49: ...49 15 Board Layout ...
Page 50: ...50 ...


