background image

Page 19

SKU 94678

for technical questions, please call 1-800-444-3353.

eMission control 
systeM warranty

california and united states 

emission control defects 

warranty statement

The  California  Air  Resources  Board  (herein  CARB),  the  United 
States Environmental Protection Agency (herein EPA), and Harbor 
Freight Tools

®

 (herein HFT) are pleased to explain the emission 

control system warranty on your 1995 and later Small Off-Road 
Engine  (herein  engine).  In  California,  the  engine  must  be  de-
signed, built and equipped to meet the State’s stringent anti-smog 
standards.    Elsewhere  within  the  United  States,  new  off-road, 
spark-ignition engines certified for model year 1997 and later, must 
meet similar standards set forth by the EPA.  HFT must warrant 
the emission control system on your engine for the periods of time 
described below, provided there has been no abuse, neglect or 
improper maintenance of your engine.
Your  emission  control  system  may  include  parts  such  as  the 
carburetor or fuel-injection system, and the ignition system. Also 
included  may  be  hoses,  belts,  connectors  and  other  emission-
related assemblies.
Where a warrantable condition exists, HFT will repair your engine 
at no cost to you including diagnosis, parts and labor.

Manufacturer’s warranty coverage

The 1995 and later engines are warranted for two (2) years.  If any 
emission-related part on your engine is defective, the part will be 
repaired or replaced by HFT.

Harbor freight tools emission 

control defects warranty 

coverage

Engines  are  warranted  for  a  period  of  two  (2)  years  relative  to 
emission control parts defects, subject to the provisions set forth 
below. If any emission related part on your engine is defective, the 
part will be repaired or replaced by HFT.

owner’s warranty responsibilities

-  As the engine owner, you are responsible for the performance 

of the required maintenance listed in your Owner’s Manual. 
HFT recommends that you retain all receipts covering main-
tenance  on  your  engine,  but  HFT  cannot  deny  warranty 
solely for the lack of receipts or for your failure to ensure the 
performance of all scheduled maintenance.

-  As  the  engine  owner,  you  should,  however,  be  aware  that 

HFT may deny you warranty coverage if your engine or a part 
has failed due to abuse, neglect, improper maintenance, or 
unapproved modifications.

-  You are responsible for shipping your engine to a HFT war-

ranty station as soon as a problem exists.  Contact the HFT 
Customer Service department at the number below to make 
shipping  arrangements.   The  warranty  repairs  should  be 
completed in a reasonable amount of time, not to exceed 30 
days.

If you have any questions regarding your warranty rights and re-
sponsibilities, you should contact the Harbor Freight Tools Customer 
Service Department at 1-800-444-3353.

Harbor freight tools emission 

control defects warranty 

provisions

1. 

length of coverage

HFT warrants to a first retail purchaser and each subsequent 
purchaser that the engine is free from defects in materials 
and workmanship that cause the failure of warranted parts 
for a period of two (2) years after the date of delivery to the 
first retail purchaser.

2. 

no charge repair or replacement

Repair or replacement of any warranted part will be performed 
at no charge to the owner if the work is performed through a 
warranty station authorized by HFT.  For emissions warranty 
service, contact the HFT Customer Service Department at 
1-800-444-3353.

3. 

consequential damages coverage

Coverage under this warranty shall also extend to the failure of 
any engine components caused by the failure of any warranted 
part while it is still covered under this warranty.

4. 

coverage exclusions

Warranty claims shall be filed in accordance with the provi-
sions of the HFT warranty policy explained in the box at the 
top of the previous page.  HFT shall not be liable for any loss 
of use of the engine, for any alternative usage, for any damage 
to goods, loss of time, or inconvenience.  Warranty coverage 
shall also be excluded for any part which fails, malfunctions, 
or is damaged due to failure to follow the maintenance and 
operating instructions set forth in the Owner’s Manual includ-
ing, but not limited to:
(a)  use of parts which are not authorized by HFT
(b)  improper installation, adjustment or repair of the engine 

or of any warranted part unless performed by an autho-
rized warranty center

(c)  failure to follow recommendations on fuel use contained 

in the Owner’s Manual

(d)  improper or inadequate maintenance of any warranted 

parts

(e)  repairs  performed  outside  of  the  authorized  warranty 

service dealers

(f)  alterations by changing, adding to or removing parts from 

the engine.

5. 

service and Maintenance

Component parts which are not scheduled for replacement 
as required maintenance or are scheduled only for regular 
inspection to the effect of “repair or replace as necessary” 
are  warranted  for  the  warranty  period.  Any  warranted  part 
which is scheduled for replacement as required maintenance 
is warranted for the period of time up to the first scheduled 
replacement point for that part.  Any replacement part, pro-
vided it is equivalent in durability and performance, may be 
used in performance of maintenance or repairs.  The owner 
is responsible for commissioning a qualified technician/me-
chanic  to  perform  all  required  maintenance,  as  outlined  in 
the 

Maintenance and  cleaning

 sections on page 13-14 of 

this manual.

Summary of Contents for 94678 and

Page 1: ...s Blvd Camarillo CA 93011 Visit our website at http www harborfreight com To prevent serious injury read and understand all warnings and instructions before use Copyright 2006 by Harbor Freight Tools All rights reserved No portion of this manual or any artwork contained herein may be reproduced in any shape or form without the express written consent of Harbor Freight Tools For technical questions...

Page 2: ...t AC Tools and Equipment 11 To Charge 12 V Lead acid Type Batteries 12 Inspection Maintenance and Cleaning 13 Troubleshooting 14 Parts List Engine 15 Assembly Diagram Engine 16 Parts List A Generator 17 Assembly Diagram A Generator 18 Emission Control System Warranty 19 Warranty 20 Unpacking When unpacking check to make sure that the item is intact and undamaged If any parts are missing or broken ...

Page 3: ...e engine Bore x Stroke 52 x 46 mm PTO Shaft Rotation Counterclockwise Facing The Shaft Caution This generator is not intended to power sensitive electronic equipment without the addition of an appropriate line conditioner not included or sold by Harbor Freight Tools The Emission Control System for this generator s engine is warranted for standards set by the U S Environmental Protection Agency and...

Page 4: ...diators ranges and refrigerators There is an increased risk of electric shock if your body is grounded Do not expose equipment to rain or wet conditions Water entering a equipment will increase the risk of electric shock Do not abuse Power Cords Never use a Power Cord to pull a Plug from the outlet Keep all Power Cords away from heat oil sharp edges or moving parts Replace damaged Power Cords imme...

Page 5: ...ontrolled with the Power Switch is dangerous and must be replaced Turn the power switch and the fuel supply to off and unplug the spark plug wire before making any adjustments changing accessories or storing the equipment Such preventive safety measures reduce the risk of starting the equip ment accidentally Store idle equipment out of reach of children and other untrained persons Equipment is dan...

Page 6: ...For eye con tact immediately flush eyes with clean water Prolonged exposure to noise levels above 85 dBA is hazardous to hearing Always wear ANSI approved hearing protection when operating or working around the Generator when it is running Lifting transport precautions Never lift the Generator using the engine or al ternator lifting lugs Connect lifting equipment only to the Frame of the Generator...

Page 7: ... it is not raining or snowing to avoid trapping moisture within the Generator s area The supporting floor ground surface should be level and strong enough to safely hold the weight of the Generator If the floor ground surface is not level strong cross members should be placed under the full length of the Generator Frame at its low side For trailer installation the Generator should be mounted on th...

Page 8: ... and in compliance with all relevant local state and federal electrical codes and standards and other regulations where applicable The Generator must be earth grounded in accordance with all relevant electri cal codes and standards before operation Do not attempt to connect or disconnect load connections while standing in water or on wet or soggy ground Insulate all connections and disconnected wi...

Page 9: ...nd direction Install the Generator on a concrete slab or other area where rain drainage or flood waters can not reach it Generator placement should allow four feet of access to all sides for mainte nance Place the Generator as close as possible to the electrical tools and equipment be ing powered to reduce the length of extension cords If the Generator in located indoors the Engine exhaust must be...

Page 10: ...al information regarding the parts listed in the following pages refer to the Assembly Diagrams on pages 16 and 18 and the Generator Control Illus trations above Pre start Checks Check to make sure the Engine s Power Switch 52a is in its OFF position IMPORTANT Prior to first using the Generator the Engine MUST be filled with approximately 1 2 0 47 quart of a high quality SAE 10W 30 grade engine oi...

Page 11: ...00 W is adequate to supply all electrical loads that the unit will power If powering exceeds the Generator s capacity it may be necessary to group one or more of the tools and or equipment for connection to a separate Generator Only start the Generator with no loads attached Once the Generator is running simply connect the Power Cords of 110 120 volt AC powered tools and equipment into the 110 120...

Page 12: ...d incorporating an inline regulator is strongly recommended while charging To start the charging process connect the Charging Plug 60a to the Battery Charg ing Outlet 57a Do not leave the battery unattended while it is charging NOTE The Generator features a DC Circuit Protector 59a to protect the DC circuit in case of an overload Should an overload occur the Breaker will trip to its OFF position c...

Page 13: ...rces including lit cigarettes are nearby that rags for cleaning up spills and a class ABC fire extinguisher is nearby and that you have a suitable place to temporarily put the gas tank during work First make sure that the Fuel Valves 9a 81 are both turned to their OFF posi tions Secure the Fuel Valve 9a under the Fuel Tank closed using a string or cable tie if possible Have a rag ready to promptly...

Page 14: ...es Service is to be performed only by a qualified mechanic and includes Valve Clearance Check Adjust Clean Combustion Chamber Clean Fuel Tank Filter and Supply Line replacefilterandlineasneeded 1 2 3 X Troubleshooting Problem Possible Causes Probable Solutions Engine will not start Fuel Tank empty Fuel Valve s closed Choke not in proper start position ON OFF Switch off Oil level low Spark Plug dam...

Page 15: ...camshaft 2 35 Tappet 2 36 Intake valve 1 37 Exhaust valve 1 38 Oil seal valve stem 1 39 Spring seat valve 2 40 Valve spring 2 41 Cap 2 Part Description Q ty 42 Gasket cylinder head 1 43 Cylinder cover 1 44 Spark plug 1 45 Bolt M6 35 6 46 Gasket intake port 1 47 Carburetor assy 1 48 Connecting block 1 49 Gasket carburetor 1 50 Governor arm 1 51 Pull rod governor 1 52 Lock bolt 1 53 Return spring 1 ...

Page 16: ...Page 16 SKU 94678 For technical questions please call 1 800 444 3353 Assembly Diagram Engine ...

Page 17: ...a Cushion 2 43a Frame 1 44a Anti vibration Feet 4 45a Flex Tube 1 46a Circuit Cover 1 47a Bolt M4 x 10 2 48a Capacitor 1 49a Bolt M4 x 16 1 50a Panel 1 51a Bolt M6 x 25 4 52a Engine Switch 1 53a AC Circuit Protector 1 54a AC Outlet 2 55a Grounding Point 1 56a Pilot Lamp 1 57a Battery Charging Socket 1 58a Voltmeter 1 59a DC Circuit Protector 1 60a Battery Charging Cord 1 PLEASE READ THE FOLLOWING ...

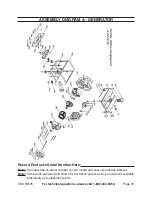
Page 18: ...3 Assembly Diagram A Generator Record Product s Serial Number Here Note If product has no serial number record month and year of purchase instead Note Some parts are listed and shown for illustration purposes only and are not available individually as replacement parts ...

Page 19: ...30 days If you have any questions regarding your warranty rights and re sponsibilities you should contact the Harbor FreightTools Customer Service Department at 1 800 444 3353 Harbor Freight Tools Emission Control Defects Warranty Provisions 1 Length of Coverage HFT warrants to a first retail purchaser and each subsequent purchaser that the engine is free from defects in materials and workmanship ...

Page 20: ...ccidents repairs or alterations outside our facilities or to lack of maintenance We shall in no event be liable for death injuries to persons or property or for incidental contingent special or consequential damages arising from the use of our product Some states do not allow the exclusion or limitation of incidental or consequential damages so the above limitation of exclusion may not apply to yo...

Reviews: