background image

Black plate (59,1)

Full-Size Truck Navigation System - 2012 - CRC 2nd Edition - 11/15/11

Infotainment System

59

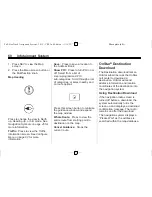
5. Press and hold one of the six

preset screen buttons at the
bottom of the screen until the
text within the button changes.

6. The name appears in that preset

destination screen button and
can be selected from the Select
Destination screen.

Favorite Route

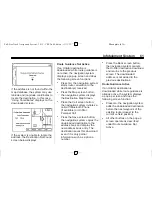
1. After the route has been

planned, press NAV until the full
map screen is shown.

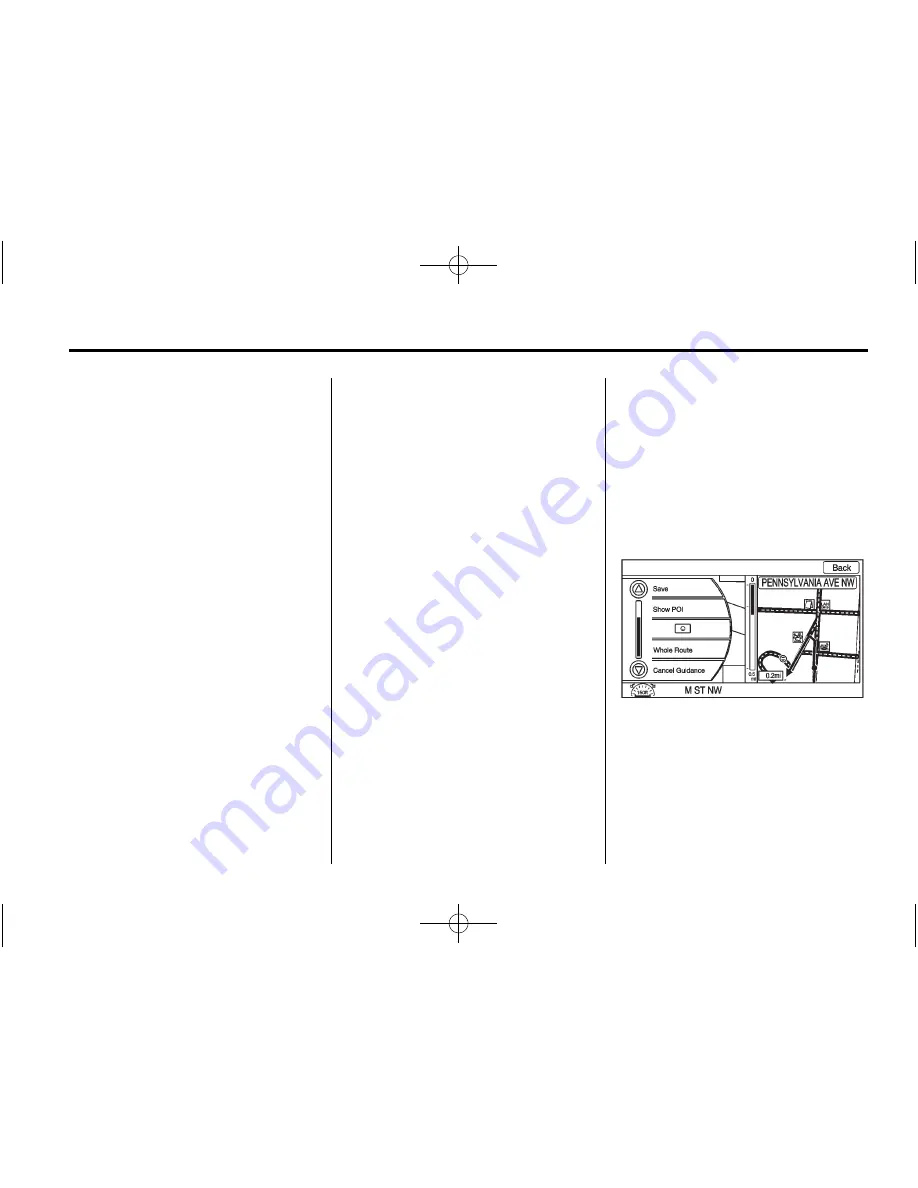
2. Press the Multifunction knob.

A menu displays.

3. Scroll down and press the

Whole Route option. The whole
route map screen displays.

4. Press the Add Route screen

button. The route is stored as a
favorite.

To change the route name, add a
voice tag or delete a favorite route:

1. Press DEST.

2. Press the Fav Route screen

button.

3. Select the route.

4. Press the Edit screen button.

5. Select from: Change Route

Name, Add Voice Tag, or Delete
Favorite Route screen buttons.

To change the route name:

1. Select the Change Route Name

screen button.

2. Using the Keypad, enter

the name.

3. Select the Favorite Route entry

to be edited.

4. Press OK. The new name will be

in the Favorite Route Menu.

To add a voice tag:

1. Select Add Voice Tag.

2. Speak the name after the beep

within four seconds. The name is
repeated back.

To delete a favorite route:

1. Press the Delete Favorite Route

screen button. The confirmation
screen displays.

2. Press Yes to delete the route

and No to cancel from deleting
the route.

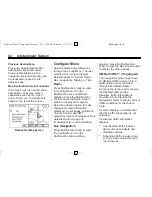
Menu Screen Button

Various navigation system settings
are available through the Menu
screen button. Some options are
only available after a route is
planned.

Summary of Contents for 2012 Full-Size Truck

Page 1: ...iliary Devices 35 Rear Seat Infotainment 36 Rear Seat Entertainment RSE System 36 Navigation 41 Using the Navigation System 41 Maps 44 Navigation Symbols 45 Destination 50 OnStar Destination Download 60 Configure Menu 62 Global Positioning System GPS 69 Vehicle Positioning 70 Problems with Route Guidance 70 If the System Needs Service 71 Map Data Updates 71 Database Coverage Explanations 72 Voice ...

Page 2: ...Black plate 2 1 Full Size Truck Navigation System 2012 CRC 2nd Edition 11 15 11 ...

Page 3: ...was printed We reserve the right to make changes in the product after that time without notice For vehicles first sold in Canada substitute the name General Motors of Canada Limited for Chevrolet Motor Division or GMC whenever it appears in this manual Keep this manual with the owner manual in the vehicle so it will be there if it is needed If the vehicle is sold leave this manual in the vehicle C...

Page 4: ...tive screen buttons Set up the audio by presetting favorite stations setting the tone and adjusting the speakers Set up the navigation features such as entering an address or a preset destination Set up phone numbers in advance so they can be called easily by pressing a single button or a single voice command for navigation systems equipped with phone capability WARNING Taking your eyes off the ro...

Page 5: ...onditions When the navigation system is turned on a screen may appear with information that must be read and acknowledged before accessing some navigation features After acknowledging the start up information the NAV Navigation and DEST Destination functions are accessible Information can now be entered or deleted and other functions accessed See instructions later in this section Every 50 times t...

Page 6: ... Infotainment System Navigation System Overview A O Power Volume B Z Eject C Auxiliary Input Jack D Multifunction Knob E SRCE Source F 6 Seek Next Forward G 7 Seek Previous Reverse H J Play Pause I 4 Information J FAV Favorite K MENU L RPT Repeat M DEST Destination N NAV Navigation ...

Page 7: ...s Turn the Multifunction knob to scroll through the available setup features Once the desired feature displays press the Multifunction knob or press the desired feature on the screen to display more options within that feature Languages To change the display language see Vehicle Personalization in the vehicle owner manual The vehicle supports English French Canadian and Spanish The default languag...

Page 8: ...Address and Point of Interest and Storing Preset Destinations The vehicle must be in P Park to perform these operations Entering an Address If having trouble finding a city or a street name Enter the street name first instead of the city name or vice versa Enter more characters or reduce the amount of characters to reduce or expand the available options To set a destination by entering a street na...

Page 9: ... of Interest screen button 5 Enter the specific title of the POI in the POI name space If four or less names are available a list displays If more than four are available there is a match counter with a number in it representing the number of available POI names Press List to view the list Select the POI 6 Press Go The system calculates the route 7 Select the route preference for Fastest Shortest ...

Page 10: ... calculates the route 5 Select the route preference for Fastest Shortest or Easiest The system highlights the route 6 Press the Start Guidance screen button The route is now ready to be started See Preset Destination under Destination on page 50 Canceling Guidance Guidance is canceled once you arrive at the final destination To cancel guidance prior to arrival at the final destination 1 Press DEST...

Page 11: ... decrease the volume The volume is adjusted for the current audio source active navigation voice guidance or voice prompts The steering wheel controls can also be used to adjust the volume See Steering Wheel Controls in the Index of the vehicle owner manual for more information Also see Radio Settings and Automatic Volume in this section Multifunction Knob Turn to change the radio station See Find...

Page 12: ...ess MENU then select Tone Setting the Tone To adjust the bass treble and midrange using the sound menu Bass Press or to change the level Mid Midrange Press or to change the level Treble Press or to change the level Adjusting the Speakers To adjust the speaker balance Press and hold o for more sound from the left speakers or p for more sound from the right speakers The middle position balances the ...

Page 13: ...tons are located at the bottom of the screen Normal Select to adjust the audio to be in normal mode This provides the best sound quality for all seating positions Driver Select to adjust the audio to give the driver the best possible sound quality Rear Select to adjust the audio to give the rear seat occupants the best possible sound quality Surround Select to adjust the audio to give the best ove...

Page 14: ...he categories such as Playlist Artist Album and Genre to be used as a favorite category during HDD mode DivX VOD The DivX VOD feature must be registered before it can be used 1 Press the DivX VOD screen button to display the DivX Video on Demand menu 2 Press the Registration Code screen button to display the Registration Code information display 3 Press the Deactivation option to unregister this d...

Page 15: ...t feature automatically begins recording the audio when listening to the radio The recording allows playback of content that was missed Timeshift stores up to 20 minutes of content After 20 minutes it removes the oldest content and continues recording new content When listening to a station for more than 20 seconds press J play pause to stop hearing the information through the speaker During this ...

Page 16: ...gories XM stations are organized in categories Removing or Adding Categories 1 Turn the Multifunction knob until Radio displays Press the Multifunction knob to select Radio or press the Radio screen button to display more options within that feature 2 Select Show Hide XM Categories screen button 3 Press the category screen buttons to show or hide the category XM Radio Messages See XM Radio Message...

Page 17: ... get caught in the player Insert only one disc at a time Keep the loading slot free of foreign materials liquids and debris If a description label is needed try labeling the top of the disc using a marking pen Loading and Ejecting Discs To load a disc 1 Turn the ignition on 2 Insert a disc into the slot label side up The player pulls it in the rest of the way If the disc is damaged or improperly l...

Page 18: ...o go to the next or previous track MENU Press this knob or touch the CD Menu on the screen to display the track list option then select the track from the list The system plays the selected track and returns to the CD screen CD Menu Press the CD Menu screen button to display the CD Music Menu Shuffle Plays the tracks randomly rather than in sequence Press again to stop shuffle A checkmark indicate...

Page 19: ... J Play Pause Press to start pause or resume play 6 Seek Next Forward 1 Press to seek to the next chapter 2 Press more than once to continue moving forward through the disc 3 Press and hold to fast forward through a disc When fast forward is active press again to change the speed Elapsed time displays 4 Press J to resume playing 7 Seek Previous Reverse 1 Press to seek to the beginning of the curre...

Page 20: ...2 Continue pressing to cycle through the available audio streams or languages depending on the DVD Subtitle 1 Select while a DVD is playing to view with subtitles on or off or to change the language of the subtitles 2 Continue pressing to cycle through the available subtitle languages and to turn subtitles off depending on the DVD playing Pan Scan Pan Scan is a method of adjusting widescreen film ...

Page 21: ...ed on a CD R or CD RW with a maximum capacity of 700 MB When an MP3 is loaded in the player MP3 displays If a disc is already loaded but you are currently on a map screen or listening to a different audio source press SRCE to switch to the Disc source A track number appears on the display when each track starts to play To play a disc J Play Pause Use to start pause or resume play of a loaded disc ...

Page 22: ...een Folders Playlists Select to view the folders stored on the disc Select a folder to view the list of all the songs in that folder There might be a delay before the list displays Select the song from the list and it begins to play Track List All Songs Select to view a list of all songs on the disc There might be a delay before the list displays Select a song from the list and it begins to play S...

Page 23: ...ucture that contains a compressed audio file The empty folder s are not displayed or numbered No Folder When the CD only contains compressed audio files without any folders or playlists all files are located under the root folder File System and Naming The displayed song title is taken from the file s ID3 tag If a song title is not present in the ID3 tag the radio displays the file name as the tra...

Page 24: ...firmation displays Press the REC record screen button 4 Press All Songs to record all tracks A progress bar displays To record selected tracks from the disc 1 Load a CD until the CD screen displays 2 Press 6 7 or press CD Menu to select a song for recording 3 Press REC 4 A confirmation displays 5 Select the song name to record A progress bar displays Recording from a USB Device to the Hard Drive T...

Page 25: ...system is turned off during a CD or USB recording process it stops When the radio is turned back on the recording process does not resume automatically Playing Hard Disc Drive Content To operate hard drive functions while the HDD source is active use the following buttons or touch sensitive buttons J Play Pause Press to start pause or resume play of the current media source 6 Seek Next Forward 1 P...

Page 26: ...Like This Press to use Gracenote music recognition technology and related data to generate a list of songs similar to the current song Select a song from the list This feature is only available with songs recorded to the HDD from Audio CDs not MP3s and other compressed audio When recording CDs to the HDD there might be delays to build the list until all the files are compressed Folders Playlists 1...

Page 27: ...avorites message displays To save an entire Artist Album or Genre to a FAV category preset Press FAV until the correct FAV category appears Press and hold a preset button on the bottom of the screen Playing HDD Favorites Favorites can be played two different ways 1 Press FAV until the appropriate FAV HDD category displays Press a preset button at the bottom of the HDD screen 2 Select FAV from the ...

Page 28: ...eek Next Forward 1 Press to seek to the next track 2 Press and hold to advance quickly through playback 3 Release the button to return to playing speed Elapsed time displays 7 Seek Previous Reverse 1 Press to seek to the beginning of the current or previous track If the track has been playing for less than five seconds the previous track plays If playing longer than five seconds the current track ...

Page 29: ...older Playlist Mode displays Track List 1 Press to view the list of tracks stored on the USB 2 Select a track from the list Artists 1 Press to view the artists stored on the USB 2 Select an artist to view a list of all songs by the artist 3 Select a song from the list Once selected Artist Mode displays Albums 1 Press to view the albums stored on the USB 2 Select an album to view a list of all song...

Page 30: ...g the latest iTunes application For more information visit www apple com itunes Recording from the iPod to the HDD is not supported Media must be recorded using a USB mass storage device To connect and control an iPod connect one end of the standard iPod USB cable to the iPod s dock connector Connect the other end to the USB port in the center console iPod music information displays on the radio s...

Page 31: ...his button to view the artists that have been stored on the iPod 2 Select an artist name to view a list of all songs by the artist 3 Select the desired song from the list Once a song has been selected Artist Mode appears on the iPod main screen to show that music is being played from a specific artist Albums 1 Press this button to view the albums that have been stored on the iPod 2 Select an album...

Page 32: ... that genre 3 Select the desired book from the list Once a book has been selected Audio Book Mode appears on the iPod main screen Podcasts appear with the general music They do not have their own category Like the other music files they are searchable by title artist album Eject iPod Press this button to remove the iPod If the iPod is disconnected without selecting this button the files on the iPo...

Page 33: ... Select Book screen button After the files have been recorded eject the CD USB external media Playing Audio Book Content After activating and transferring audible com files to the system play the files by 1 Press SRCE until the HDD source is selected 2 Enter the HDD Menu the HDD Music Menu displays Scroll down to the Audio Book option and select 3 The Audio Book screen displays a list of the avail...

Page 34: ...k To play a different audio book from the one selected return to the Audio Book menu options To change the audio book currently playing 1 Press MENU or press the HDD Menu screen button to enter that screen menu The HDD Music Menu displays Scroll down to the Audio Book option 2 The Audio Book screen displays a list of the available audio books for playback Select a book 3 Select a chapter to start ...

Page 35: ... navigation system s faceplate Possible auxiliary audio sources include Laptop computer MP3 player This jack is not an audio output Do not plug headphones into the auxiliary input jack Drivers are encouraged to set up any auxiliary device while the vehicle is in P Park Connect a 3 5 mm 1 8 in cable from the auxiliary device to the auxiliary input jack When a device is connected the system automati...

Page 36: ...source 2 Press SRCE repeatedly until the AV source screen displays or press the toggle page button 3 Press Rear Display 1 for the second row video screen and Rear Display 2 for the third row video screen if equipped 4 Select the video source to be used AUX A V or DVD If the front seat source is USB or HDD the rear seat audio RSA is not available for USB or HDD Headphones A Battery cover B Channel ...

Page 37: ...ars on the outside bottom edge of the ear cup and should be positioned on the left ear The symbol R Right appears on the outside bottom edge of the ear cup and should be positioned on the right ear Notice Do not store the headphones in heat or direct sunlight This could damage the headphones and repairs will not be covered by the warranty Storage in extreme cold can weaken the batteries Keep the h...

Page 38: ...econd row video screen to the DVD player 4 Press the AUX button a fourth time to change the source of both video screens to the DVD player How to Change the RSE Video Screen Settings The screen display mode brightness and language can be changed from the setup menu using the remote control To change a setting 1 Press z 2 Use n q p o and r to select the settings 3 Press z again to exit the setup me...

Page 39: ... to turn the video screens on and off P Illumination Press to turn the remote control backlight on The backlight times out after several seconds if no other button is pressed v Title Press to return to the main menu of the DVD This function could vary for each disc y Main Menu Press to access the DVD menu The DVD menu is different on every DVD Use the navigation arrows to move the cursor After mak...

Page 40: ... DVD or CD To stop fast forwarding a DVD video press s To stop fast forwarding a DVD audio or CD release This button might not work when the DVD is playing the copyright information or the previews e Audio Press to change audio tracks on DVDs that have this feature when the DVD is playing Subtitles Press to turn ON OFF subtitles and to move through subtitle options when a DVD is playing AUX Auxili...

Page 41: ...s functions are disabled when the vehicle is moving Navigation Control Buttons The control buttons are on the faceplate of the navigation system O Power Volume 1 Press to turn the system on and off 2 Turn to adjust the volume for the audio OnStar if equipped voice guidance and voice recognition voice prompts Multifunction Knob Turn to zoom in or out while viewing a map screen NAV Navigation Press ...

Page 42: ... be entered All characters are touch screen buttons Press to select À Ý Accent Alphabet To select letters with accent symbols A Z Alphabet To select letters from the alphabet Symbols To select symbols U Space To enter a space between characters or the words of a name q Backspace The backspace screen button is used to delete an incorrect character that has been selected To make name selection easie...

Page 43: ...sound level Voice Guidance Enable or disable voice guidance A checkmark indicates on Speech Confirmation Feedback Turns the speech confirmation feedback on or off A checkmark indicates on Route Preference Press Route Preference to change route options when a route is calculated A checkmark indicates on Avoid Freeway Major roads are avoided Avoid Toll Road Toll roads are avoided Avoid Ferry Ferries...

Page 44: ...selected a popup screen displays gas station icons on the map or lists the five nearest gas stations Back Track Mode When selected the back track feature is on See Back Track earlier in this section Weather Warning If Equipped When selected a popup screen displays weather warnings Show 3 D Landmark When selected 3 D landmarks display on the map screen Maps This section includes basic information n...

Page 45: ...l Features To scroll within the map press anywhere on the map screen and the scroll symbol displays Tap the map to center that location on the screen Hold a finger in any direction outside of the scroll symbol and the map will continue to scroll in that direction until finger is removed Scroll speed increases when touching closer to the edge of the screen Press NAV to exit map scrolling and return...

Page 46: ...er destination point added to the planned route The estimated time and distance to the destination are displayed If waypoints have been added to the current route each waypoint destination displays estimated time and distance This symbol indicates that the map view is North up North up displays North at the top of the map screen regardless of the direction the vehicle is traveling Select this scre...

Page 47: ...ng System GPS satellite signal These symbols indicate that the information shown on the right side of the map can be hidden to show a full screen map view This symbol indicates that a menu is available and displays on the left side of the screen Press this symbol or the Multifunction Knob knob to access the screen menu Driving on a Route While driving on a route the next maneuver the map screen di...

Page 48: ...ions are available while viewing the map screen To access this menu 1 While on the Map screen 2 Press the Multifunction Knob knob to display the menu on the left side See Navigation Symbols on page 45 to learn how to change the map view to North up Head up or 3 D view When this symbol is selected the distance and time remaining from the current vehicle position to the first waypoint displays This ...

Page 49: ...n that is selected from the next menu 2 Select the new POI icon 3 The new icon is on the Show POI Icons menu List Displays a list of available POIs Clear Clears all selected POI on the Show POI Icons menu Nearby Displays up to 200 or the selected POI s within a 32 km 20 mi of the current vehicle position The POIs can be sorted by distance icon or type Hide Select to hide the POIs from view on the ...

Page 50: ...ter a street name House Enter a valid address number Cross Street Name Enter a street name that intersects with the selected street A checkmark displays on the right side when the field has been selected and the destination can be entered After an entry step is completed the checkmark moves to the next item Entering the city name first 1 Press DEST 2 If necessary enter the State Province name The ...

Page 51: ...the state province name The last state province name is automatically recalled 3 Select the street name field Enter the street name Do not enter directional information or street type Use the space U screen button between street and city names Use the backspace q screen button to delete an incorrect character A list displays if four or fewer names are available If there are more than four there is...

Page 52: ...th a number of available POI names Press the List button to view the list 4 Select the POI name from the list 5 Press Go on the confirmation screen if the information is correct 6 Select the route preference for Fastest Shortest or Easiest 7 Press the Start Guidance screen button and the route is now ready to be started Entering a POI by City Name 1 Press DEST 2 Press the Point of Interest screen ...

Page 53: ...w ready to be started Previous Destination Select a destination from a list of previous destinations Up to 15 points that have been previously entered can be recalled If the list is full the oldest destinations automatically are deleted once the newest destinations are added 1 Press DEST 2 Press the Previous Destination screen button A list displays the previous destinations 3 Select the Destinati...

Page 54: ... is now ready to be started Lat Long Coordinates Choose a destination based on Latitude and Longitudinal coordinates Enter in the location as coordinates Latitude and Longitude 1 Press DEST 2 Press the Lat Long screen button 3 Enter the coordinates for the destination in degrees minutes and seconds 4 Press Go The route calculates 5 Select the route preference for Fastest Shortest or Easiest 6 Pres...

Page 55: ...nue the guidance Voice Prompt Select Voice Volume to change the volume of voice prompts and voice recognition Press the Voice Guidance Speech Confirmation Feedback or Traffic Voice Prompt screen buttons to turn voice prompts on or off for each category See Navigation settings under Using the Navigation System on page 41 for more information Detour To select a detour around the current route select...

Page 56: ...oute and the route can be started To delete a waypoint 1 Press DEST 2 Press the Delete Waypoint screen button 3 Select the waypoint to be deleted by pressing the screen 4 A confirmation message displays Press Yes to delete the waypoint press No to cancel this operation The system calculates and highlights the route and the route can be started Route Preview Preview the entire route in either direc...

Page 57: ... or Pick from Map in the Dest Menu Scroll to the location Press the Multifunction Knob knob on the faceplate A menu displays on the left side of the screen Press the Save screen button and the location is saved 2 Address Entry Enter a destination through the Address Entry menu Press the Save screen button and a menu displays with the Save option located on the bottom of the screen Press the Save o...

Page 58: ...s the Change Phone Number screen button 6 Use the numeric keyboard to enter or change the phone number 7 Press OK to save changes To add a voice tag to an address book entry 1 Press DEST 2 Press the Address Book screen button A list displays the address book entries 3 Select the address book entry to be changed 4 Press the Edit screen button 5 Select Add Voice Tag 6 Speak the name after the beep a...

Page 59: ... or delete a favorite route 1 Press DEST 2 Press the Fav Route screen button 3 Select the route 4 Press the Edit screen button 5 Select from Change Route Name Add Voice Tag or Delete Favorite Route screen buttons To change the route name 1 Select the Change Route Name screen button 2 Using the Keypad enter the name 3 Select the Favorite Route entry to be edited 4 Press OK The new name will be in t...

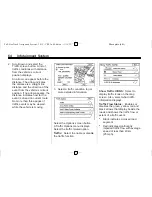
Page 60: ...es or select nearby and on route options Press this screen button to minimize the guidance window and expand the map window Whole Route Press to view the entire route from starting point to destination on the map Cancel Guidance Stops the current route OnStar Destination Download The Destination download lets an OnStar subscriber ask the OnStar call center to download a destination OnStar will sen...

Page 61: ...Call screen button the navigation system initiates a call with Bluetooth Phone if available or OnStar Personal Call Press the Save screen button the navigation system copies the downloaded destination to the address book and display the new address book entry The destination saves this download even if it is only partial information such as a phone number Press the Back screen button the navigatio...

Page 62: ...her options Select the desired option to make changes for radio information displayed preset pages Automatic Volume Control and XM categories restore if equipped See Satellite Radio on page 16 If equipped for more information Nav Navigation Press Multifunction Knob to enter the Config Menu Turn the Multifunction knob until Nav displays press the Multifunction knob or press the Nav screen button to...

Page 63: ...Traffic button This button highlights and a check mark displays when active Selecting Alert for Approaching Traffic Events displays a screen to notify of possible traffic events ahead Traffic Icon When traffic conditions are found in the local area the Traffic Icon appears in the lower left side of the map The Traffic Icon has three different condition displays These are No icon displays if there ...

Page 64: ... than three pages of traffic events may be viewed while the vehicle is moving 3 Select a traffic condition to get more detailed information Select the Options screen button A Traffic Options menu displays Select the traffic related option Traffic Select to enable or disable the traffic function Show Traffic ICONS Select to display traffic icons on the map screen Also select what traffic informatio...

Page 65: ...t Avoid screen displays With route planned Traffic Event on Route screen displays If the Alert for Approaching Traffic Events is Off the alert does not display On Route Select On Route to display all events ahead on the current active route No traffic events reported on route displays if there are none to report Name Select Name to display traffic events in alphabetical order Distance Select Dista...

Page 66: ...sed due to a road condition k Weather Heavy rain snow or fog weather condition m Parking Available parking area l Information Special event general information or warning Traffic Event Information Use to display additional details of a traffic event This screen can display when Scrolling to an event on the map and then pressing INFO Selecting a traffic event listed on the Traffic Event List screen...

Page 67: ...raffic maneuvers The current prompt playback cancels if RPT is pressed during a traffic voice prompt Traffic prompts are disabled during OnStar if equipped or Voice Recognition activity Alternate Route When Detour Available displays a possible quicker route is available and an alternate route can be selected to detour around the traffic condition Press Yes and a new route is calculated This option...

Page 68: ...n to download During this time the screen will be blank Extended Forecast Select the Menu button by pressing the Multifunction knob to show the Weather Menu screen From this screen select the Extended Forecast screen button Weather Along the Route If a destination is set while driving along the route there is the option to view weather conditions for up to three locations Current vehicle s positio...

Page 69: ...e Multifunction knob or press the Clock screen button to display the other options 2 Press the Hours and Minutes and signs to decrease and to increase the time 12 24 HR Format Select the 12 HR screen button for standard time select the 24 HR screen button for military time Day or Day Press the day or day display buttons to increase or decrease the day Global Positioning System GPS The position of ...

Page 70: ...y The vehicle has been transferred by a vehicle carrier or a ferry The current position calibration is set incorrectly Traveling at high speed The vehicle changes directions more than once or when the vehicle is turning on a turn table in a parking lot The vehicle is entering and or exiting a parking lot garage or a lot with a roof The GPS signal is not received A roof carrier is installed on the ...

Page 71: ...e with the engine running for two to five minutes until the vehicle position updates If the System Needs Service If the navigation system needs service and the steps listed here have been followed but there are still problems see your dealer for assistance Map Data Updates The map data in the vehicle is the most up to date information available when the vehicle was produced The map data is updated...

Page 72: ...Identification Number VIN in the Index of the vehicle owner manual for more information After receiving the updated disc see Installing the DVD Map Disc under Maps on page 44 for more information Database Coverage Explanations Coverage areas vary with respect to the level of map detail available for any given area Some areas feature greater levels of detail than others If this happens it does not ...

Page 73: ...han the volume knob or the volume steering wheel control button cancels the session 3 Press and hold the SRCE steering wheel control button to restart the voice recognition session Helpful Hints for Speaking Commands When a multiple command is available choose the command that best works for you Words that are in brackets are optional For example the command Radio band FM saying Radio FM or Radio ...

Page 74: ...fic help commands such as Radio Help Display Help Navigation Help for the user to choose from Radio help Helpful advice about radio commands and some common radio commands which are available Use this command to learn about how to select a band AM or FM and how to change radio stations by speaking frequency numbers CD DVD Disc help Helpful advice about disc commands and some common disc commands w...

Page 75: ...pped For example radio select one fifty one XM Radio help Instructs the system to play back some helpful advice about radio commands and some common radio commands which are available to the user CD DVD Disc Commands The following commands are only available when a CD MP3 or DVD is loaded Radio CD radio DVD radio Disc Instructs the system to go to Disc mode Radio CD select track number radio DVD s...

Page 76: ...opping POIs on the map screen Destination and Guidance Commands Navigation go to preset destination number one two three four five or six Instructs the system to set one of the preset destinations one through six as the new destination Navigation delete Instructs the system to delete the destination route or next waypoint The system requests a confirmation of which item should be deleted destinati...

Page 77: ...system shows New York NY in the pop up list say Change State 3 After saying Change State the system replies with Please say state name Say the correct state The state name displays In some cases the radio shows a candidate list with the closest matches to the spoken state name The system asks the user to select an item from the candidate list either by pressing the desired choice or by saying the ...

Page 78: ...n house number Say the house number as single digit 7 Confirm the correct address is displayed then reply with yes or no when prompted 8 This address is now set as the destination Select the Start Guidance screen button to begin destination guidance Voice Tag Commands Voice Tags are recorded phrases that can be stored in the navigation system These voice tags are associated with Address Book Entri...

Page 79: ...tion system See OnStar in the Index of the vehicle owner manual for more information Help Commands Help Radio help CD help DVD help Disc help Display help Navigation help Display Commands Display set select day mode Display set select night mode Display set select auto mode Radio Commands radio radio band AM radio radio band FM radio radio band XM Radio select frequency AM Radio select frequency F...

Page 80: ...ation used in conjunction with another command Yes used in conjunction with another command No used in conjunction with another command Destination used for Destination VR entry available in English language only Voice Tag Commands Navigation go to Voice Tag OnStar Command if equipped Hands Free Phone Bluetooth For vehicles equipped with Bluetooth capability the system can interact with many cell ...

Page 81: ...SSORY position The range of the Bluetooth system can be up to 9 1 m 30 ft Not all phones support all functions and not all phones work with the in vehicle Bluetooth system See www gm com bluetooth for more information on compatible phones Voice Recognition The Bluetooth system uses voice recognition to interpret voice commands to dial phone numbers and name tags For additional information say Help...

Page 82: ...on A Bluetooth phone with MP3 capability cannot be paired to the vehicle as a phone and an MP3 player at the same time Up to five cell phones can be paired to the Bluetooth system The pairing process is disabled when the vehicle is moving Pairing only needs to be completed once unless the pairing information on the cell phone changes or the cell phone is deleted from the system Only one paired cel...

Page 83: ...one If the phone name you want to delete is unknown see Listing All Paired and Connected Phones 1 Press and hold b g for two seconds 2 Say Bluetooth 3 Say Delete The system asks which phone to delete 4 Say the name of the phone you want to delete Connecting to a Different Phone To connect to a different cell phone the Bluetooth system looks for the next available cell phone in the order in which a...

Page 84: ...last number To hear all of the numbers recognized by the system say Verify at any time 1 Press and hold b g for two seconds 2 Say Digit Store 3 Say each digit one at a time that you want to store After each digit is entered the system repeats back the digit it heard followed by a tone After the last digit has been entered say Store and then follow the directions given by the system to save a name ...

Page 85: ...d by entering the digits one at a time After each digit is entered the system repeats back the digit it heard followed by a tone If an unwanted number is recognized by the system say Clear at any time to clear the last number To hear all of the numbers recognized by the system say Verify at any time 1 Press and hold b g for two seconds 2 Say Digit Dial 3 Say each digit one at a time that you want ...

Page 86: ...Call Press c x to end a call Muting a Call During a call all sounds from inside the vehicle can be muted so that the person on the other end of the call cannot hear them To mute a call press b g and then say Mute call To cancel mute press b g and then say Un mute call Transferring a Call Audio can be transferred between the Bluetooth system and the cell phone The cell phone must be paired and conn...

Page 87: ... the numbers stored as name tags during a call You can use this feature when calling a menu driven phone system Account numbers can also be stored for use Sending a Number or Name Tag During a Call 1 Press b g The system responds Ready followed by a tone 2 Say Dial 3 Say the number or name tag to send Clearing the System Unless information is deleted out of the in vehicle Bluetooth system it will ...

Page 88: ... modifications not expressly approved by the party responsible for compliance could void the user s authority to operate the equipment This Category II radio communication device complies with Industry Canada Standards RSS GEN 210 220 310 Operation is subject to the following two conditions 1 this device may not cause interference and 2 this device must accept any interference including interferen...

Page 89: ...D section in your device setup menu Go to vod divx com for more information on how to complete your registration Made for iPod and Made for iPhone mean that an electronic accessory has been designed to connect specifically to iPod or iPhone respectively and has been certified by the developer to meet Apple performance standards Apple is not responsible for the operation of this device or its compl...

Page 90: ... any of its content Furthermore the AMBER voice compression software included in this product is protected by intellectual property rights including patent rights copyrights and trade secrets of Digital Voice Systems Inc General Requirements 1 A License Agreement from XM is required for any product that incorporates XM Technology and or for use of any of the XM marks to be manufactured distributed...

Page 91: ...in the United States and or other countries If you require more information regarding the use of the Gracenote Service visit www gracenote com corporate For the data provided by Gracenote Music Recognition Service the content is not necessarily guaranteed 100 Regarding the use of Gracenote Music Recognition Service when this product is used it is necessary to agree to the following articles Gracen...

Page 92: ...g about who you are For more information see the web page for the Gracenote Privacy Policy for the Gracenote service The Gracenote Software and each item of Gracenote Data are licensed to you AS IS Gracenote makes no representations or warranties express or implied regarding the accuracy of any Gracenote Data from in the Gracenote Servers Gracenote reserves the right to delete data from the Gracen...

Page 93: ...Y ALL TERMS AND CONDITIONS SET FORTH BELOW LICENSE GRANT DENSO CORPORATION DENSO as a licensed distributor of the DATABASE grants to you a non exclusive non perpetual license to use your copy of the DATABASE for your personal use or for your use in your business internal operations and not for any other purpose This license does not include the right to grant sub licenses OWNERSHIP The DATABASE an...

Page 94: ...XPRESSLY DISCLAIM ALL OTHER WARRANTIES EXPRESS OR IMPLIED INCLUDING BUT NOT LIMITED TO THE IMPLIED WARRANTIES OF NON INFRINGEMENT MERCHANTABILITY SATISFACTORY QUALITY ACCURACY TITLE AND FITNESS FOR A PARTICULAR PURPOSE NO ORAL OR WRITTEN ADVICE OR INFORMATION PROVIDED BY DENSO OR TANA OR ANY OF THEIR LICENSORS AGENTS EMPLOYEES OR THIRD PARTY PROVIDERS SHALL CREATE A WARRANTY AND YOU ARE NOT ENTITL...

Page 95: ... disclosure or transfer of this commercial product and accompanying documentation is restricted in accordance with the LIMITED or RESTRICTED rights as described in DFARS 252 227 7014 a 1 JUN 1995 DOD commercial computer software definition DFARS 227 7202 1 DOD policy on commercial computer software FAR 52 227 19 JUN 1987 commercial computer software clause for civilian agencies DFARS 252 227 7015 ...

Page 96: ... immediately null and void Any copies of the DATABASE held by you shall immediately be destroyed If any court of competent jurisdiction considers this clause void and unenforceable in whole or in part for any reason this Agreement shall be considered terminated and null and void in its entirety and any and all copies of the DATABASE shall immediately be destroyed BTV 461060 2 END USER NOTICE PLEAS...

Page 97: ...way You may not decompile disassemble or reverse engineer any portion of this information and may not transfer or distribute it in any form for any purpose Without limiting the foregoing you may not use this information with any products systems or applications installed or otherwise connected to or in communication with vehicles capable of vehicle navigation positioning dispatch real time route g...

Page 98: ...ertain liability exclusions or damages limitations so to that extent the above may not apply to you Indemnity You agree to indemnify defend and hold DENSO and its licensors including their respective licensors suppliers assignees subsidiaries affiliated companies and the respective officers directors employees shareholders agents and representatives of each of them free and harmless from and again...

Page 99: ...ject 25 CD Menu 18 CD DVD Player 16 CD DVD Disc Commands 75 Cleaning the Display 11 Clearing the System 87 Config Menu 7 Configure Menu 62 D Database Coverage Explanations 72 Deleting Personal Information 7 Destination and Guidance Commands 76 Destination Download OnStar 60 Destination Navigation 50 Devices Auxiliary 35 Dimming Mode 69 Display 69 Driving on a Route 47 Dual Tone Multi Frequency DTM...

Page 100: ...on 3 L Languages 7 Lat Long Coordinates 54 Listing Stored Numbers 84 Loading and Ejecting Discs 17 M Making a Call 85 Map Adjustments 44 Map Coverage 44 Map Data Updates 71 Map End User License Agreement 93 Map Scales 45 Maps 44 Menu Configure 62 Menu Screen Button 59 Mixed Band Presets 15 MP3 21 Muting a Call 86 N Nav Navigation 62 NAV Navigation Menu 7 Navigation Destination 50 Symbols 45 Using ...

Page 101: ...and DVD 21 Playing from an iPod 30 Playing from USB 28 Playing Hard Disc Drive Content 25 Playing HDD Favorites 27 Playing the Radio 11 Point of Interest POI Commands 76 Power Mode 25 Preset Destination 54 Previous Destination 53 Previous Destinations 57 Problems with Route Guidance 70 R Radio 62 Radio Commands 75 Radio Data System RDS 15 Radio Settings 13 Radios AM FM Radio 11 CD DVD Player 16 Sa...

Page 102: ...6 Timeshift 15 Touch Screen Buttons 42 Transferring a Call 86 U Updates Map Data 71 USB Host Support 27 USB Menu 29 USB Supported Devices 27 Using Destination Download 60 Using the Stored Preset Destinations 10 Using Voice Recognition 73 V Vehicle Positioning 70 Video Screens 38 Voice Guidance 10 Voice Pass Thru 87 Voice Recognition 72 81 Voice Recognition Commands 74 Voice Recognition Help 74 Voi...

Reviews: