CLUTCHES AND TRANSMISSIONS 7-17
Installation
1. Apply a light coating of High Temperature Grease
to the main drive gear bearing retainer and splined
portion of transmission main drive gear shaft to as
sure free movement of clutch and transmission com
ponents during assembly.
2. Shift the transmission into high gear.
3. Mount transmission on dolly or jack and move into
position under the vehicle.
NOTE:
On models equipped with “ Apron” type
flywheel housing, position the clutch release
bearing and support assembly inside the fly
wheel housing. Be sure the clutch fork properly
engages the clutch release bearing.
4. Align the transmission main drive gear shaft with
the clutch disc hub by rotating the transmission
companion flange. Move the transmission forward,
guiding the main drive gear shaft into the clutch disc
splines.
IM PORTANT:
Avoid springing the clutch when
the transmission is being installed to the engine.
Do not force the transmission into clutch disc
splines. Do not let transmission drop or hang
unsupported in the splined hub of the clutch disc.
5. Install clutch housing-to-engine flywheel housing
mounting bolts and lock washers (except models
equipped wi t h “ Apron” t y p e flywheel housing).
Tighten bolts to 25 to 30 ft. lbs.
6
. On vehicles equipped with ‘ ‘Apron” type flywheel
housing, i n s t a l l transmission-to-flywheel housing
mounting bolts and lock washers. Tighten bolts to
60 to 65 ft. lbs.
7. If the rear engine mounts were removed, reinstall
the mounts as covered in ENGINE MOUNTINGS
(Section
6
) of this manual. Be sure all mounting
bolts are properly torqued.
8
. Install bolts attaching transmission to rear cross
member support (when used). Tighten bolts to 80
to
100
ft. lbs.
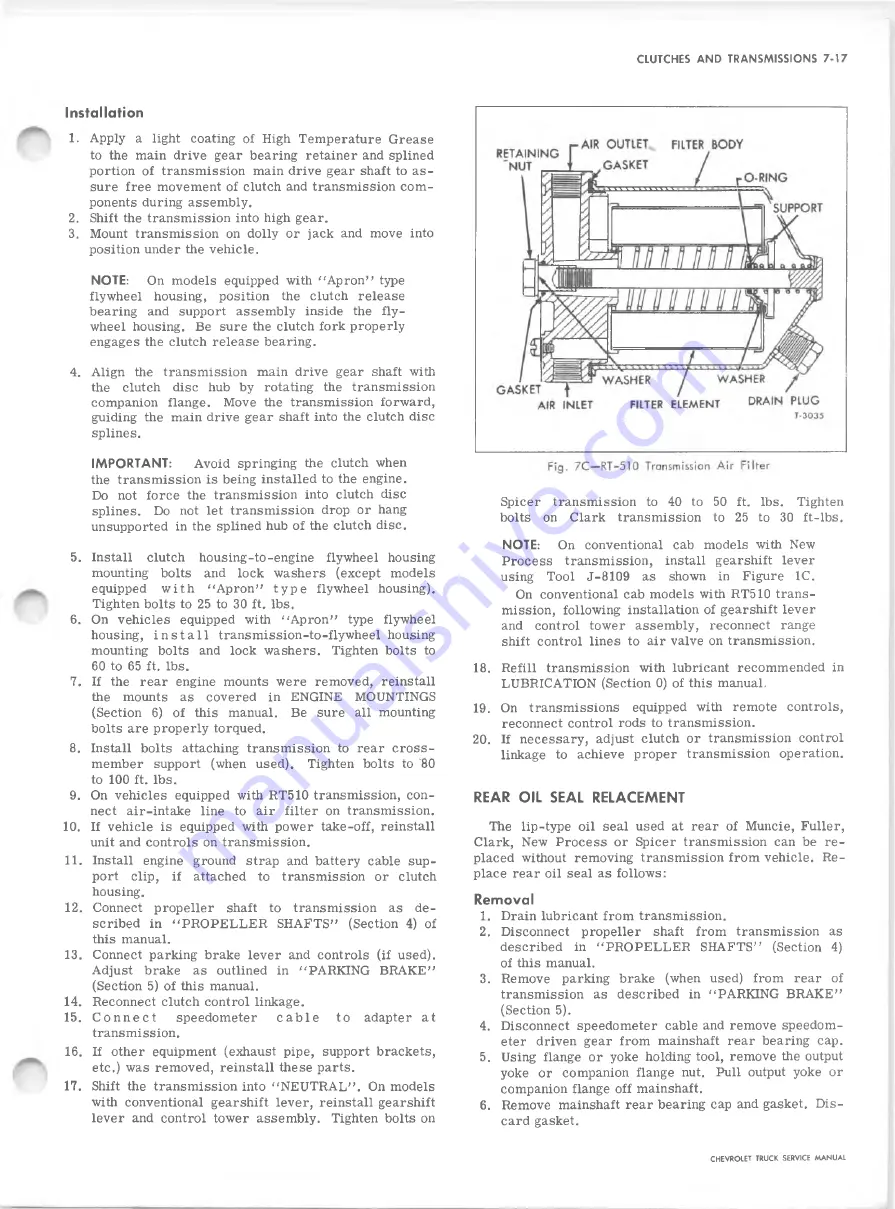
9. On vehicles equipped with RT510 transmission, con
nect air-intake line to air filter on transmission.
10. If vehicle is equipped with power take-off, reinstall
unit and controls on transmission.
11. Install engine ground strap and battery cable sup
port clip, if attached to transmission or clutch
housing.
12. Connect propeller shaft to transmission as de
scribed in "PR O PE LLE R SHAFTS” (Section 4) of
this manual.
13. Connect parking brake lever and controls (if used).
Adjust brake as outlined in “ PARKING BRAKE”
(Section 5) of this manual.
14. Reconnect clutch control linkage.
15. C o n n e c t
speedometer
c a b l e
to adapter at
transmission.
16. If other equipment (exhaust pipe, support brackets,
etc.) was removed, reinstall these parts.
17. Shift the transmission into “ NEUTRAL” . On models
with conventional gearshift lever, reinstall gearshift
lever and control tower assembly. Tighten bolts on
Spicer transmission to 40 to 50 ft. lbs. Tighten
bolts on Clark transmission to 25 to 30 ft-lbs.
NOTE:
On conventional cab models with New
Process transmission, install gearshift lever
using Tool J-8109 as shown in Figure 1C.
On conventional cab models with RT510 trans
mission, following installation of gearshift lever
and control tower assembly, reconnect range
shift control lines to air valve on transmission.
18. Refill transmission with lubricant recommended in
LUBRICATION (Section 0) of this manual.
19. On transmissions equipped with remote controls,
reconnect control rods to transmission.
20. If necessary, adjust clutch or transmission control
linkage to achieve proper transmission operation.
REAR OIL SEAL RELACEMENT
The lip-type oil seal used at rear of Muncie, Fuller,
Clark, New Process or Spicer transmission can be re
placed without removing transmission from vehicle. Re
place rear oil seal as follows:
Removal
1. Drain lubricant from transmission.
2. Disconnect propeller shaft from transmission as
described in “ PROPELLER SHAFTS” (Section 4)
of this manual.
3. Remove parking brake (when used) from rear of
transmission as described in “ PARKING BRAKE”
(Section 5).
4. Disconnect speedometer cable and remove speedom
eter driven gear from mainshaft rear bearing cap.
5. Using flange or yoke holding tool, remove the output
yoke or companion flange nut. Pull output yoke or
companion flange off mainshaft.
6
. Remove mainshaft rear bearing cap and gasket. Dis
card gasket.
CHEVROLET TRUCK SERVICE MANUAL
Summary of Contents for 10 Series 1968
Page 1: ...ST 1 3 3 SB...
Page 3: ...w w...
Page 52: ...HEATER AND AIR CONDITIONING 1A 21 Fig 32 Charging Schematic CHEVROLET TRUCK SERVICE MANUAL...
Page 67: ......
Page 128: ...BODY IB 61 Fig 135 A uxiliary Seat CHEVROLET TRUCK SERVICE MANUAL...
Page 132: ...Fig 4 1 0 3 0 Series Truck Frame...
Page 133: ...Fig 5 4 0 6 0 Single A xle Truck Frame E x c Tilt Cab...
Page 135: ...Fig 7 4 0 6 0 Series Tilt Cab Truck Frames...
Page 139: ...w...
Page 169: ...fit w...
Page 233: ...I...
Page 248: ...BRAKES 5 15 TD 50 60 Fig 26 Parking Brake Cables T Models CHEVROLET TRUCK SERVICE MANUAL...
Page 347: ......
Page 389: ......
Page 393: ......
Page 411: ...ENGINE FUEL 6M 18 Fig 18A V 8 Typical CHEVROLET TRUCK SERVICE MANUAL...
Page 525: ......
Page 551: ......
Page 583: ...CHASSIS SHEET METAL 11 12 Fig 20 Designation and Name Plate CHEVROLET TRUCK SERVICE MANUAL...
Page 587: ...ELECTRICAL BODY AND CHASSIS 12 2 Fig 1 Fuse Panel CHEVROLET TRUCK SERVICE MANUAL...
Page 611: ...r ELECTRICAL BODY AND CHASSIS 12 26 9 CHEVROLET TRUCK SERVICE MANUAL...
Page 663: ......
Page 686: ...w...
Page 698: ...SPECIFICATIONS 12 ENGINE TORQUES CHEVROLET TRUCK SERVICE MANUAL...
Page 713: ...9...


