

RM43596 JBOD
/ System Components Removal and Installation
│
17
2-2 External Hot-Swap HDD Assembly Removal and Installation
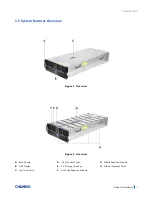
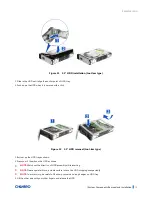
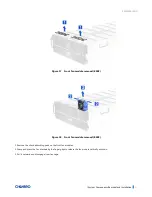
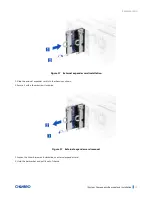
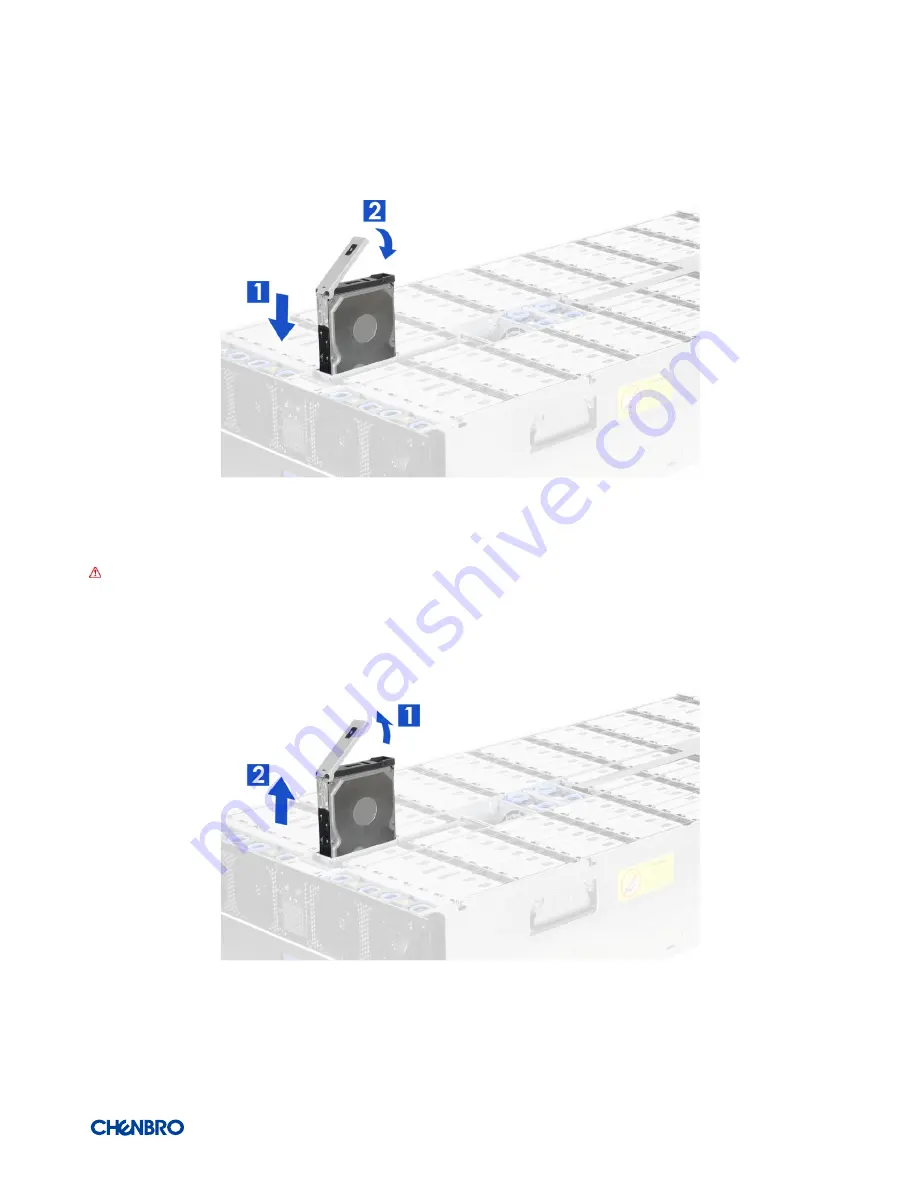
Figure 9
3.5” hot-swap HDD assembly installation
1. With the open latch, insert the HDD assembly into the drive bay as shown until the bottom of chassis base.
NOTE:
Watch out the direction of HDD assembly while inserting.
2. Push the latch when it is secured with a click.
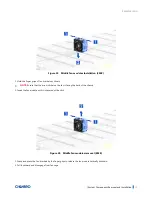
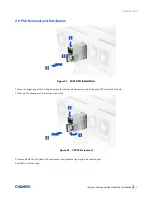
Figure 10
3.5” hot-swap HDD assembly removal
1. Open the latch to release the HDD assembly as shown.
2. Pull the HDD assembly out of drive bay.


