–4 –
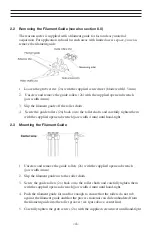
2.2 Removing the Filament Guide (see also section 8.0)
The tension meter is supplied with a filament guide for fast and easy material
acquisition. For application in hard-to-reach areas with limited access space, you can
remove the filament guide.
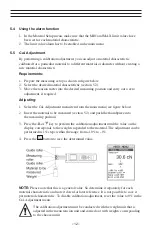
1. Loosen the grub screws (2x) with the supplied screwdriver (blade width 1.5 mm).
2. Unscrew and remove the guide rollers (2x) with the supplied open end wrench
(jaw width 4 mm).
3. Slip the filament guide off the roller shafts.
4. Screw the guide rollers (2x) back on to the roller shafts and carefully tighten them
with the supplied open end wrench (jaw width 4 mm) until hand-tight.
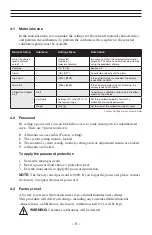
2.3 Mounting the Filament Guide
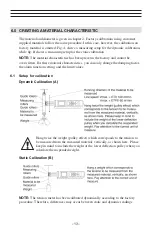
1. Unscrew and remove the guide rollers (2x) with the supplied open end wrench
(jaw width 4 mm).
2. Slip the filament guide on to the roller shafts.
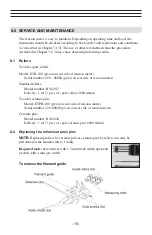
3. Screw the guide rollers (2x) back on to the roller shafts and carefully tighten them
with the supplied open end wrench (jaw width 4 mm) until hand-tight.
4. Push the filament guide forward far enough to ensure that the rollers do not rub
against the filament guide and that the process material can slide unhindered from
the filament guide into the roller grooves (see fgure above, center line).
5. Carefully tighten the grub screws (2x) with the supplied screwdriver until hand-tight.
Summary of Contents for ETB
Page 1: ...MODEL ETB ETPB TENSION METERS Operating Manual ...
Page 6: ... 5 2 4 Display elements Numeric Display Display with Bar Graph ...
Page 25: ... 24 NOTES ...
Page 26: ......

